
This article is for the new Clarity interface. Screenshots and descriptions will be updated as features are released. For the current interface article, see The Passport Standalone Attendance Tool.
Table of Contents
- Overview
- Configuring Passport Module Access for a User
- Accessing the Passport Module
- Attendance Management Tool Navigation
- Recording a Service for a Client
- Deleting an Attendance Record
- Customization Tools
- Audit Logs
Overview
Clarity Human Services offers an access right permission that allows users to record client attendance without accessing the rest of the system. This permission grants access to the standalone Passport Attendance module (referred to as the "Passport" module in this article), which we created for users whose only role is to check clients into an attendance service.
The Passport module provides the security of allowing these users to perform this function without seeing any other information in the system, and is explicitly designed with congregate shelter environments and associated privacy considerations in mind.
The Passport module in the new Clarity interface provides a high-efficiency tool designed for rapid check-ins and supports both barcode scanners and manual entry.
Configuring Passport Module Access for a User
To enable the Passport Attendance standalone module for a user:
- Create an Access Role with the Attendance Standalone Module access right as the only permission enabled for that role. When the Attendance Standalone Module access right is enabled, all other access rights will become disabled and read-only.
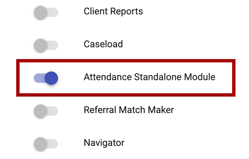
- Assign the Access Role to the user.
Note: Users whose main access role has the Attendance Standalone Module access right for the Passport module are not allowed to have additional agency access added to their Staff Account. The only exception is for System Administrator users.
Accessing the Passport Module
The Passport module is accessed via the instance’s URL with /passport added to the end. For example, the Passport address for an instance at sample.clarityhs.com would be sample.clarityhs.com/horizon/passport.
Clicking the Passport URL takes the user to the standard Clarity Human Services login page.
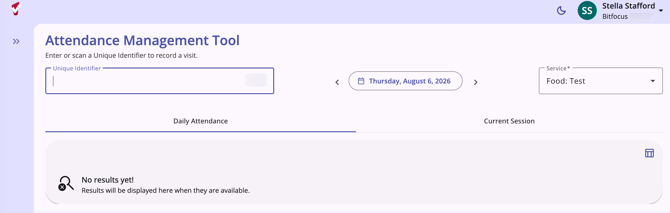
Once logged in, the user will see the Passport module's default landing page, the Attendance Management Tool.
Attendance Management Tool Navigation
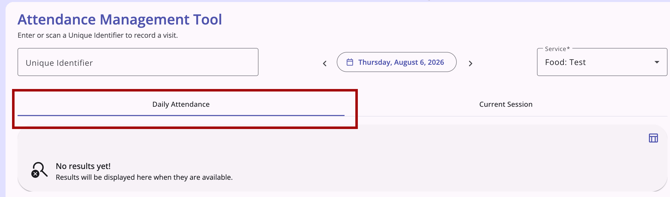
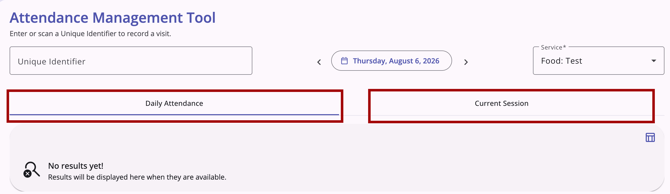
The Attendance Management Tool includes a Tools Row at the top of the page. Below the Tools Row, two tabs are displayed: Daily Attendance (left) and Current Session (right).
- The Daily Attendance tab is selected by default on page load.
The Tools Row
The top of the page contains the primary controls for managing attendance in a Tools Row:
- Unique Identifier Input: Accepts scanned barcode data or manually typed IDs.
- Date Picker: Defaults to today's date (based on the instance time zone).
- Service Dropdown: Lists all services in the current agency with a Delivery Type of Daily Attendance or Multiple Attendance.

Note: The current "session" is scoped to a specific combination of service and date. If you switch the service or change the date, the Current Session tab will clear, and the Daily Attendance tab will refresh to show records for the new selection. You can think of it as the current "session" starting over (or picking back up) for the new selection.
Date Picker
On login, the Date Picker defaults to today's date in the instance time zone.
If the user changes the date, the Daily Attendance table refreshes to show records for the currently selected service on the newly selected date.
When the selected date changes, the Current Session table clears, and the current "session" is scoped to the current service and date combination.
Service Dropdown
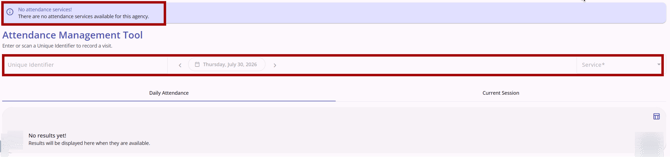
If the current agency has no Daily Attendance or Multiple Attendance services, a standard info notification banner appears at the top of the page content area with the text: "No attendance services!” and subtext “There are no attendance services available for this agency."
- When the notification banner is visible, the Service dropdown, Date picker, and Unique Identifier input are visible but disabled — no scans or selections can be made.
If the user selects a different service from the dropdown, the Daily Attendance table refreshes to show records for the newly selected service on the currently selected date.
When the user selects a different service from the dropdown, the Current Session table clears , and the current "session" is scoped to the current service and date combination.
Attendance Tabs
Below the tools row, the module displays two tabs:
- Daily Attendance (Default): Lists all attendance records for the selected service and date.
- Current Session: Lists only the records created during your current active session.
Attendance Tables
The Daily Attendance and Current Session tabs feature a data table with the following columns:
- Client Name
- Age
- Unique ID
- Total Attendance
- Time
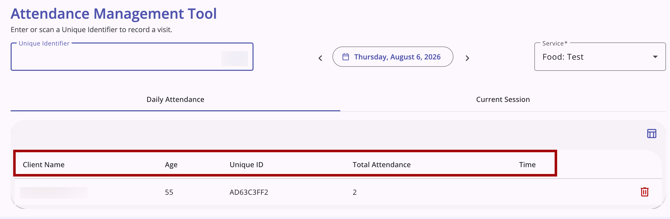
Rows are ordered by time, with the most recent check-in appearing at the top.
A Delete (trash can) icon shows on the right side of each client row.
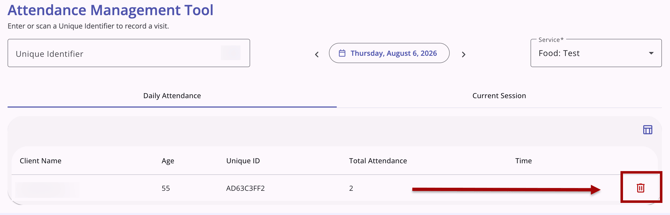
The Total Attendance value displayed in a row represents the all-time count of attendance records for this client for this service across all dates.

When a new attendance record is created, this value for any prior rows of the same client in the Daily Attendance or Current Session tables is also updated to reflect the new total.
For services configured for Multiple Attendance, the system allows repeated entries for the same client on the same day. Each scan creates a unique record and increases the Total Attendance count.
Recording a Service for a Client
On login, the Date picker defaults to today's date in the instance time zone, but can be updated.
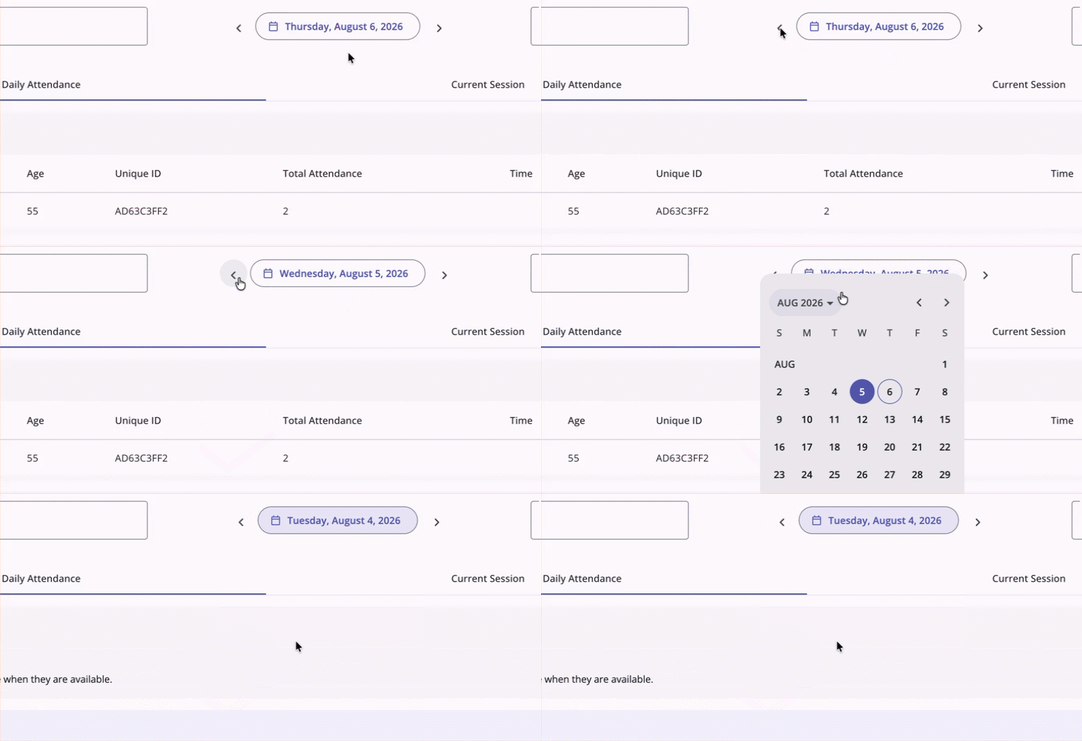
Use the Service Dropdown in the upper right corner of the screen to select the service to record for the client.
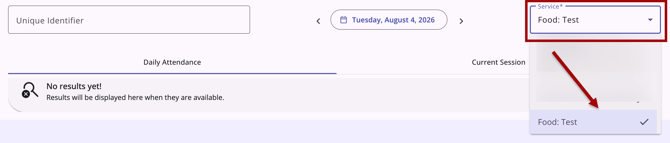
Note: The service that appears in this field when you log in is the service that will be recorded for this client unless you make a different selection.
Enter the client’s Unique Identifier:
- Type the number into the field.
OR - Scan the client’s Clarity Human Services Photo ID card.
Successful Check-In
When a valid ID is entered, and no restrictions apply:
- A new attendance record is created.
- A Success audio cue plays.
- A new row appears at the top of both the Daily Attendance and Current Session tables.
- The Unique Identifier input clears automatically for the next scan.
Client Pop-Up Card
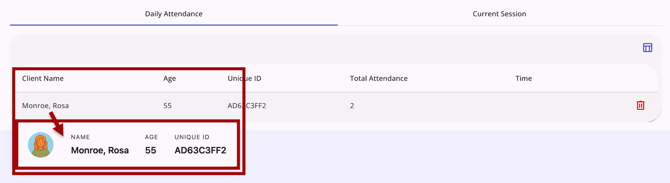
Upon success, a temporary card appears below the tools row, displaying the client's Photo, Name, Age, and Unique ID.
- The card auto-dismisses after 3 seconds or when you perform the next action.
- To view the card again, hover over (or tap on touch devices) the client's name in the Daily Attendance table.
Unsuccessful Check-In
If a check-in is unsuccessful, the system will play a Failure audio cue and display a red error message below the Unique Identifier input.
Check-In Blocks
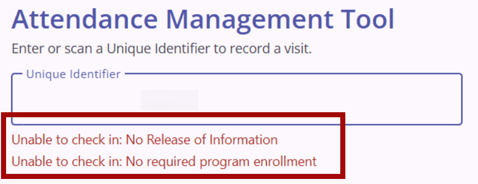
Check-Ins will be blocked if the client does not meet the service requirements. If multiple blocks apply, they will be listed vertically in the following order:
- Release of Information (ROI): The notification message is:
"Unable to check in: No Release of Information" - Program Enrollment: The notification message is:
"Unable to check in: No required program enrollment" - Reservation: This block applies only to reservation-based services. The notification message is:
"Unable to check in: No reservation for this date"
Scan/Input Error Blocks
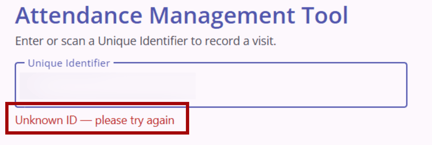
If the Unique Identifier added does not match an active client, the system displays an Unknown ID notification:
- The notification message is:
"Unknown ID — please try again."
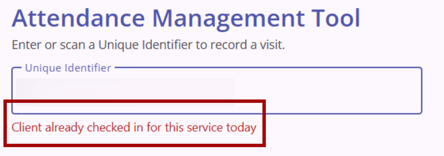
 For Daily Attendance services, if a client is scanned a second time on the same day, the system displays an Already Checked In notification:
- The notification message is:
"Client already checked in for this service today"
Deleting an Attendance Record
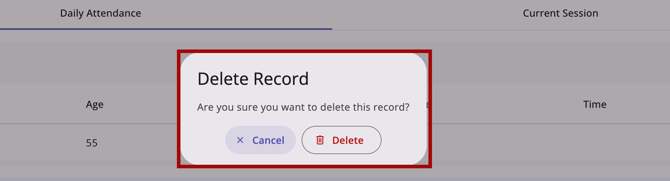
If the user enters a record incorrectly, they can use the Delete (trash can) icon at the end of the record’s row.
Clicking the Delete (trash can) icon triggers the standard delete confirmation:
- Title: Delete Record
- Subtitle: "Are you sure you want to delete?"
-
Buttons: Cancel (basic color) and Delete (red text color)
Customization Tools
The Passport module includes tools to customize the page.
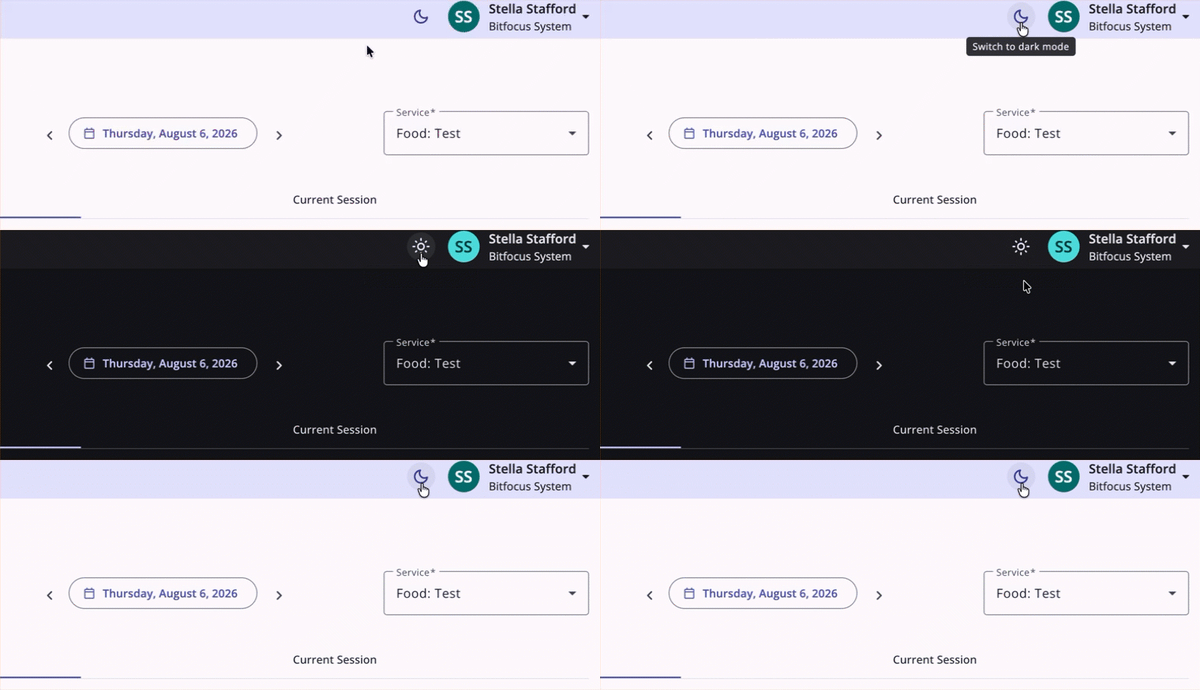
Dark Mode
Users can switch to dark mode by clicking the Moon icon.
Column Selector
A column selector is available in the Passport module. At this time, it is view only.
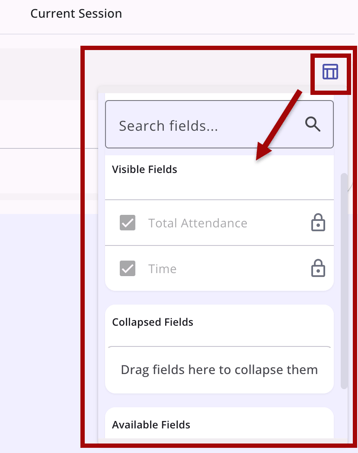
For more information about column selectors, refer to the Client Record Overview article.
Audit Logs
A successful check-in or deletion generates an entry in the client's audit log. An admin user with audit log access rights can access audit logs for client records. All audit log records are accessible on the relevant screen via the action menu at the top right of the record.
Note: Since the typical user of the Passport Standalone Attendance Module would not have admin access to audit logs, the attendance record audit log is located in Clarity Human Services for the client.
Published: 08/06/2026