
This article is for the new Clarity interface. Screenshots and descriptions will be updated as features are released.
Table of Contents
- Client Details Cards
- Options to Refine Search Results
- Standardized Record Deletion
- Unsaved Changes Warning
- Missing and Required Field Alerts
- Sensitive Data Protections
- Audit Logs
Overview
The new Clarity Human Services interface was designed to be easy to use and pave the way for future enhancements. The client record contains the tools to collect and manage data used for reporting, case management, and coordinated care.
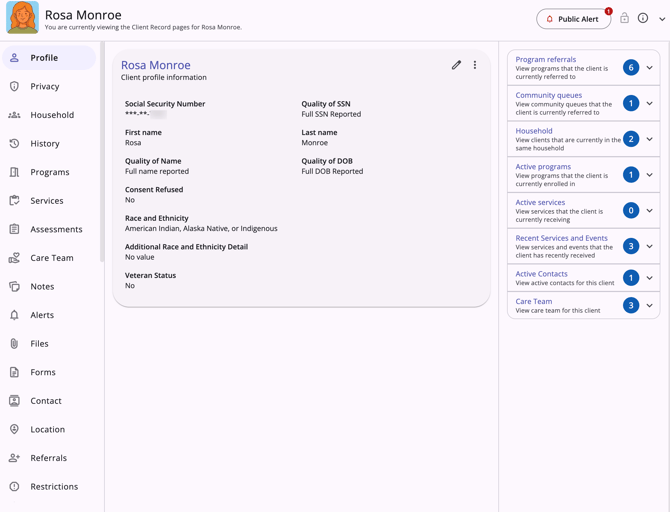
Note: The features available to each end user are determined by the community's system administrator. Not all sections shown in the screenshot above may be available to all end users. If you think you are missing a section necessary for your workflow, please reach out to your system administrator or agency contact.
Client Information Bar
The client record includes an information bar at the top that is visible at all times while you are working in that client's record.
Client Name and Initials/Photo
The left side of the information bar displays the client's name and either their initials or a client photo.

Adding a Profile Photo
When the user hovers over the client’s photo (or initials if there is no current photo), they see a camera icon in the top-right corner of the image/initials.
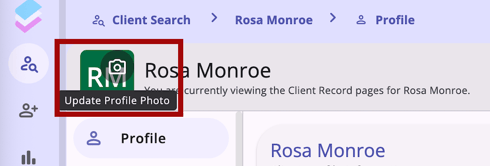
When the user clicks on the camera icon, the Add a Photo modal opens on the right side of the screen, and the user sees two options:
- Upload Photo
- Capture Photo
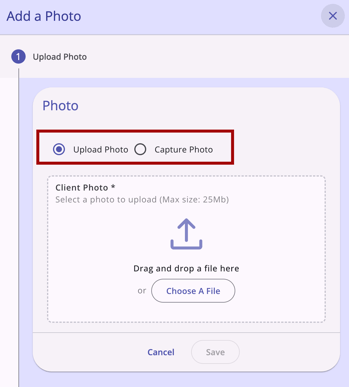
After the user completes the steps to add a photo and returns to the client's Profile, they can see that the photo has replaced the client's initials.

For more information on how to add a profile photo to the client record, refer to the How Do I Create a New Client Record? article.
Client Alerts or Warnings
The right side of the information bar may occasionally change if the client has an alert or warning. If you do not see any additional information, there are no current client alerts or warnings available to view based on your access rights.

The right side of the information bar changes but will always include a Privacy icon and a drop-down arrow.

Each item on the right side of the information bar is described below and/or has a link to a standalone article.
Drop-down Arrow
An end user can click the drop-down arrow (⌄) to reveal the client’s Unique Identifier (UID), Personal ID, and more.

Refer to our Personal ID article for more information on how it is used to identify duplicate client records. Information about managing demographic information can be found in this article. Click here to jump to the section.
Note: The information in the dropdown menu on the information bar depends on the end user's access rights. The information visible in the screenshot above may not be available to all users. Refer to the Rights Glossary for Access Roles article for more information on access rights.
Privacy
The Privacy icon on the information bar indicates if the client record is public or private.

Refer to the Making Client Data Private article for more information on privacy management.
Client Alerts and Warnings
Client alert and warning banners will appear in the information bar for end users with the appropriate access. They will remain visible until either the alert or warning expires or the end user adds any missing information that generated the alert or warning.
No Contact Information
This warning will appear for end users with the appropriate access if the client has a pending referral, but no contact information is available.

End users with the access rights to manage contact information can click on the warning to jump to the contact tab and manage the client's contact information. Refer to the Client Contact Tab article for more information.
Public Alert
For clients with a Public Alert, a warning will be visible to users with the appropriate access to view public alerts. There is a badge that indicates the number of alerts for the client.

When a user with the appropriate permissions to view alerts hovers over the public alert, a list of alerts for the client will be displayed, with dropdown arrows available with more information. When the user with the appropriate permissions clicks on the public alert, they are redirected to the Alerts workspace. Refer to the How Do I Create a Public Alert? article for more information.
ROI Missing/ROI Expires Soon
For clients who are missing a Release of Information (ROI) or whose ROI is about to expire, a warning will appear.
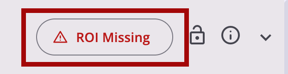
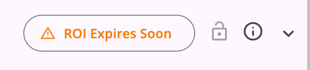
End users with the appropriate permissions to view or manage the ROI will be redirected to the Privacy workspace when they click on the warning. Refer to the Release of Information (ROI) Overview article for more information.
Client Navigation Menu
The client navigation menu on the left side of the client record is always available, so you can easily switch between workspaces. You can collapse the list of menu items with the double arrow at the bottom of the list, but continue to move from one workspace to another by clicking on the menu item icons.
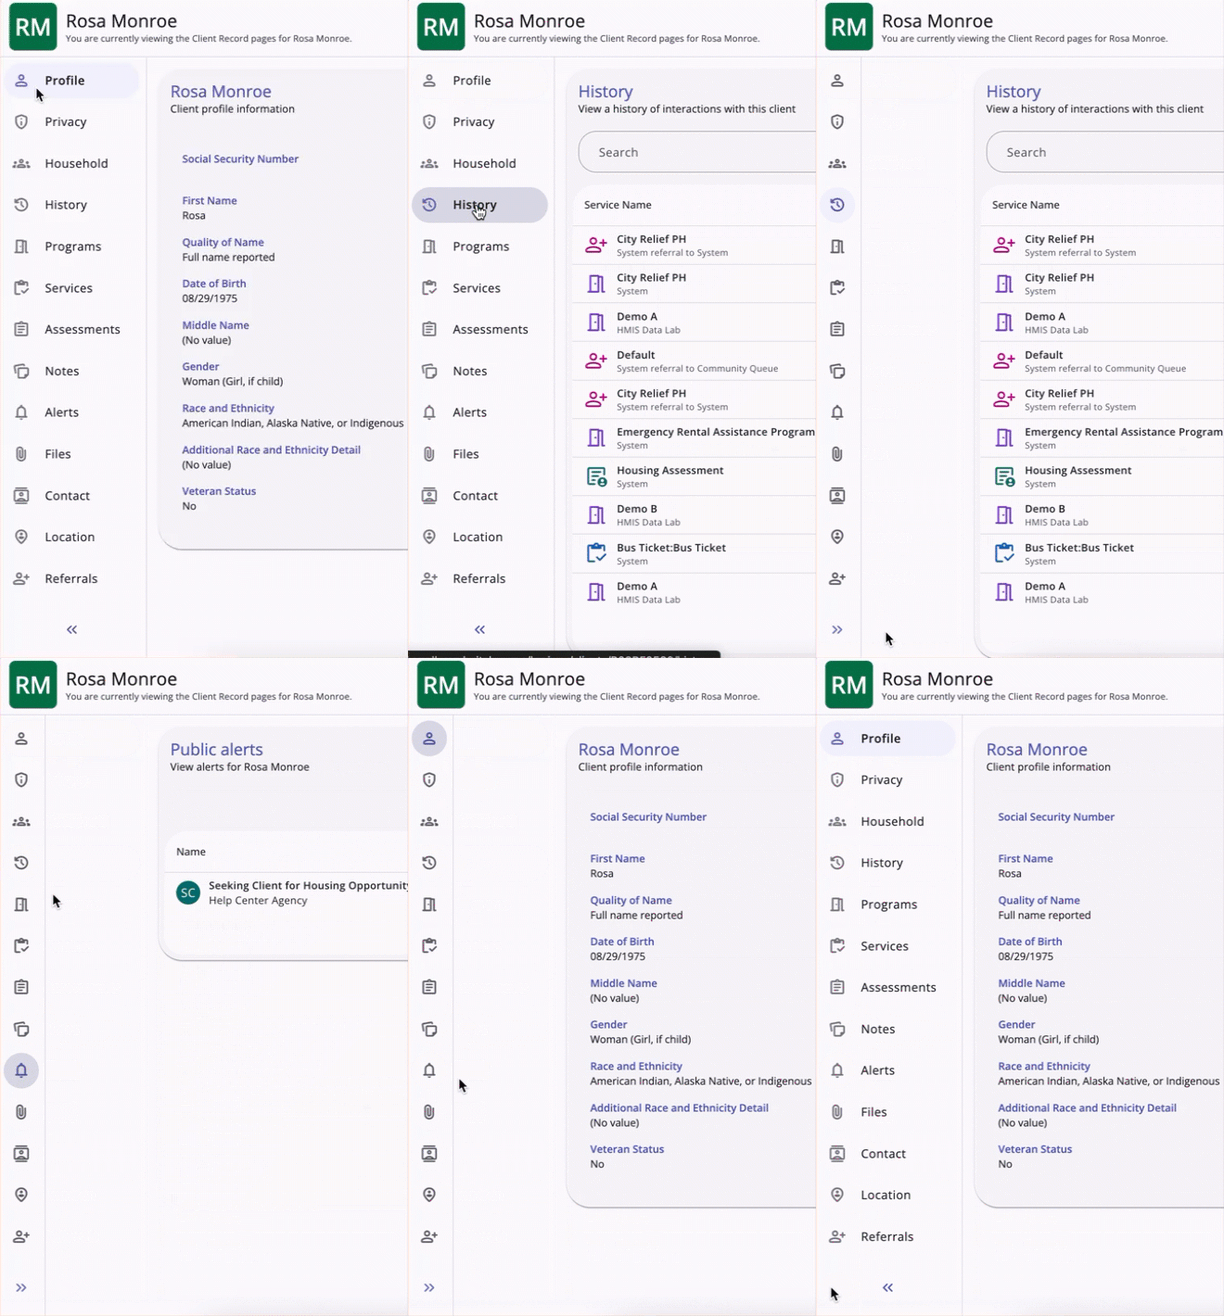
The information visible in the central workspace of the client record depends on the menu item you click on the navigation menu.
Each menu item on the client navigation menu is described below and/or includes a link to a standalone article.
Profile
The Profile workspace contains core and general client data. When the user clicks the Profile menu item, several indicators indicate which screen they are currently on.
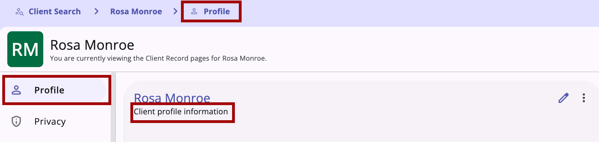
The fields displayed on the Profile workspace are based on the Client Profile screen assigned to the agency (or based on the Client Profile screen assigned to the staff member, if a system administrator has used the Profile Override setting to assign a Client Profile screen other than the Agency Default to that staff member).
Client profile data can be edited here, and system administrators can view the audit log for changes to client profile data.
Signature Fields on the Profile Screen
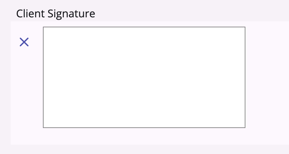
If a System Administrator has added a core or custom signature field to the profile screen, users can collect a signature there.
- The field can be signed via a cursor or an electronic signature pad
- When the user views the field, there is an empty box for the signature and an X icon visible
- Once a signature is added, the Checkmark icon appears, and the user can apply the signature by clicking the Checkmark icon or reset the signature by clicking the X icon
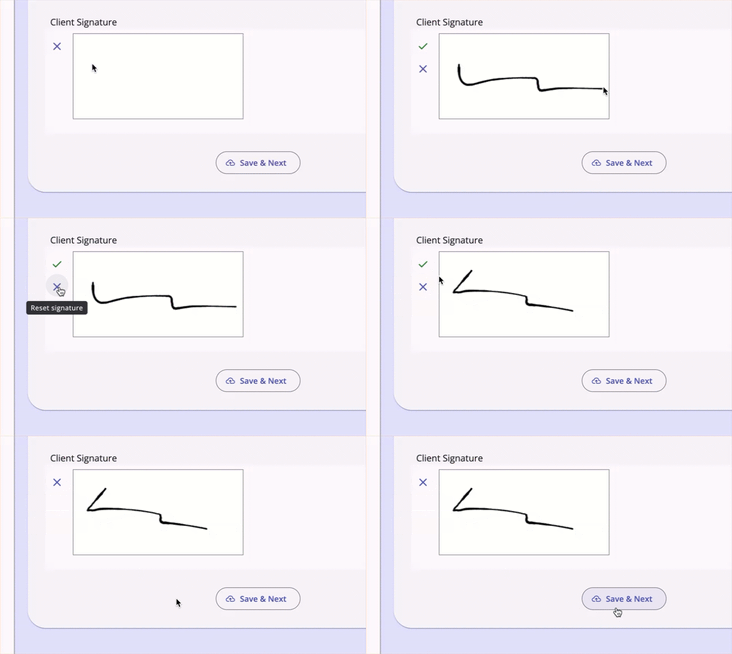
- Tooltips show when the user hovers over the Checkmark icon (Apply signature) and X icon (Reset signature)
- Depending on where the user or client is signing, move to the next field on the screen or click Save & Next to save the screen and move forward in the workflow.
Privacy
The Privacy workspace contains the Release of Information (ROI) history and the Add icon for adding new ROIs.
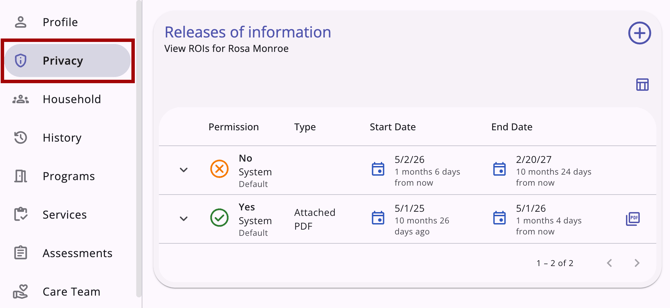
Refer to the Release of Information (ROI) Overview article for more information.
After a client record is created, System Administrators or users with the Manage Consent Refused Records access right enabled for their Access Role can enable the Consent Refused toggle on the client's Profile.
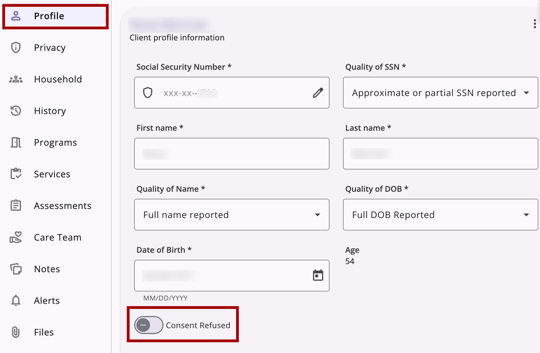
Refer to the Consent Refused article for more information.
Household
The Household workspace includes household member history and the ability to add household members and manage household members for the global household.
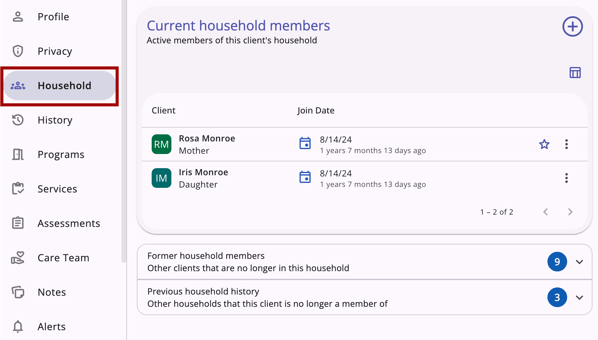
Refer to the How Do I Create a Household and Manage Members? article for more information.
Note: For information on managing program-based household information, refer to the Creating and Managing Program Enrollments article.
History
The History workspace is the "central hub" of the client record. It includes a complete history of service items, program enrollments, referrals, reservations, assessments, and Coordinated Entry Events recorded in a client record.
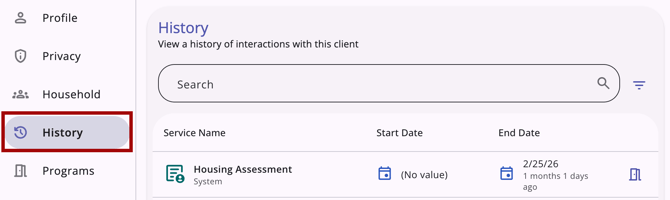
Refer to The History Tab article for more information.
Programs
The Programs workspace includes program enrollment history and the ability to add and manage program enrollments.
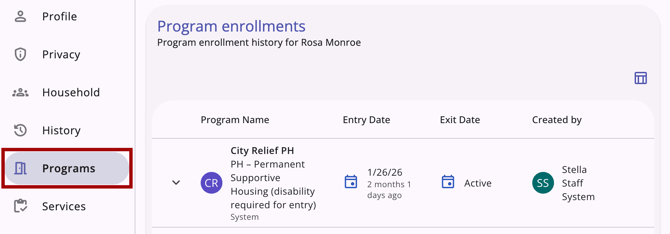
Refer to the Creating and Managing Program Enrollments article for more information.
Services
The Services workspace includes service history and the ability to add and manage services.
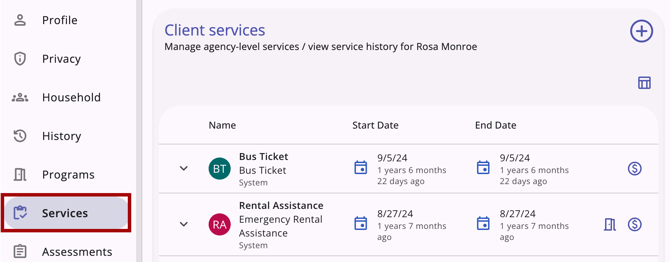
Refer to the Recording and Editing Service Items in the Client Record article for more information.
Assessments
The Assessments workspace includes assessment history and the ability to add and manage assessments.
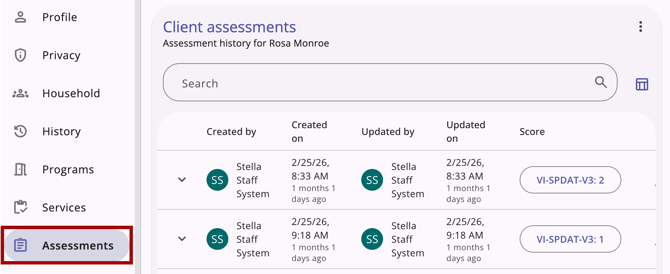
Refer to the Completing an Assessment in the Client Record article for more information.
Care Team
The Care Team workspace includes all Assigned Staff from the client's active program enrollments, as well as any staff members manually added to the team who are involved in the client's care but aren't on the Assigned Staff list.
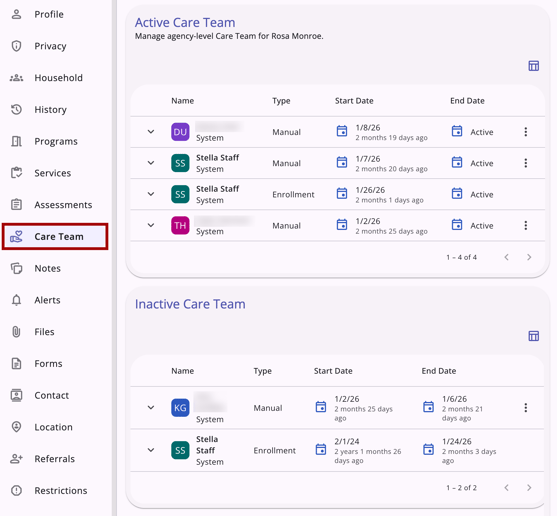
Refer to the Care Team article for more information.
Notes
The Notes workspace includes note history and the ability to add and manage notes.
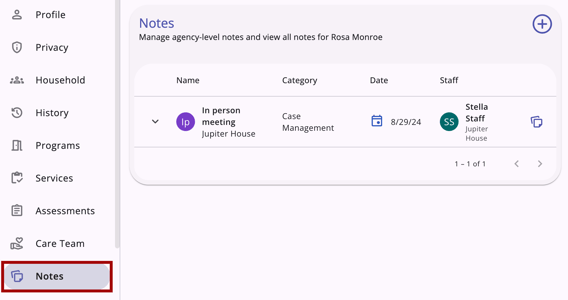
Refer to the How Do I Create Client Notes? article for more information.
Client Portal
The Client Portal workspace is visible only to communities that have enabled the Customer Portal and to users with access to it.
Refer to the Customer Portal: Client Portal Tab and Client Portal Card article for more information.
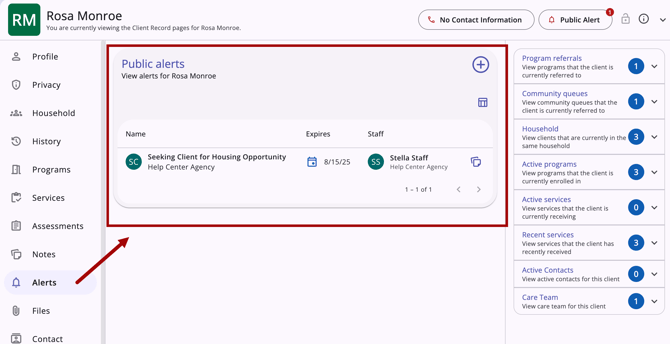
Alerts
The Alerts workspace is available only in the new Clarity interface; it does not exist as a standalone tab in the current interface. This tab includes public alert history and the ability to add and manage public alerts.
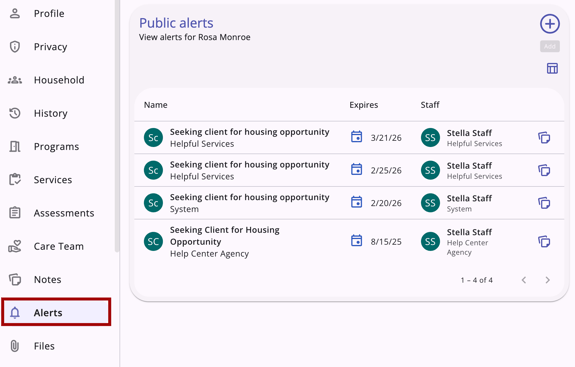
Refer to the How Do I Create a Public Alert? article for more information.
Files
The Files workspace includes file history and the ability to add and manage files.
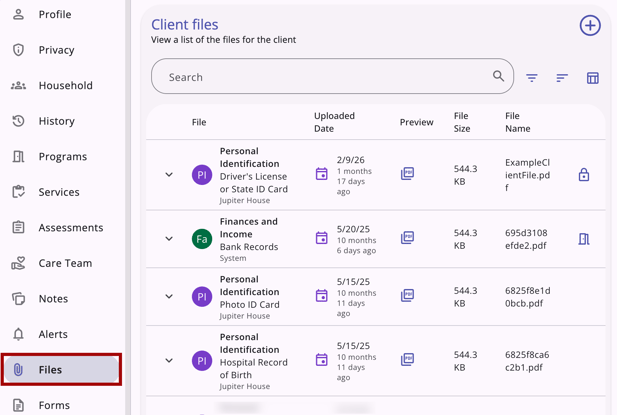
Refer to the Working with Files in the Client Record article for more information.
Forms
Users can add, view, and manage forms from the Forms workspace in the client navigation menu and from the Forms tab within a client's program enrollment.
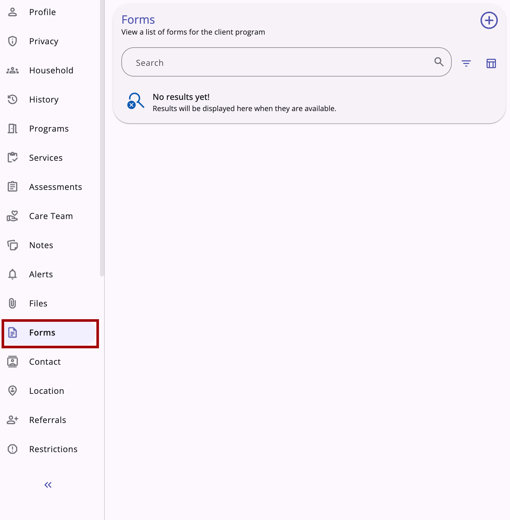
Refer to the Working with Forms in the Client Record article for more information.
Contact
The Contact workspace includes contact history and the ability to add and manage contact information.
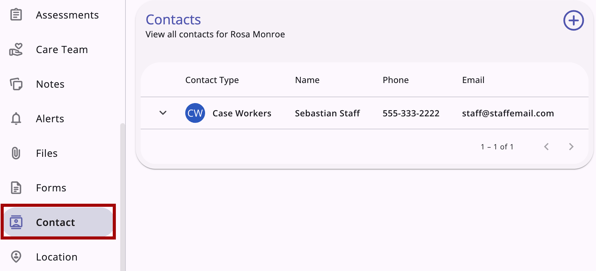
Refer to the Client Contact Tab article for more information.
Location
The Location workspace includes client location history and the ability to add and manage location information.
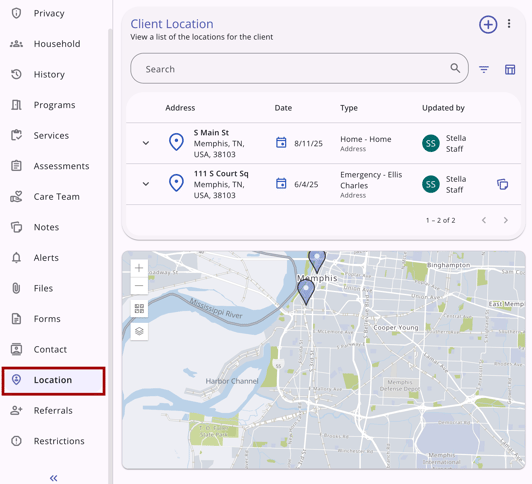
Refer to the Location Tab Overview article for more information.
Referrals
The Referrals workspace includes the client's referral history. Referral details, along with the ability to add direct referrals, are displayed in the default view.
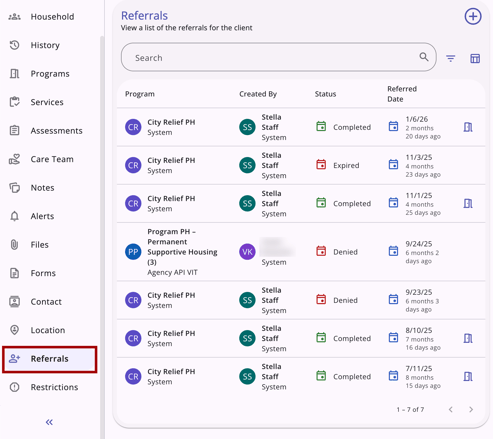
Refer to the Client Referrals Tab Overview article for more information.
Restrictions
Users can view, add, edit, or delete restrictions in the Restrictions workspace if their Access Rights and their agency’s Notes Sharing Settings permit.
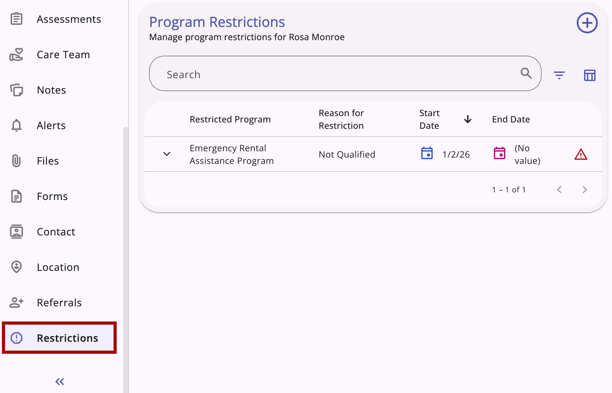
Refer to the Program Restrictions article for more information.
Client Details Cards
On the right side of the client record are the Client Details cards, which provide a summary of client information. Most cards contain a circle with a number indicating how many items can be viewed when the end user clicks the drop-down arrow. The Active Referral(s) card, when visible, displays only a Check-In button.
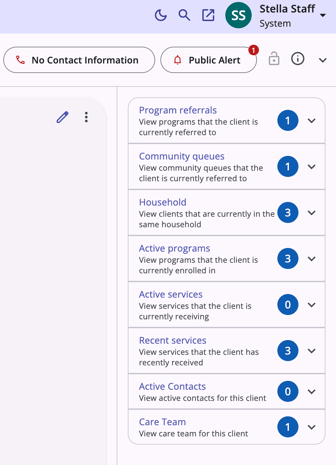
Each card is described below and has a link to a standalone article.
Active Referral(s)
An Active Referral(s) card is now available in the right sidebar of a client's record, providing case managers with a single-click Check-In button that resets the Last Activity date for all Pending-status referrals for the client.

The card is visible only when the following three conditions are simultaneously met:
- The Display Client Profile 'Check-in' button setting is enabled in Referral Settings (this existing toggle defaults to On)
AND - The client has at least one qualifying pending referral
AND - The viewing user has Edit Agency Referral access rights and/or Edit Any Agency Referral access rights enabled for their access role.
The card title is Active Referral when the client has exactly one qualifying pending referral, and Active Referrals when the client has more than one. The card subtitle is always:
"Restart the clock for all active referrals."
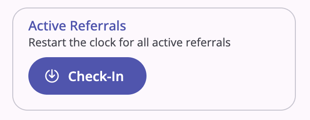
The card contains a single Check-In button. No other actions or information are available on this card.
Notes:
- When the Active Referral(s) card is visible for a client record, the Active Referral(s) card is pinned to the top of the right sidebar cards.
- When the Active Referral(s) card is visible for a client record, the Active Referral(s) card is visible regardless of which client record tab you are currently working on.
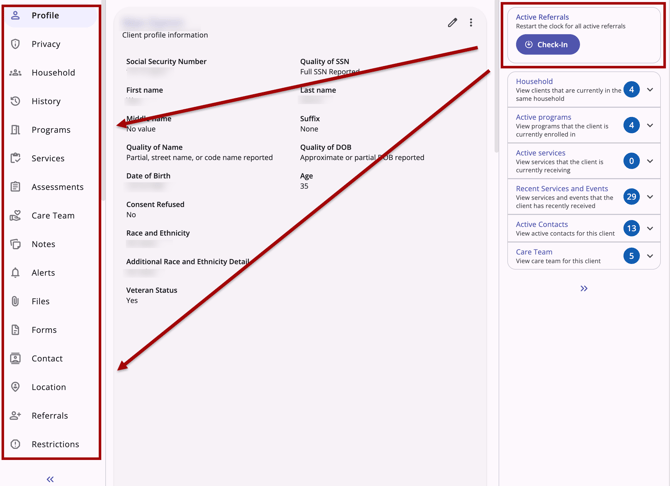
- A user with only the Edit Agency Referral access right enabled sees the card when at least one qualifying pending referral is available for a client for their current agency.
- Visibility and card title are evaluated on page load. If conditions change after page load, the card does not update until the page is refreshed.
Clicking the Check-In button on the sidebar card immediately executes the check-in action for all of the client's qualifying pending referrals in a single automatic operation. The following occurs with the check-in action:
- No confirmation or success message is shown.
- For each affected referral, the Last Activity date updates to today's date. All affected referrals remain in their current Pending status.
- No referral is enrolled, denied, or resolved by this action.
- The sidebar card remains visible if visibility conditions are still met.
- If the operation fails (e.g., network error), a surface-level error banner appears at the bottom of the page, and the message reads:
"Check-In could not be completed. Please try again."
No partial updates occur; if the operation fails, no referrals are updated.
Information about the Check-In button is also included in the Client Referrals Tab Overview (New Clarity Interface) article.
Audit Log
Each time the Check-In action is completed successfully, an entry is added to each referral’s individual audit log, and a single entry is added to the client’s profile audit log, no matter how many pending referrals were updated.
Audit Logs throughout the system are available to system administrators with the Audit Log access right. Refer to the Rights Glossary for Access Roles article for details on access rights and the Audit Trails article for details on audit logs.
Program Referrals
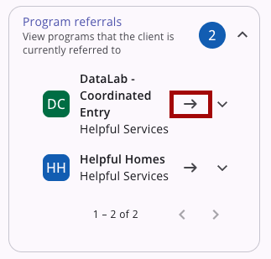
The Program Referrals card will appear only if the client has a program referral. This card shows the number of active, pending program referrals for the client. When you click the dropdown arrow to expand the card, the program and agency names will appear. If you click on the arrow to the right of the agency name, you will jump to the program referral.
Click on the dropdown arrow next to the community queue name for more information.
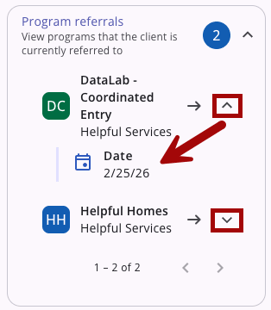
Note: Referrals are a collaborative day-to-day activity across agencies, so the filter for the Program referral card shows referrals for all agencies in a given Continuum of Care (CoC) or Sharing Group, depending on the selected Coordinated Entry (CE) Type.
Program referrals can also be reviewed on the Client Referrals Tab.
Community Queues
The Community Queues card will only appear if the client has a referral to a community queue. This card shows any community queues where the client has a pending referral. When you click the dropdown arrow to expand the card, the community queue name(s) will appear. If you click on the arrow to the right of the community queue name(s), you will jump to the community queue referral.
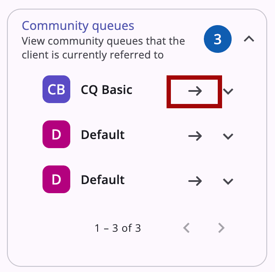
Click on the dropdown arrow next to the community queue name for more information.
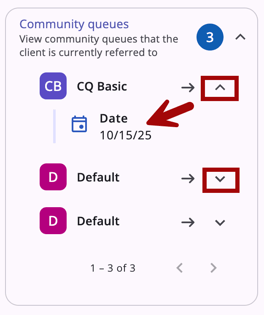
Note: Referrals are a collaborative day-to-day activity across agencies, so the filter for the Community queues card shows referrals for all agencies in a given Continuum of Care (CoC) or Sharing Group, depending on the selected Coordinated Entry (CE) Type.
Refer to the Global Referrals Tab: Community Queue article for more information about community queue referrals.
Household
The Household card shows the number of clients currently in the same household at the global level. When you click the dropdown arrow to expand the card, the name, member type, and unique identifier for each household member will be displayed. A Star icon indicates the Head of Household (HoH).
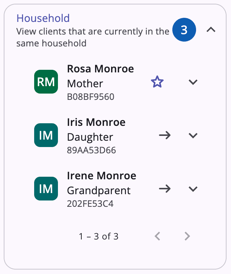
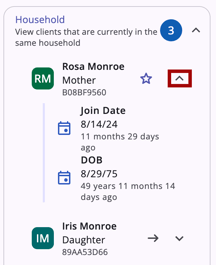
When you click the dropdown arrow next to a household member's name, more information will show.
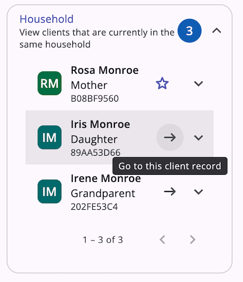
When you click on the Arrow icon next to a household member's name, you will be redirected to that client's client record.
Refer to the How Do I Create a Household and Manage Members? article for more information about global household management.
Active Programs
The Active Programs card includes the number of active programs for the client. When you click the dropdown arrow to expand the card, the program and agency names will appear.
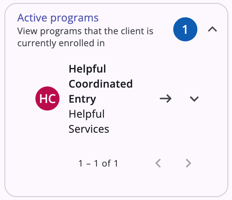
When you click on the dropdown arrow next to a program name, more information will show.
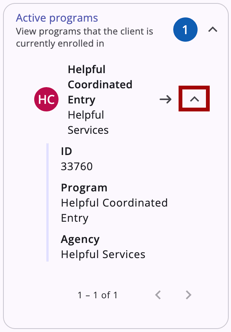
If you click on the arrow to the right of the program name, you will jump to that program's enrollment record.
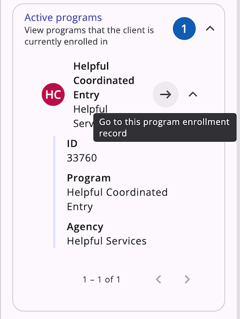
Refer to the Creating and Managing Program Enrollments article for more information about creating programs.
Active Services
The Active Services card includes the number of active services for the client. When you click the dropdown arrow to expand the card, the service name and the service item name will appear.
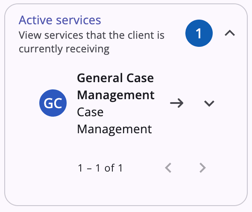
When you click on the dropdown arrow next to a service name, more information will show.
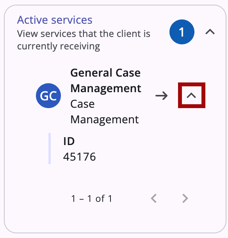
If you click on the arrow to the right of the service name, you will jump to that service's record.
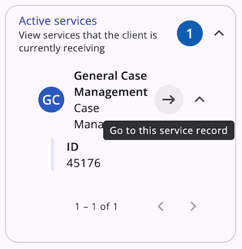
Refer to the Recording and Editing Service Items in the Client Record article for more information.
Recent Services
The Recent Services card includes the number of recent services for the client. When you click the dropdown arrow to expand the card, the service name and the service item name will appear.
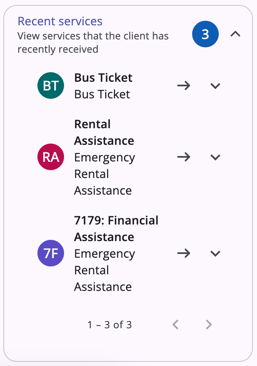
When you click on the dropdown arrow next to a service name, more information will show.
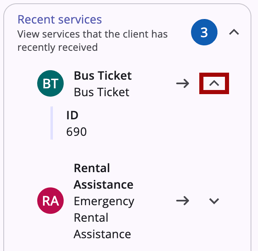
If you click on the arrow to the right of the service name, you will jump to that service's record.
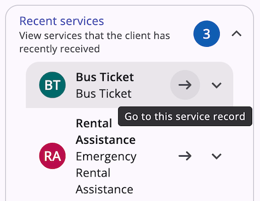
Refer to the Recording and Editing Service Items in the Client Record article for more information.
Active Contacts
The Active Contacts card displays the client's active contacts. When you click the dropdown arrow to expand the card, contact details will show.
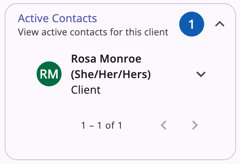
When you click on the dropdown arrow next to a contact, more information will show.
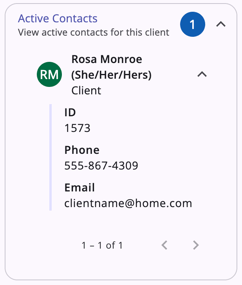
Refer to the Client Contact Tab article for more information.
Care Team
The Care Team card includes the client's Care Team information. When you click the dropdown arrow to expand the card, more details will show.
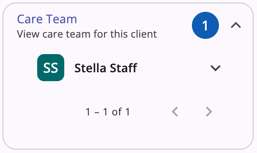
When you click on the dropdown arrow next to a contact, the Care Team member's agency will show.
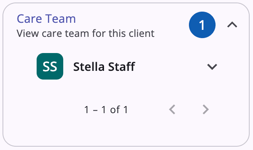
Refer to the Care Team article for more information.
Options to Refine Search Results
Each client's record includes multiple options to refine and view search results: a Search bar, Filters, Sorting options, and a Column Selector.
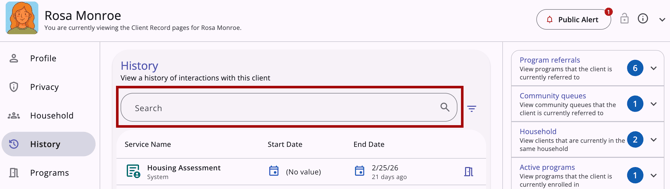
Search Bar
Users can use the Search bar to find client records. A search bar is available in the History, Assessments, Files, Forms, Location, Referrals, and Restrictions tabs.
Filters
Filters are available to narrow search results.
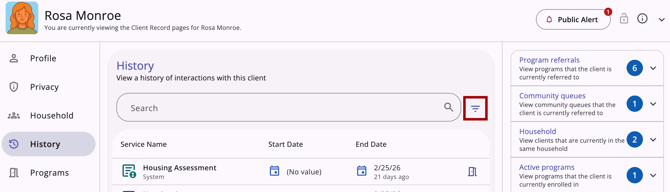
To search for a record using filter options, choose one of the available filters, enter the relevant information, or select options from a multi-select filter, and click your keyboard’s Enter / Return button or click the Arrow icon on the screen.
The available filters will vary depending on where you are in the system.
Multi-select Filters
Multi-select filters allow users to select one or more values for a single filter in a single step.
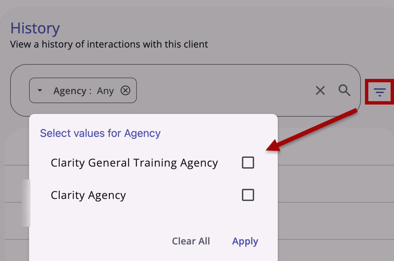
When you select a filter that has multiple options, a filter menu pop-up appears with all available values for the field. Click Apply when you have made your selections.
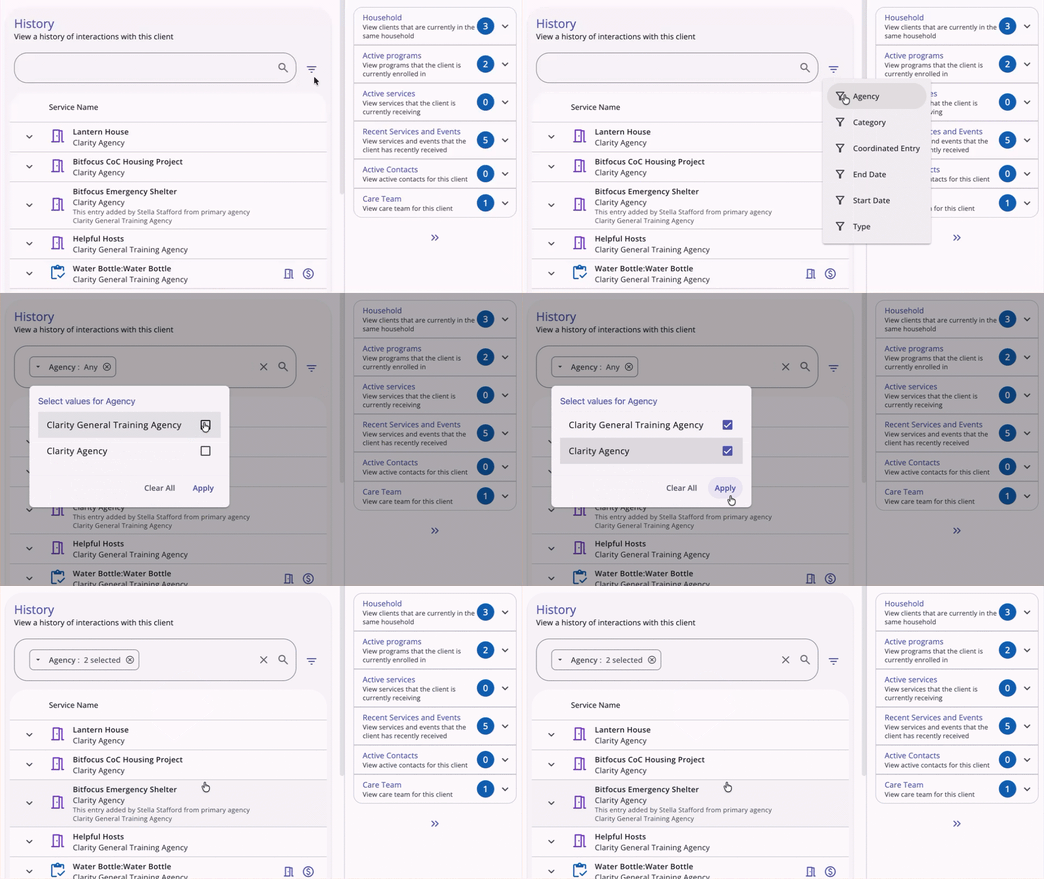
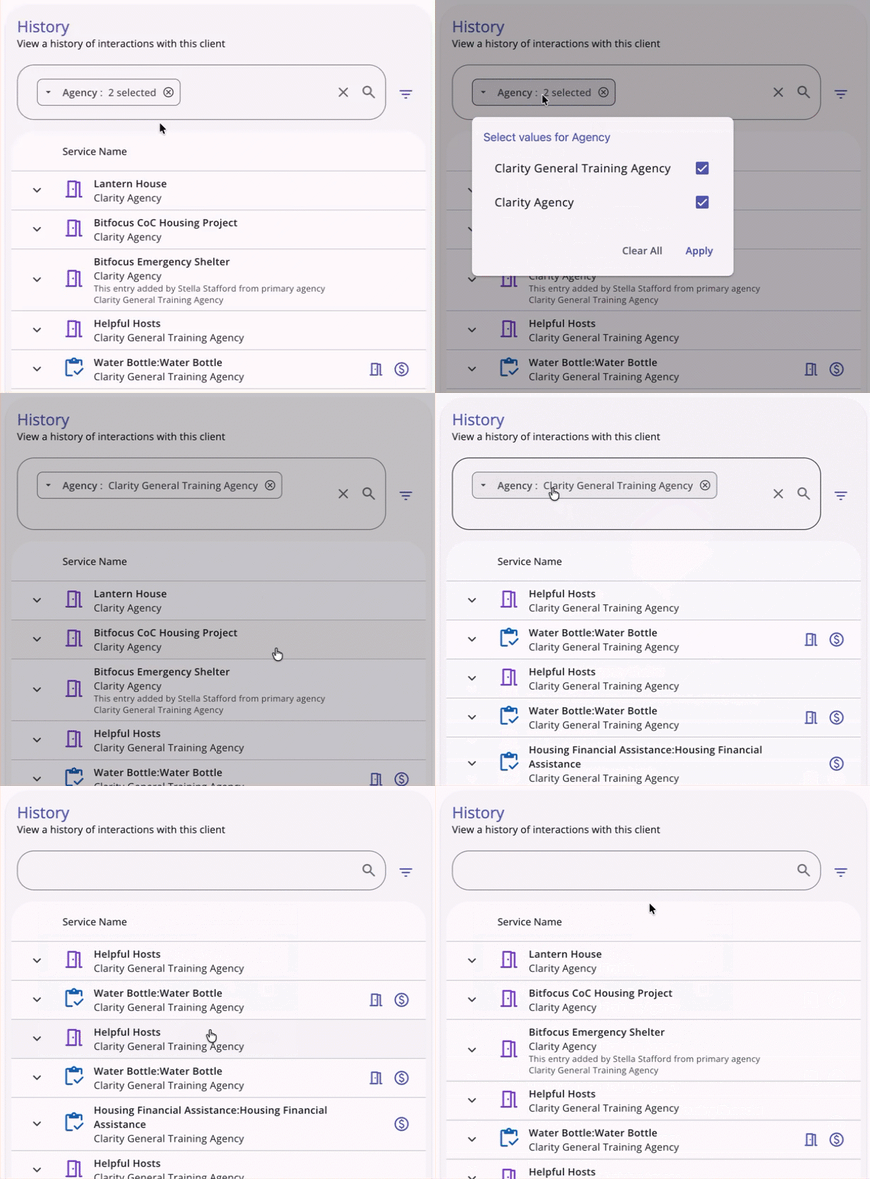
Users can review, edit, or clear previous selections by clicking on the filter within the Search bar.
- Review: Users can click outside the filter menu box (or click Apply) after a review without changes to leave selections as they are.
- Edit: Users can make changes to their original selections in the filter menu and click Apply to make updates to the filter.
- Clear: Users can click Clear All to remove selections and refresh the table.
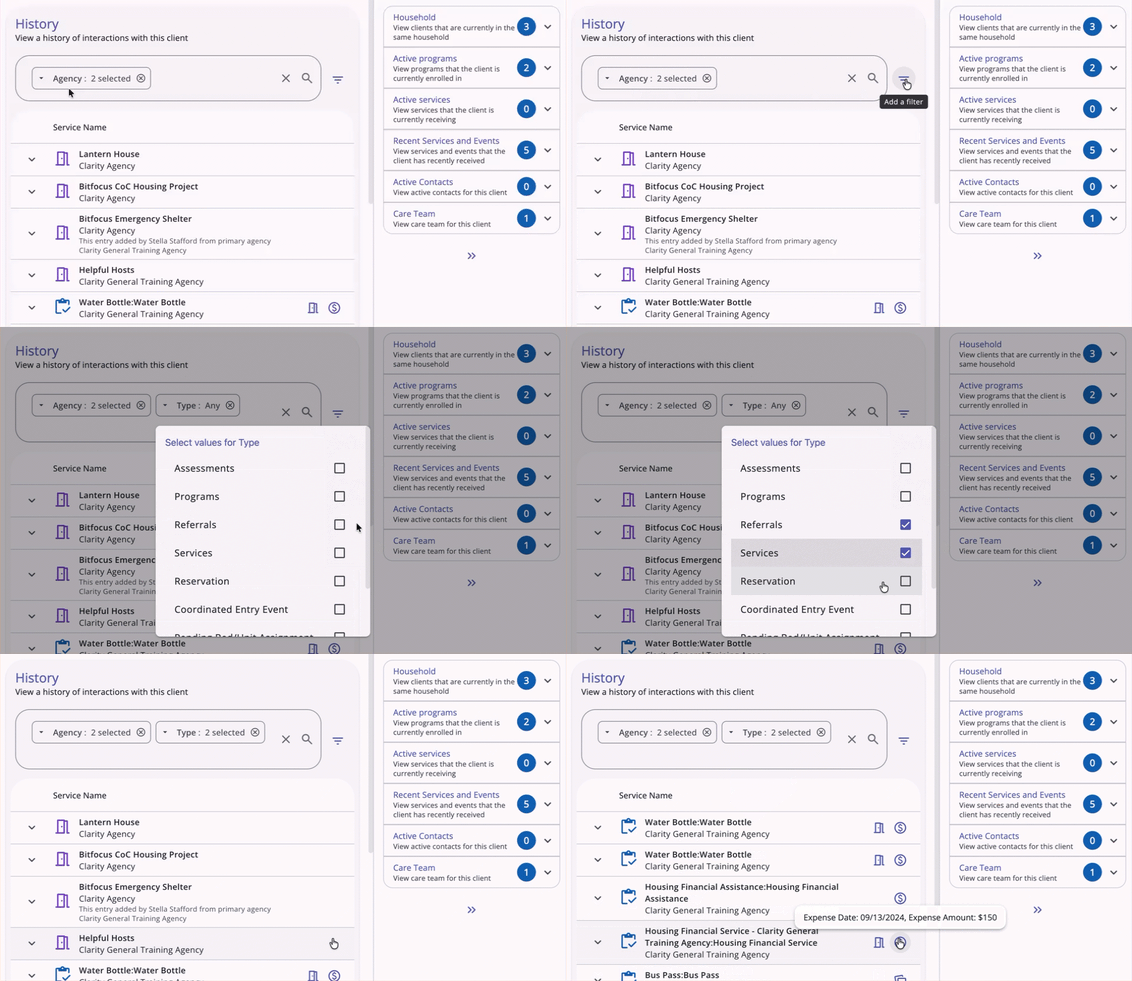
Once you have selected one filter, you can add more if needed.
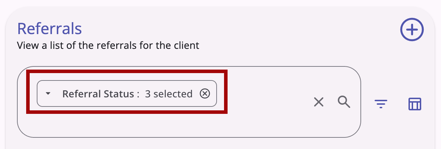
When more than one value is selected within the same filter, the chip shows "[Filter title]: #Selected." For example, you will see "Referral Status: 3 selected" if you select 3 of the referral status values for the multi-select Referral Status filter on the client’s Referrals tab.
When multiple values are selected in the same field filter, the system uses OR logic to filter results that contain any of those values.
- OR logic only applies to multiple values selected within the same field filter.
- Per current functionality, the system will use AND logic across multiple field filters.
Multi-select filters are found on the following pages in a client record on the Clients tab:
- Clients > History
- Clients > Files
- Clients > Forms
- Clients > Location
- Clients > Referrals
- Clients > Restrictions
- Clients > Programs > Files
- Clients > Programs > Forms
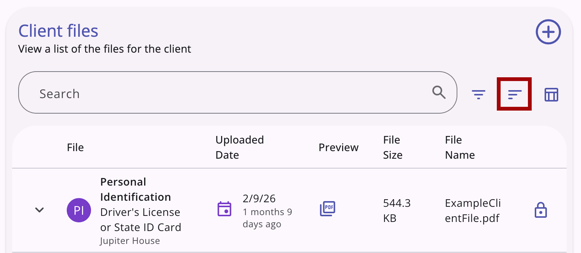
Sorting
Dynamic sorting options allow for multiple layers of sorting logic. Sorting is available in the Files workspace.
Column Selectors
Column Selectors are available throughout the new Clarity interface to support a customized view.
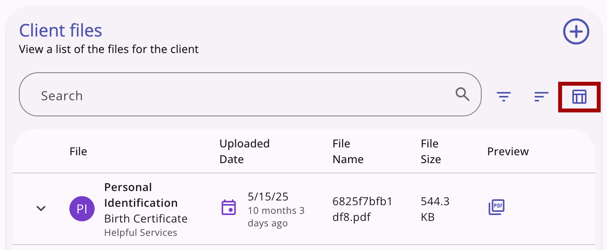
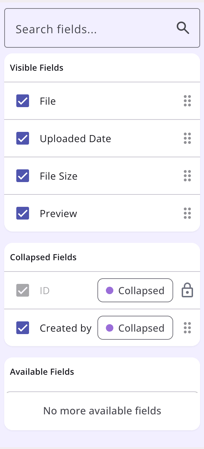
Many workspaces in the client record contain column selectors. When a user sees a column selector, they can click it to view the fields available for customizing their view. The user will see a Search bar; the default (or currently selected) fields in the Visible Fields section; the available fields in the Available Fields section; and a section to add fields that will collapse on the screen in the Collapsed Fields section.
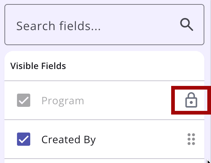
Fields in the Visible Fields section with a Lock icon cannot be moved or removed.
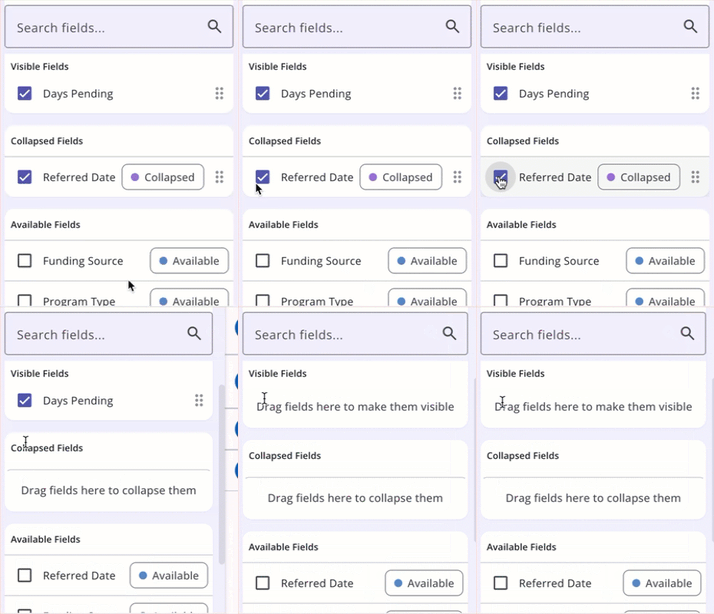
Clicking a checkbox next to an Available Field will add the field to the Collapsed Fields section. The user can use a “drag & drop” feature to move the field into the Visible Fields section to display it on the screen. Users can also drag a Visible Field to the Collapsed Fields section. Any field with a checkmark can be moved between the Visible Fields and Collapsed Fields sections.
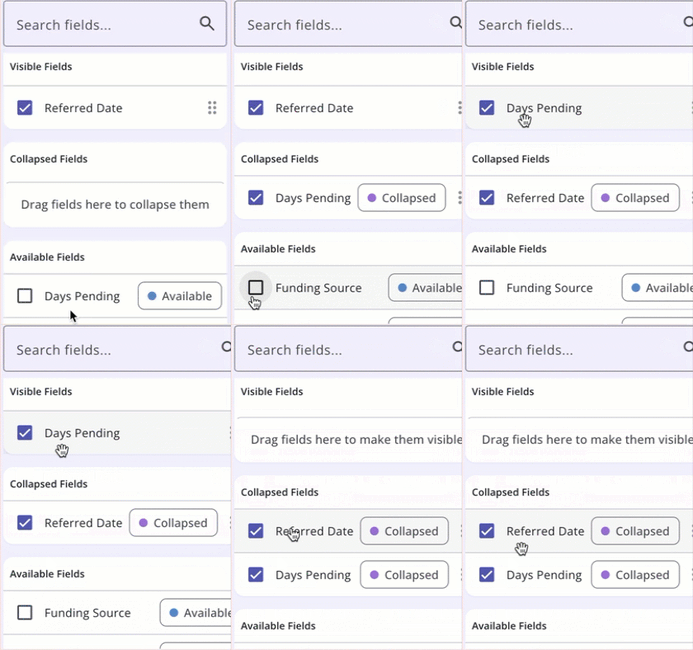
To remove a field from the Collapsed Fields or Visible Fields section, click the checkbox next to the field to clear the check; this moves the field to the Available Fields section.
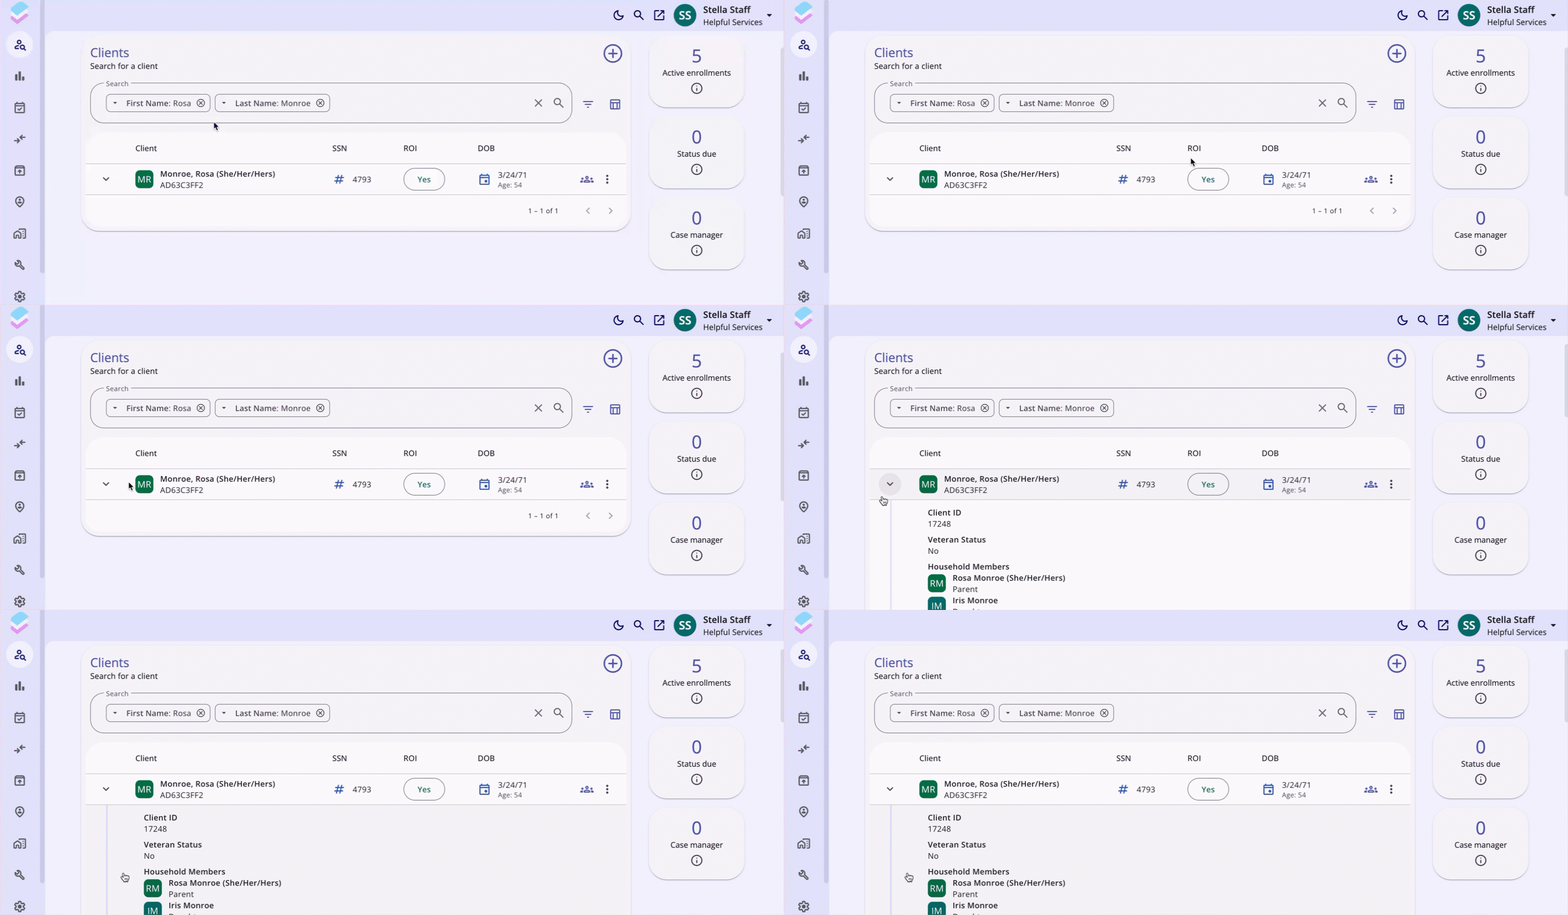
Any field in the Collapsed Fields section can be seen by clicking on the dropdown arrow on the page where you are working.
The selections made in the column selector are saved in the user’s browser and determine what they see the next time they view that screen.
Note: If the user uses a different browser to access Clarity, they will see the default view.
Standardized Record Deletion
Record deletion has been standardized across all screens. The delete action is now separate from the record-editing experience. On all new Clarity interface screens where the Delete (trash can) icon could previously only be accessed after clicking the Edit (pencil) icon on a record, the Delete (trash can) icon has been removed. Now, all delete actions are available as an option in the Action Menu dropdown.
Accessing the Delete Option
On all new Clarity interface screens with delete functionality, the Delete option is accessed through the Action Menu icon.
- Clicking the Action Menu icon displays a Delete option in the dropdown menu.
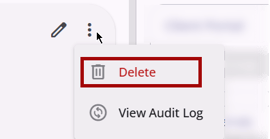
- The Delete option only appears for users who have the Delete access right enabled in their access role for the associated record type. If the user does not have delete access, the option does not appear in the dropdown.
- If the Delete option is the only option in the action menu and the user does not have the Delete access right enabled, the Action Menu icon does not appear at all. Refer to the Rights Glossary for Access Roles for details on access rights.
Delete Confirmation Dialog
Before any record is deleted, a confirmation dialog appears with the following standardized messaging:
-
Title: Delete Record
-
Body: "Are you sure you want to delete this record?"
The dialog includes two buttons:
- Delete (bottom right) confirms the deletion. When clicked, the confirmation dialog is dismissed, the record is deleted, and the user is returned to the workspace they were on. The table refreshes to reflect the removal.
- This button displays in red with a Delete (trash can) icon.
- Cancel (bottom left) cancels the delete action. When clicked, the pop-up is dismissed, and the record is not deleted. The user is returned to the workspace they were on with no changes made.
- This button displays as dark purple with an X icon to the left.
Unsaved Changes Warning
When you begin entering data into a form, Clarity Human Services protects your work by warning you before any unsaved changes are lost.
When a form is in a changed state (meaning data has been entered but not yet saved), a warning dialog appears if you attempt to exit the form.
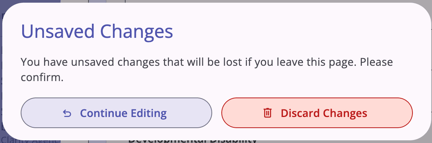
This applies to side sheets, centered dialog forms, and any step within a multi-step workflow.
What Makes a Form "Changed"
A form is in a changed state when its current state differs from the state it was loaded with. A form returns to a clean state when its current state matches exactly the state it was loaded with. The warning fires only when at least one field in the form is in a changed state.
Field-level behavior:
| Field Type | Returns to a Clean State when... |
| Text inputs, text areas, rich-text editors | Characters are entered and then deleted back to the original value |
| Date and time pickers | A selected value is cleared back to the original (opening the picker without committing a value does not mark the field as changed) |
| Toggles and switches | Flipped and then flipped back to the original position |
| Single-select dropdowns and radios | Changed and then changed back to the original selection |
| Multi-select chips, dropdowns, and tree-selects | Selections are added/removed such that the final set matches the original |
| File uploads | The uploaded file is removed from the form before exit |
| Geolocation | A new location is set and then deleted, or an existing location is removed and re-added, such that it exactly matches the original |
When the Warning Appears
The warning dialog appears when you attempt to exit a changed form by any of the following actions:
- Clicking the X (close) button in the form header
- Clicking the Cancel button in the form footer
- Pressing the Escape key
- Clicking outside the form (on the backdrop or the area behind the form)
- Navigating to a different route in the underlying page (e.g., clicking a left-nav item, breadcrumb, or any link)
- Closing the browser tab or window (triggers the browser's default unsaved changes modal)
The warning does not appear when closing a form that has not been edited.
The Warning Dialog
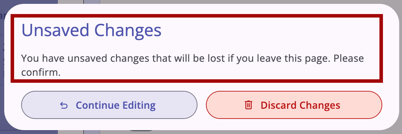
The warning dialog displays:
- Title: Unsaved Changes
- Body text: "You have unsaved changes that will be lost if you leave this page. Please confirm."
The dialog includes two buttons:
- Continue Editing — Dismisses the warning and returns you to the form with all entered data intact. Focus returns to the last field you were editing.
- Discard Changes — Dismisses both the warning dialog and the underlying form. No data entered in the form is saved. Any files uploaded to the form but not yet saved are deleted from the server.
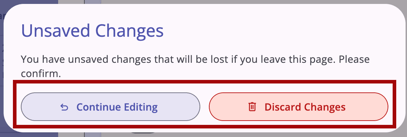
If you dismiss the warning dialog by pressing Escape or by clicking outside the dialog, the behavior matches Continue Editing; you are returned to the form with your data intact.
Multi-Step Workflows
Within a multi-step workflow, you can move freely between steps without triggering the warning. Data entered in any step persists as you navigate:
- Clicking Back to return to a previous step does not trigger the warning, even if the current or a previous step is in a changed state.
- Clicking Next (or Save & Next) to advance to a subsequent step does not trigger the warning.
- Clicking the final-step primary action (e.g., Submit or Complete) saves the workflow and closes it without a warning; this is your intentional save action.
A changed state is tracked across the entire workflow, not per step. If you attempt to exit the workflow entirely from any step, a warning is displayed if any step has unsaved changes.
For multi-step workflows, Continue Editing returns you to the step you were on when you attempted to exit. No error states are displayed for fields that have not yet been edited.
Mobile Behavior
On mobile devices, the browser's default unsaved changes form is used. If that is not available, a pop-up appears on the page when you close the form by:
- Refreshing the tab.
- Pressing the Back button.
- Clicking another link on the page.
- Navigating away in any way that causes the form or the workspace the form is on to close.
Accessibility
The warning dialog is fully accessible for users of assistive technology:
- Focus is trapped inside the warning dialog while it is open.
- When the dialog opens, the title and body text are announced by screen readers.
- Initial focus lands on the Continue Editing button when the dialog loads.
Notes:
- This feature is enabled by default for all customers. There is no System Administrator or access role opt-out.
- Discarding unsaved changes does not generate an audit log entry, as no record state was changed.
Missing and Required Field Alerts
Required fields are clearly indicated when a form is in progress, automatically flagging any missing required fields when a Save is attempted.
Save Button Behavior
If a form has missing or incomplete required fields, the Save/Next button will still appear dimmed, but it's now clickable.
- On desktop: Hovering over the button while required fields are missing displays a red outline, along with a tooltip reading "Required fields are missing" and with "Click to review" below it.
- On mobile: The Save/Next button remains tappable in its dimmed state. Tapping it does not display a tooltip; instead, a snackbar appears at the bottom of the screen with a warning icon and the message "Required fields are missing."
The Required Fields Banner
Clicking the tooltip (desktop) or tapping Save (mobile) does the following:
- Highlights every missing or invalid required field on the form with the familiar red outline and error message.
- Displays a yellow warning banner above the Save/Cancel/Back buttons, alongside a list of the missing required fields.
The banner is expanded by default and lists the specific missing or invalid field labels, using the exact label as it appears on the form.
- The banner is expanded by default and displays a bulleted list of the specific missing or invalid field labels, using the exact field name as it appears on the form.
- Click Hide to collapse the list down to just the warning message, or Show to expand it again.
- If the list is longer than the visible area, the expanded section scrolls independently while the Save/Cancel/Back buttons stay pinned.
- The banner does not block or disable the rest of the form — users can continue editing fields while it's visible.
- The list live-updates, removing each missing field as it’s resolved.
- Once all flagged fields are resolved, the banner disappears, and the Save button becomes fully enabled.
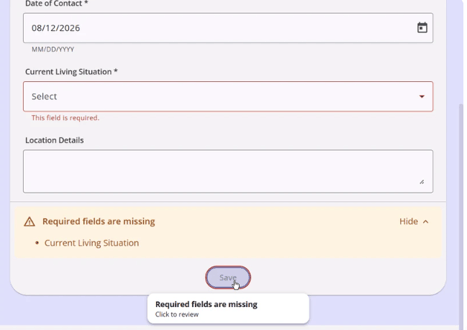 Fig. 1: Desktop Version
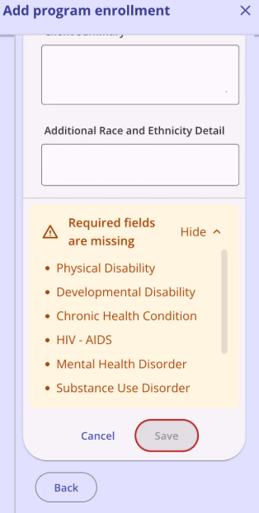 Fig. 2: Mobile Version
Sensitive Data Protections
Protected labels appear for fields with sensitive data field restrictions.
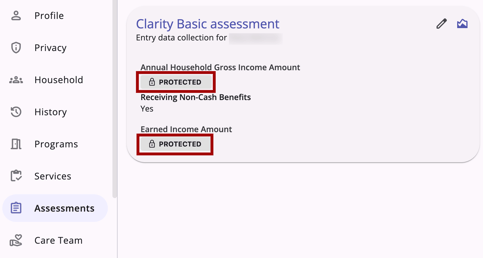
Fields marked as Protected in any of the following configurable screens are hidden for users who don’t have the appropriate permissions for the agency that owns the record:
- Profile screens
- Program Enrollment screens
- Program Status screens
- Program Exit screens
- Assessments screens
- Program Follow-up screens
Users with one of the following two Access Right permissions can see fields with Protected labels:
- Agency Sensitive Data: Users see the values in the protected fields for the agencies they currently have access to (home agency and switched into agency(ies).
- Any Agency Sensitive Data: Users see the values in the protected fields for all agencies.
Notes:
- If the user is the creator of the record, regardless of whether the user has any of the permissions noted above enabled in their role, when the user switches to the agency to which the record belongs, the user can see the actual value in the protected field.
- Even when the user is the creator of a record, if the user loses access to the agency, that means that the user can't switch to this agency. Even if the user has the Agency Sensitive Data access right enabled in their access role, they will not see the values for the protected fields.
Audit Logs
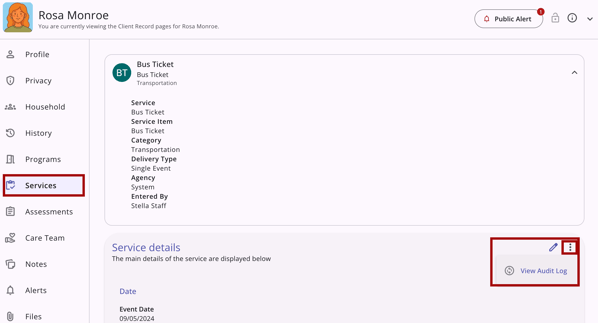
System administrators with audit log access can click the Action Menu icon that includes the View Audit Log option. Click View Audit Log to open the audit log.
Refer to the Audit Trails article for more information.
Icons & Tooltips
|
Icon |
Icon/Tooltip Name |
Tooltip |
Icon Location |
|
|
Action menu, also known as:
|
"Show more actions" |
All Screens: typically on the far right of a screen or section |

|
Add | "Add" | Anywhere the Add icon appears |

|
Alerts menu item | "Alerts" | Client Navigation Menu > Alerts |

|
Alert/Warning |
(no tooltip) |
Client record Information box; anywhere an alert or warning appears |

|
Double Left Arrows | (no tooltip) | Anywhere you see this icon, you can click to collapse the section |

|
Double Right Arrows | (no tooltip) | Anywhere you see this icon, you can click to expand the section |

|
Dropdown Arrow: Collapse | (no tooltip) | Anywhere you see this icon, you can click to collapse or expand the section |

|
Dropdown Arrow: Expand | (no tooltip) | Anywhere you see this icon, you can click to collapse or expand the section |

|
Link Arrow | Varies depending on screen; example from Program Referrals widget: “Go to this referral” | Anywhere you see this icon, you can click to jump to the record indicated |

|
Assessments menu item | "Assessments" | Client Navigation Menu > Assessments |

|
Care Team menu item | "Care Team" | Client Navigation Menu > Care Team |

|
Column Selector |
"Show/hide fields" |
All Screens: typically paired with a search bar |

|
Contact menu item | "Contact" | Client Navigation Menu > Contact |

|
Date |
(no tooltip) |
Anywhere a Date appears |

|
Delete | "Delete" | Anywhere the Delete icon appears |

|
Edit | "Edit" | Anywhere the Edit icon appears |

|
Files menu item | "Files" | Client Navigation Menu > Files |

|
Filter |
"Add a filter" |
All Screens: typically paired with a search bar |

|
Forms menu item | "Forms" | Client Navigation Menu > Forms |

|
History menu item | "History" | Client Navigation Menu > History |

|
Household menu item | "Household" | Client Navigation Menu > Household |
|
|
Information |
Varies depending on screen |
Anywhere the Information icon appears |
|
|
Location menu item |
"Location" |
Client Navigation Menu > Location |

|
Notes menu item | "Notes" | Client Navigation Menu > Notes |

|
Note | “Note [formatted note text]” | Contact, History, Location, Notes |

|
Permanent Restriction | "This is a permanent restriction (no end date)" | Visible on a Restriction record that does not have an end date |

|
Privacy menu item | "Privacy" | Client Navigation Menu > Privacy |

|
Privacy - Private |
Varies depending on screen; example from client profile: “Private Client data is not shared.” |
All Screens within the client record |
|
|
Privacy - Public |
Varies depending on screen; example from client profile: “Public Client data is shared.” |
All Screens within the client record |
|
|
Profile menu item |
"Profile" |
Client Navigation Menu > Profile |
|
|
Programs menu item |
"Programs" |
Client Navigation Menu > Programs |
|
|
Public Alert | "This client has been issued system-wide alerts: [list of alerts]" |
Client information box |
|
|
Referrals menu item |
"Referrals" |
Client Navigation Menu > Referrals |
|
|
Restrictions | "Restrictions" | Notifications for Program Restrictions |
|
|
Restrictions menu item |
"Restrictions" |
Client Navigation Menu > Restrictions |
|
|
Search |
"Search" |
All Screens:
|
|
|
Services menu item |
"Services" |
Client Navigation Menu > Services |
|
|
Sort |
"Configure sorting" |
All Screens: typically paired with a search bar |
|
|
View Audit Log |
(no tooltip) |
Any screen where audit log functionality is available; visibility is dependent on access rights |


Refer to the Icon & Tooltip Glossary article for the full list of icons and tooltips available in the new Clarity Human Services interface.
Updated: 09/28/2026