Overview
A program template specifies the screens that will collect data at each stage of a program (enrollment through follow-up). Additionally, program templates can be used to configure the automated provisioning of services, default goals, documentation requirements, assessments, and chart fields to the program.
- Bitfocus creates the templates needed for federally required data collection.
- System administrators can create custom templates as needed, such as for custom automated service provisioning needs.
Once a template is created, you can use it each time you set up a similar type of program. Templates are time-savers; without them, each time you create a program, you would have to go through and assign a screen to each stage of the program.
System Program Templates
Program Templates created by Bitfocus are marked with a SYSTEM label. Because System entities are not editable, the System Program Templates will not be adjustable but can be copied as a custom Program Template so that any necessary adjustments can be made.

"(Custom)" at the end of a Program Template Name indicates that the template was provided by Bitfocus and adjusted by the community before the "System" label was introduced.
Automated Provisioning Services included in a System Program Template will also have a SYSTEM label and cannot be edited or deleted.

Notes:
- The System Program Templates do not include the Current Living Situation screen. If you want to use a System Program Template for programs that need to collect Current Living Situation data (Street Outreach, CE, and ES NBN Project Types), you will need to make a copy of the System Program Template as described below and add the “Current Living Situation” Program Status Screen as an Additional Status Screen.
- An additional system Program Template was added for FY 2026: [2026] Clarity Project. Please review below for more information.
Creating a Program Template
To create a program template, go to SETUP > TEMPLATES > Program Templates. Click CREATE A NEW PROGRAM TEMPLATE.

Complete the following fields on the ADD NEW PROGRAM TEMPLATE page:
- Program Template Name: Choose a name for the new template.
- Encampment Program Template: Turn on this toggle, which is only displayed when Outreach is enabled for an instance, to indicate that the template will be used for configuring encampment projects. Refer to our Configuring Encampment Programs article for more information.
Note: When an Encampment Program Template is assigned to an Encampment program, the Encampment Program Template toggle for that template cannot be disabled.
- Program Screen: Select the screen that will designate the fields that appear when a program is being configured. The options available are all screens with a Screen Type of "Program Setup."
- Enrollment Screen: Select the screen that will appear at program enrollment. The options available are all screens with a Screen Type of "Program Enrollment."
- Case Status: Select how often the Annual Assessment should be completed.
- Case Status Screen: Select the screen that is displayed when a user conducts a Status Assessment or Annual Assessment. The options available are all screens with a Screen Type of "Program Status."
- Exit Screen: Select the screen that is displayed when a user exits a client from a program. The options available are all screens with a Screen Type of "Program Exit."
- Follow-up Screen: Select the screen that is displayed when a user conducts a Follow-up assessment. The options available are all screens with a Screen Type of "Program Follow-up."
- Additional Status Screen: If the program is collecting Current Living Situation data, select "Current Living Situation."
- Status: This designates the template as "Active" or "Inactive." Select "Inactive" if the program template should not be available for use. You can activate or de-activate a program template at any time.
- Automated Provisioning: This setting enables system administrators to automate the configuration of services, goals, documentation requirements, assessments, and chart fields for a program. Once you save a template with Automated Provisioning enabled, the system will display the configuration options as described below.
- Assessment Due - HUD Compliant: This setting, which is turned on by default for all program templates, pertains to HUD's requirement that the annual assessment date for all household members is based on the Head of Household's program enrollment date. Our non-HMIS customers who do not need to meet this requirement may turn this toggle off for any Program Templates where the annual assessment date for non-HoH household members should be determined by their own program enrollment date instead of the HoH's enrollment date.
- Eligibility: If Automated Provisioning is set to "Enabled," an Eligibility toggle will be visible. Turn on the Eligibility toggle to enable the ability to apply Eligibility Presets to the template as described below.
After completing all fields, click ADD RECORD.
The ADD NEW PROGRAM TEMPLATE page becomes the EDIT PROGRAM TEMPLATE page.
Automated Provisioning
If Automated Provisioning is enabled, the EDIT PROGRAM TEMPLATE page will include the following sections for you to designate the services, goals, documentation requirements, assessments, and chart fields that will automatically be provided through the program:
- SERVICES: Clicking ADD NEW SERVICE will navigate you to the ADD NEW SERVICE page, where you can create the Automated Provisioning Service. For more information on creating services, see Introduction to Services.
Note: You must add the Automated Provisioning Service to a template before using that template in a program; otherwise, the Service will not be available for use in that program.
- DEFAULT GOALS: The options available are those established in Goal Templates.
- DOCUMENTATION REQUIREMENTS: The options available are those established in File Categories.
- ASSESSMENTS: The options available are those established in Assessment Screens.
- CHART FIELDS: The fields available come from the template's enrollment screen (for more information, see Program Setup: Charts).
Program Eligibility
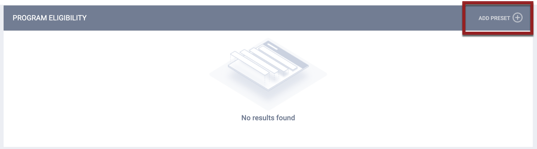
If the Eligibility toggle is enabled, the EDIT PROGRAM TEMPLATE page will also include a PROGRAM ELIGIBILITY section for you to apply Eligibility Presets as follows:
- Click ADD PRESET.
- On the ADD PRESET pop-up, select the CoC Setting, then select an Eligibility Preset that has been configured for that CoC.
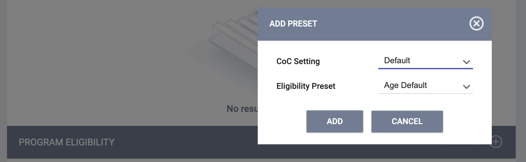
- Click ADD. The Eligibility Preset will appear in the PROGRAM ELIGIBILITY section.
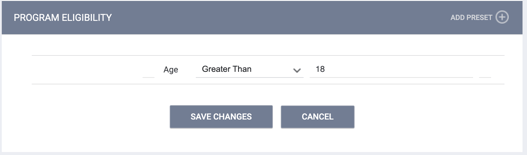
- Repeat as needed to add additional Eligibility Presets.
Notes:
- If the template assigned to a program has the Eligibility toggle enabled but does not have any Eligibility Presets in the PROGRAM ELIGIBILITY section, the program-level Eligibility toggle will still be automatically enabled.
- Eligibility Presets can be applied to any program template in the system, regardless of which CoC the Eligibility Preset was configured under.
- To best nest eligibility conditions with other configured eligibility, parentheses can be added at the program template level.

Copying a Program Template
To copy a program template, click its Copy icon. The copied program template will appear in the list, with the words "Copy of" in front of its name.
Deleting a Program Template
Hover over a program template and click its trash can icon to delete the template.
NOTE: The trash can icon will also not appear if the template is currently assigned to a program.
"Clarity" Template
An additional system Program Template (and related screens) was added for FY 2026. The Program Template is:
- [2026] Clarity Project
- This is a new system Program Template that includes new [2026] Clarity screens.
These are intended to be used for non-Federally funded projects where the Sex field is not required. For more information, please review this article.
Audit Log
![]()
Admin users with Audit Log permission enabled in their access role can click the Audit Log button for a Program Template to view the following changes:
- Changes to the Program Template setup fields
- Changes to the Eligibility setting
- Changes to the SERVICES section
- Changes to the DEFAULT GOALS section
- Changes to the ASSESSMENTS section
- Changes to the DOCUMENTATION REQUIREMENTS section
- Changes to the CHART FIELDS section.
Updated: 10/03/2025