Getting Started
INVENTORY Sites collect contact information about a project. However, unlike Administrative Sites, you can use INVENTORY Sites to designate Buildings and Units within a Site and associate funding sources and eligibility criteria with the Site, Buildings, and Units.
Managing Sites
To manage an agency's INVENTORY Sites, ensure that you’re in the correct agency for the Sites you’d like to manage, then click the launchpad and navigate to MANAGE > SITES. By default, the Administrative option in the Site Categories sidebar is selected, but you will need to select Housing Inventory in the sidebar.
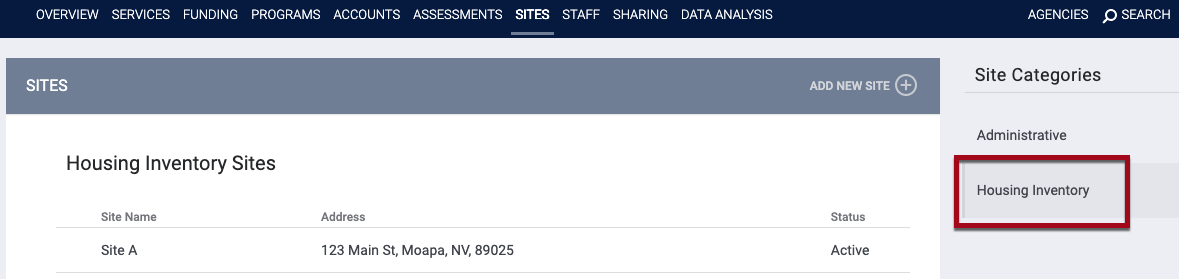
Sites are listed alphabetically by Site Name, but you can click the Status column header to sort by status if desired.
To create a new Housing Inventory Site, click ADD NEW SITE.

Note: You cannot modify the Site Category (Administrative or Housing) once you create a Site.
Complete the fields in the ADD NEW HOUSING INVENTORY SITE screen.
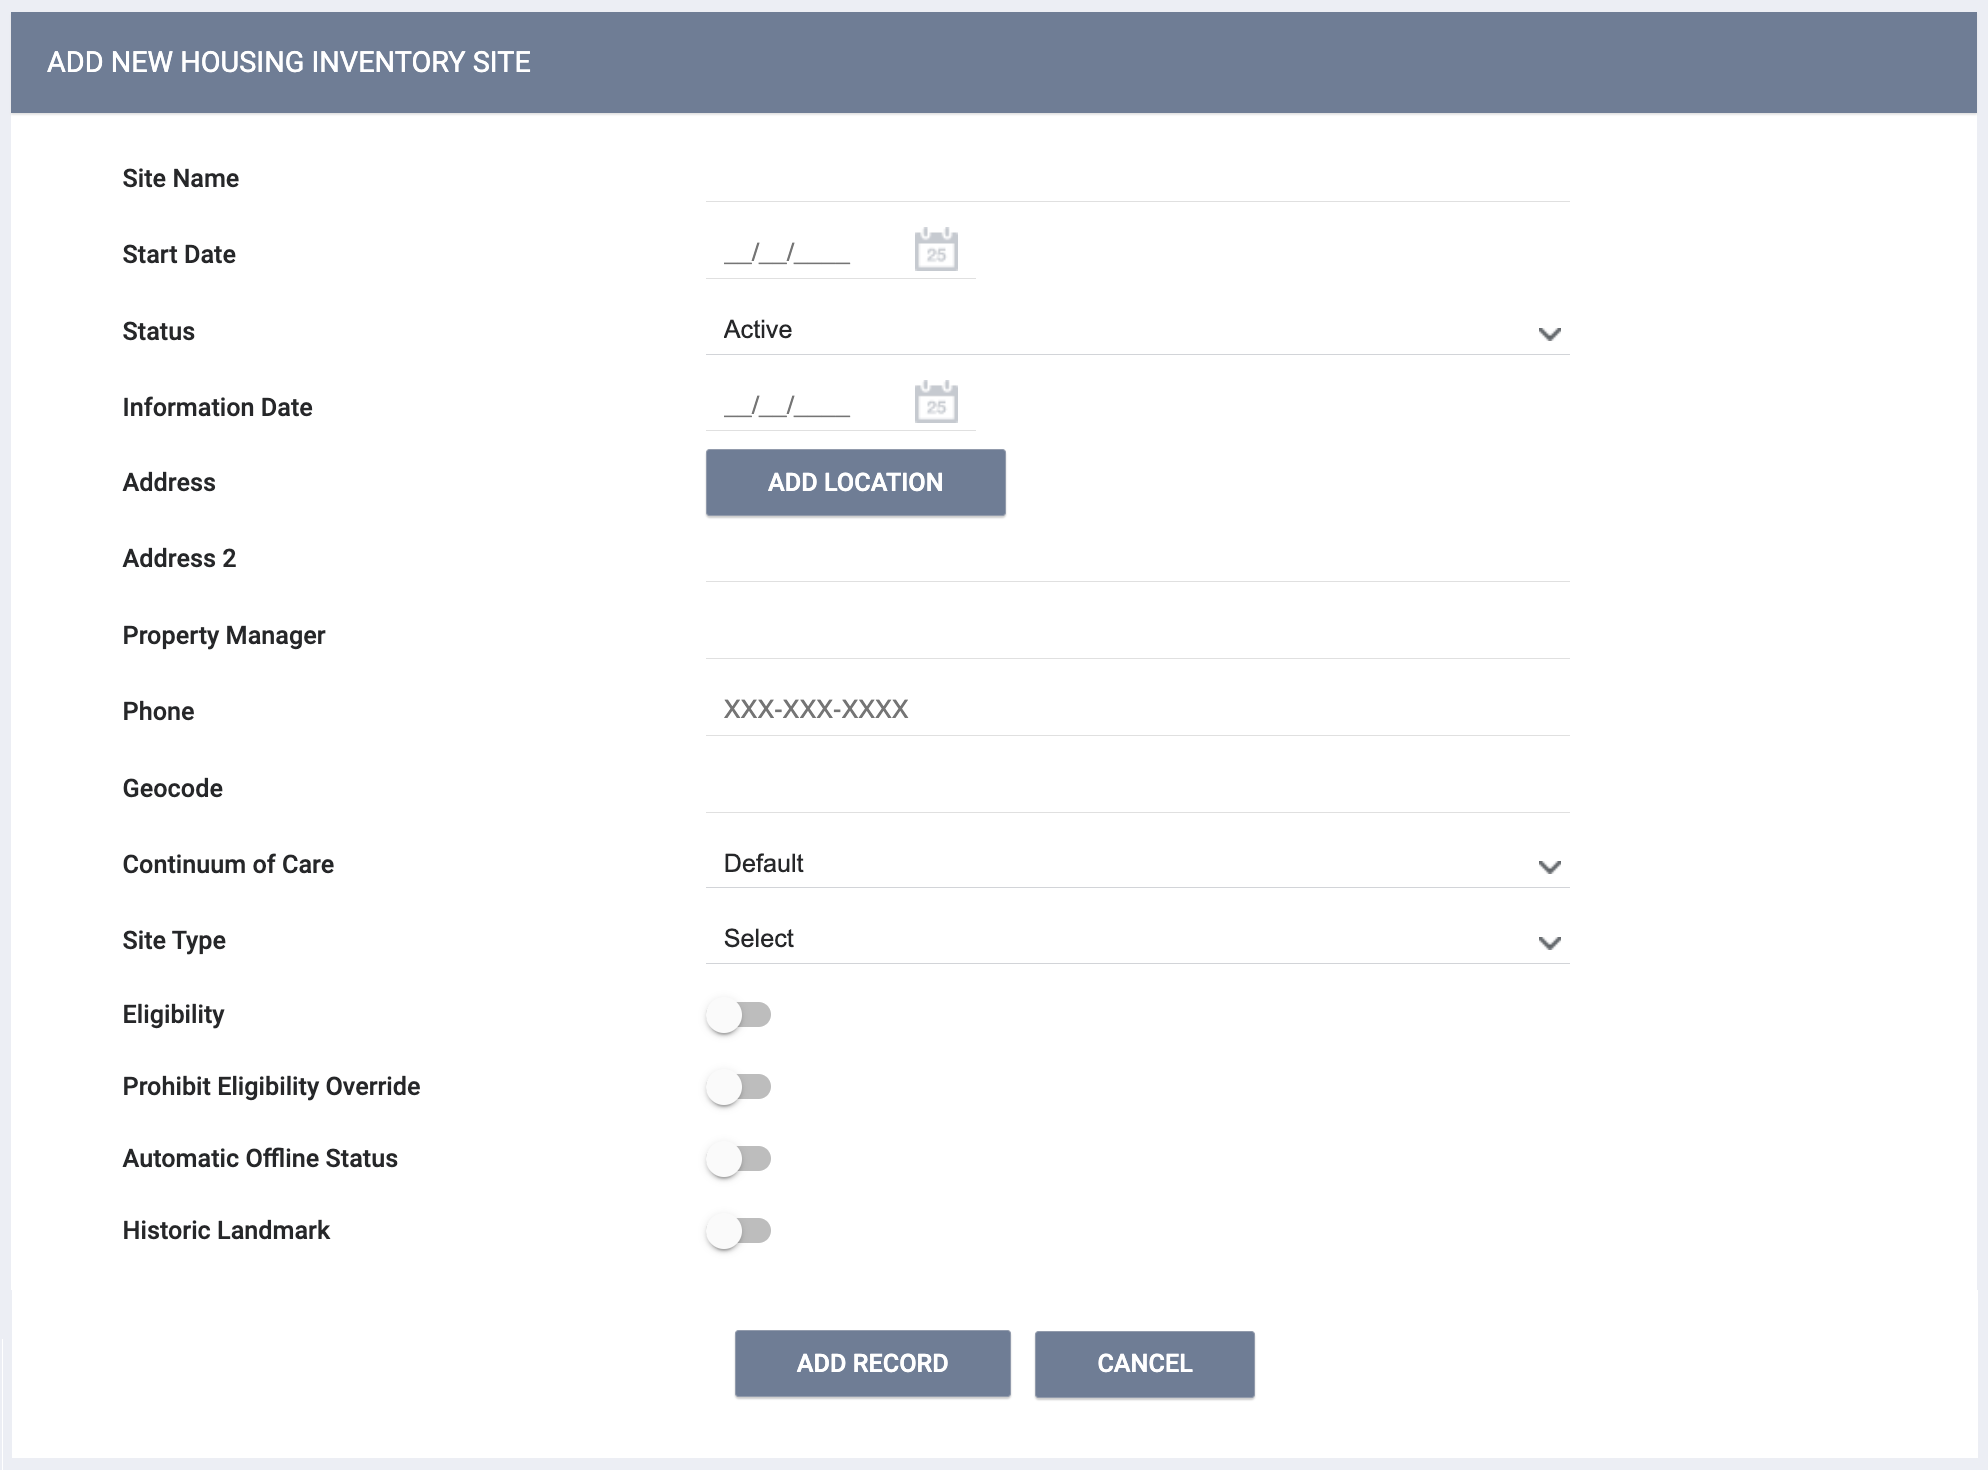
- In the Start Date field, you may enter a past, current, or future date. The system will display a pop-up warning if you attempt to change the Start Date for an existing Site to a date that is later than the Start Date of any of the Site's Buildings, Unit Configuration Types, or Units.
- The Continuum of Care drop-down menu is populated by System Variables: Continuum of Care List.
-
The option you select for Site Type will impact the Site’s configuration options, including whether you can add Buildings and Units to the Site.
- When “Standalone Unit” is selected and saved, it cannot be changed. Standalone Units do not have Buildings.
- When “Single Site: Single Building,” “Single Site: Multiple Buildings,” or “Scattered Site: Multiple Buildings” is selected, a Buildings & Units section will appear in the Site Resources sidebar.
- Geocodes are published annually and are available on the HUD Exchange.
- Once the Site is saved, the system displays a Geography Type field that populates automatically and is not editable. This information is based on the HUD Zip Code to Geography crosswalk.
- You can associate Eligibility criteria with a Site by turning on the Eligibility toggle. When this setting is enabled, the Eligibility section appears in the Site Resources sidebar.
Note: When a Site is assigned a program with eligibility (either direct eligibility or eligibility inherited through a funding source assigned to the program), the Site’s Eligibility toggle will automatically be enabled and read-only.
- Turning on Prohibit Eligibility Override prevents users from overriding eligibility criteria when searching for a Unit in this Site. Refer to Eligibility Override for details.
- Enabling Automatic Offline Status means that the system automatically creates an Offline status for a Unit/Bed when a client exits. Refer to Automatic Offline Status for details.
- Custom Fields: System Administrators can add Housing Inventory Custom fields as appropriate, such as the Historic Landmark field shown in the example above. If desired, a Housing Inventory Custom field can be designated as a Field Marker to enable data to cascade to the level below it (from a Site screen to a Building screen, for example).
Site Resources
Clicking the Edit icon next to a Site on the Housing Inventory Sites screen displays the Overview for that site, along with a Site Resources sidebar where you can make additional configurations.
Overview
Clicking Overview in the sidebar displays the MODIFY HOUSING INVENTORY SITE screen. This screen contains the fields completed for the Site at creation, which you can modify at any time.

Programs & Projects
The Programs & Projects section of the sidebar displays any programs assigned to the Site through the Site setup.
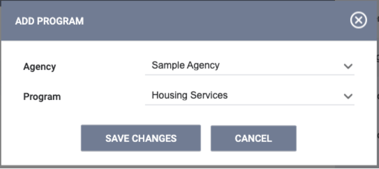
To assign a program to a Site, click ADD NEW PROGRAM. The ADD PROGRAM pop-up appears.
- Users with Agency Inventory - Add Any Agency Program enabled will see both an Agency drop-down and a Program drop-down on the ADD PROGRAM pop-up when adding a Program to the Site.
- Users with Agency Inventory - Add Agency Program enabled but not Agency Inventory - Add Any Agency Program will not see the Agency drop-down because they will only have access to associate a program from their own agency.
The following Program Types cannot be assigned to any level within INVENTORY:
- Services Only
- Street Outreach
- Other
- Coordinated Entry
- Day Shelter
- Homeless Prevention
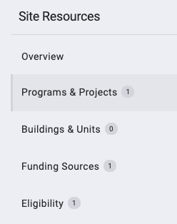
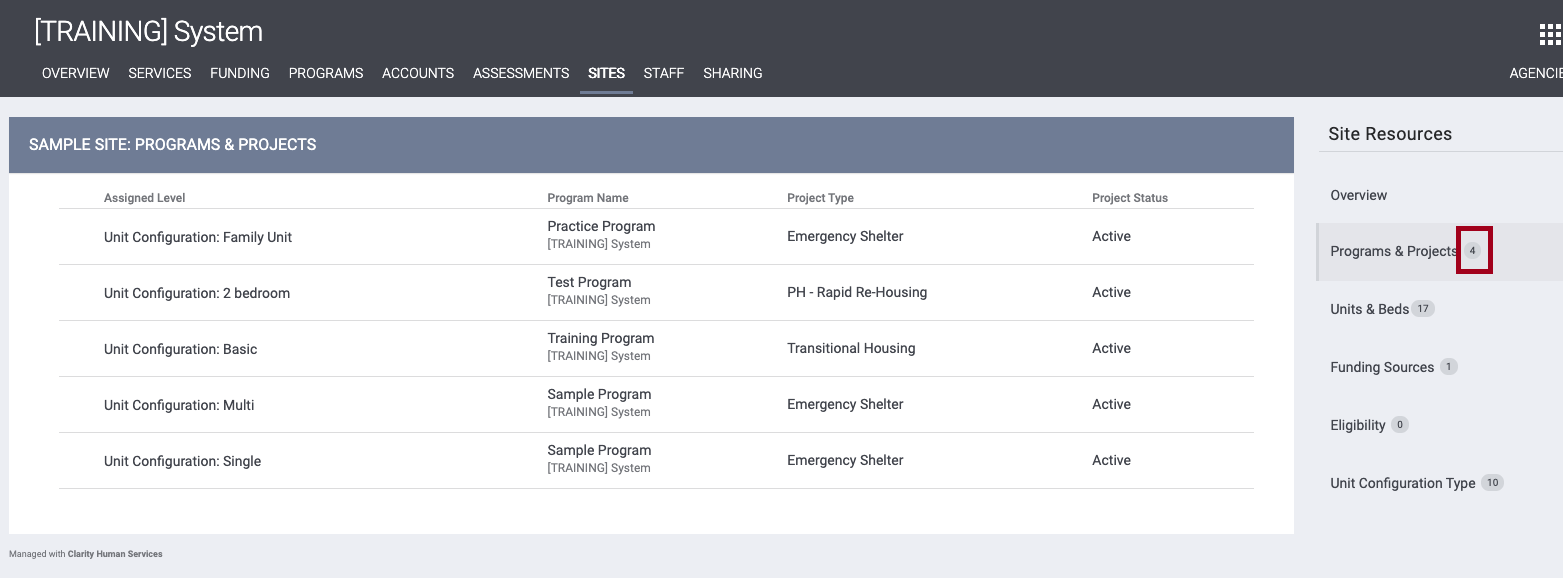
The Programs & Projects count shown in the sidebar only counts unique programs, not duplicates. For example, even though the image below shows five programs, the count shown in the sidebar (outlined in red) is “4”; the reason is that “Sample Program” is listed twice because it is assigned to two different Unit Configuration Types.
You will not be able to delete any programs that are listed as either a Current or Upcoming Unit Configuration Type of a Unit setup.
Buildings & Units
The Buildings & Units section of the sidebar displays any Buildings and Units created for the Site. If the Site is a Standalone Unit, this section won’t be displayed. To add a new Building, click ADD NEW BUILDING.

Funding Sources
Note: All reports (including federal reports) related to INVENTORY will pull Funding Source information from the program level. Therefore, Funding Sources will need to be attached at the program level in order to be included in those reports. Funding Sources attached at the Site level will not be pulled into reports.
To view or add funding sources for a Site, click the Funding Sources section of the sidebar. In the PROGRAM FUNDING section, you will see any active funding sources inherited from a program assignment.
To associate funding sources with a Site, click ADD FUNDING SOURCE. The ADD FUNDING SOURCE window will display funding sources created from the Funding tab. Toggle on the desired funding sources, then click ADD.

The Assigned Level column indicates the level at which the funding source was added.
Eligibility
To add eligibility criteria with a Site, click Eligibility in the sidebar, then click ADD REQUIREMENT. Refer to our INVENTORY Overview article for additional information on configuring eligibility criteria.
The system will display the following pop-up warning whenever an eligibility criterion is added or edited: "Please note that modifying eligibility may impact clients already associated with this [site/building/funding source/program/etc] eligibility setting. Please confirm."
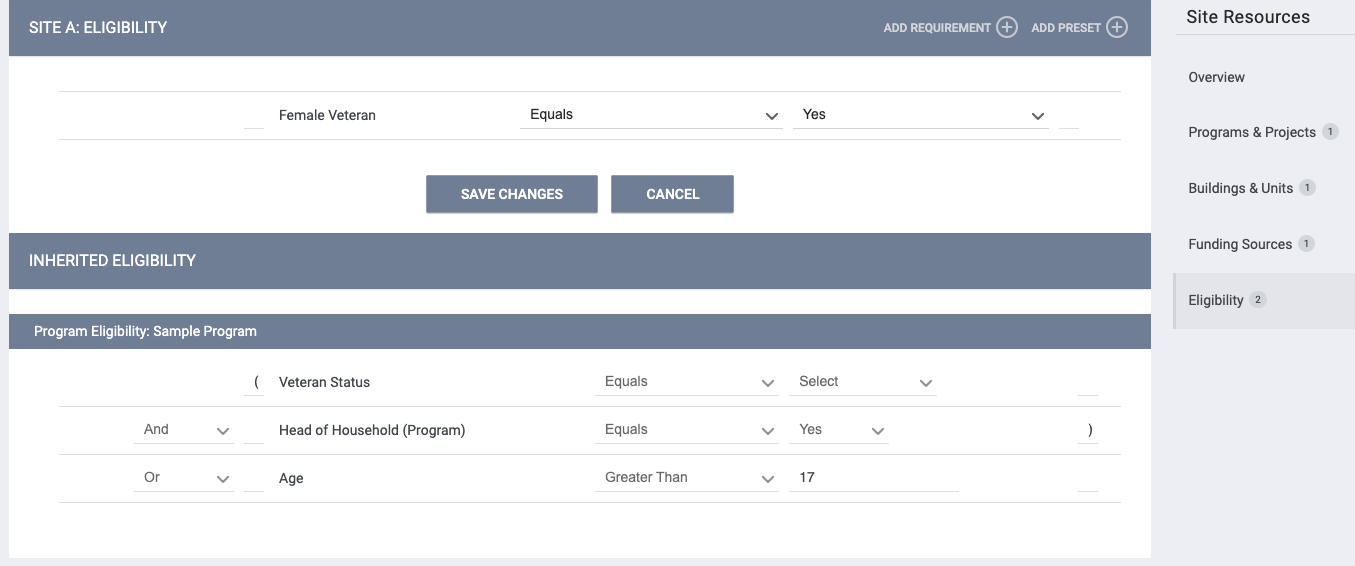
The INHERITED ELIGIBILITY section displays any eligibility criteria inherited from a program or funding source. You can hover the mouse over the information icon on an inherited funding source to display a tooltip showing the source(s) of inherited eligibility criteria. The listing will also include any eligibility inherited from assigned sub-grants.

Note: If you click SAVE CHANGES on the MODIFY HOUSING INVENTORY SITE or ELIGIBILITY pages without making any changes, the system will not display the green "Changes successfully saved" banner, update last_updated and ref_user_updated, or track the action in the Audit Log.
Active/Inactive Status Logic
When a site or building status is updated, the status inherits down and any associated unit, bed, or Unit Configuration Type (UCT) automatically updates.
Inactive Status Logic
When the user wants to change a Site or Building status to "Inactive," the system checks if any units or beds within the associated Site or Building are currently occupied or have future occupancy date or have current/future-dated referrals.
- If there are any current occupancies or current pending referrals with the units or beds within the site or building, the status field for the site and building to which the unit/bed relates is read-only.
- When the user hovers over the Status field, the system displays a tooltip that reads:
"There are one or more units or beds within this [site or building] that are currently occupied or have pending referrals. Please make any necessary adjustments to change the status of the [site or building]."
- When the user hovers over the Status field, the system displays a tooltip that reads:
- If there are no current occupancies or current pending referrals, and there are any future occupancies or future-dated referrals to units/beds set up within the site/building, then when the user changes the site or building status to "Inactive," the user sees a warning indicating that the future occupancy/referral will be deleted.
- The warning reads:
"There are one or more units or beds within this [site or building] that have future occupancies or referrals. Changing the status of this [site or building] to ‘Inactive’ will delete the future occupancies or referrals. Please confirm."
There is an "OK" button and a "Cancel" button available.- If the user clicks OK, the future occupancy(ies)/referral(s) are deleted and the site/building status is changed to "Inactive."
- If the user clicks Cancel, the future occupancy(ies)/referral(s) are not deleted and the site/building status is not changed to "Inactive."
- The warning reads:
- If there are no current occupancies, no future occupancies, no current pending referrals, and no future-dated referrals associated with the units or beds within the site or building, the "Inactive" status update applies to the site or building.
- If the "Inactive" status is applied to the site/building, the "Inactive" status applies to all entities set up under the site/building.
- The "Inactive" Start Date for the units, and beds is the date and time the "Inactive" status is applied to the site/building. The "Inactive" End Date in this case is empty until the user changes the site/building status back to active. Buildings and UCTs do not have a status Start or End Date, so the date doesn’t apply to UCTs or buildings.
- If there is a current inactive status for a unit/bed set up under the site/building and the user changes the site/building status to "Inactive," the system keeps the start date for the inactive unit/bed status as is and does not update unit/bed start date to the inactivity date for the site/building. The system clears the end date/time of current inactive status and fills it automatically when the site/building status is set back to active. The end date/time for the inactive status = date /time when the user sets the "Active" status for the site/building.
- If there is current offline status for a unit/bed set up under the site/building, and the user changes the site/building status to "Inactive," the system ends the offline status with the end date/time of the start of the inactive status. The system creates a new inactive status for this unit with a start date/time that matches the start date/time of the site/building’s inactive status.
- The "Inactive" status for the entities set up under the site/building cannot be modified or deleted while the site/building status remains "Inactive."
- The "Inactive" Start Date for the units, and beds is the date and time the "Inactive" status is applied to the site/building. The "Inactive" End Date in this case is empty until the user changes the site/building status back to active. Buildings and UCTs do not have a status Start or End Date, so the date doesn’t apply to UCTs or buildings.
- If there are any future inactive/offline statuses for units/beds within the building/site, when the user sets the site/building to "Inactive," they see a warning indicating that those future inactive/offline statuses will be deleted.
- The warning reads:
"There are one or more units or beds within this [site or building] that have future ‘Inactive’ and/or ‘Offline’ statuses. Changing the status of this [site or building] to ‘Inactive’ will delete the future ‘Inactive’ and 'Offline’ statuses. Please confirm."
There will be an "OK" button and a "Cancel" button available.- If the user clicks OK, the future "Inactive" and "Offline" statuses for the units/beds are deleted and the site/building status is changed to "Inactive."
- If the user clicks "Cancel, the future "Inactive" and "Offline" statuses are not deleted and the site/building status is not changed to "Inactive."
- The warning reads:
- If the "Inactive" status is applied to the site/building, the "Inactive" status applies to all entities set up under the site/building.
Active Status Logic
When the user changes the status of a site to "Active" from "Inactive," the "Active" status applies to the building, units, beds, and UCTs set up under the site.
- If the building, unit, bed, or UCT was inactive prior to the site being made inactive and then active again, the building, unit, bed, or UCT retains its inactive status.
- The "Active" Start Date for the units and beds is the date and time the "Inactive" status was changed to "Active." UCTs and Buildings do not have a status Start or End Date, so the date doesn’t apply to UCTs or Buildings.
When the user changes the status of a building to "Active" from "Inactive," the "Active" status applies to the units, beds, and UCTs set up under the building.
- The "Active" Start Date for the units and beds is the date and time the "Inactive" status was changed to "Active." UCTs do not have a status Start or End Date, so the date doesn’t apply to UCTs.
Existing Data Considerations
For existing data, any currently "Inactive" sites or buildings where there is a current occupancy, current pending referral, future occupancy, or future pending referral, are made "Active."
- If there is no current or future occupancy or pending referral to unit/bed or if there are any past occupancies, the site/building status remains "Inactive."
Audit Logs
When the user changes the status of a site/building to "Inactive," this is reflected in the audit log for the level where the changes were made and all lower levels.
The list of levels with an audit log is:
- Site
- Building
- Units
- Beds
- UCTs
Status Visibility
When the status of a site/building is changed, the status of the site/building/UCT/bed is visible on the following pages:
- Listing within the Housing Inventory Site page → Status column
- Modify Housing Inventory Site page → Status field
- Listing within the Buildings page → Status column
- Modify Building page → Status field
- Listing within the UCT page → Status column
- Modify Unit Configuration Type page → Status field
- Listing within the Units page → Availability column
- Modify Unit page → Status field
- Unit → Unit Status page → Status column
- Unit → Bed List → Availability column
- Unit → Bed List → Modify Bed → Bed Status section → Status column.
Deleting Sites
To delete a Site, click the trash can icon next to the Site name on the SITES page.

Note: You can only delete a Site if there are no Buildings connected to the Site, if there is no client data connected to the Site, and if no Units have been created for the Site.
Audit Logs
Users with the appropriate permission can click the Audit Log button to view changes made to the Site.

Updated: 02/13/2026