This article is for the current interface. For the new Clarity interface article, see How Do I Create a New Client Record? (New Clarity Interface).
Note: If the client is a domestic violence survivor, follow your community's procedures for entering their information into the system.
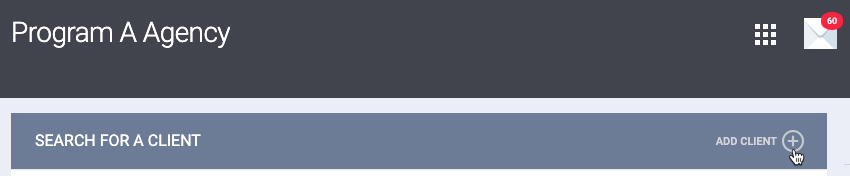
If you search for a client record and do not find it in the system, click ADD CLIENT on the SEARCH FOR A CLIENT page to create a new record.
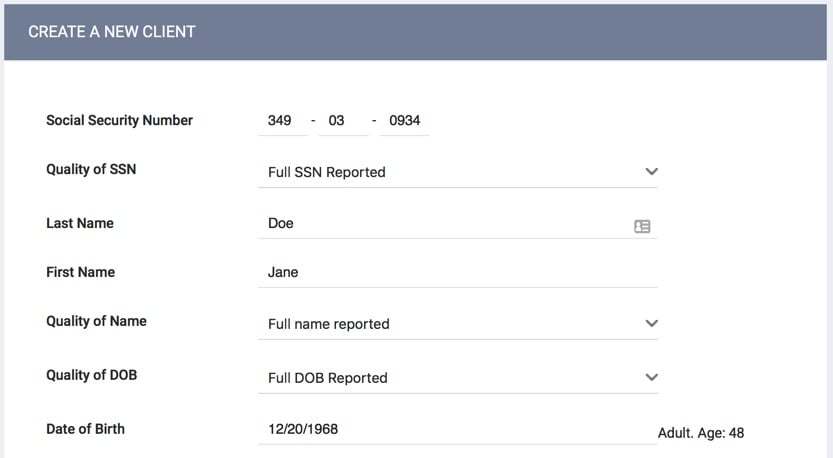
The CREATE A NEW CLIENT page is where you’ll record core data about the client. The fields displayed here are based on the Client Profile screen assigned to the agency (or based on the Client Profile screen assigned to the staff member, if a system administrator has used the Profile Override setting to assign a Client Profile screen other than the Agency Default to that staff member).
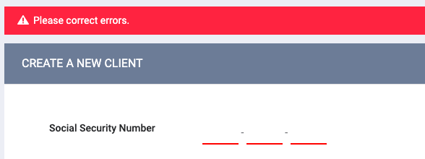
Certain fields are required before you can save the record. If a required field is left blank, the system displays a banner to indicate that the record cannot be saved.
Note: To assist with data entry, if you enter xxx-xx-xxxx for the Social Security Number field value, the Quality of SSN field will auto-populate with “Client doesn’t know". If you enter up to eight placeholder ‘x’ characters to represent unknown SSN numerals, the Quality of SSN field will auto-populate with “Approximate or partial SSN reported". You can update this value as needed. Similarly, since the HUD Data Standards only require users to enter a value for the Date of Birth field when specific Quality of DOB field selections are made, the Quality of DOB field is listed first; the selection you make for the Quality of DOB field will then determine whether the Date of Birth field remains on the screen:
- If you select “Full DOB Reported” or “Approximate or partial DOB reported,” the Date of Birth field remains on the screen for you to complete.
- If you select “Client doesn’t know,” “Client prefers not to answer,” or “Data not collected,” the Date of Birth field will disappear from the screen.
If the assigned Client Profile is customized locally, it may also contain fields that aren’t required.
One of the fields that may be included on this screen is the Alias field. If the client is known by other names, you may enter them in this field. Insert a comma between each name.
If the Pronouns field appears on the screen, you can make a selection from the drop-down menu.

If you do not see the client's pronouns listed, you may select "Manual Entry" and use the Pronouns Manual Entry field to enter custom pronouns for the client.

The client's pronouns will appear in parentheses after the client's name in all locations throughout the system where the client's name is displayed.![]()
- If you choose “Select,” “Client doesn’t know,” “Client prefers not to answer,” or “Data not collected,” no pronouns will be displayed.
- If you select "Manual Entry" but do not enter any text in the Pronouns Manual Entry field, no pronouns will be displayed.
Completing the Release of Information
Whether a Release of Information is required for record creation depends on the system and agency-level settings. If a Release of Information is required, the system will display Please fill in Release of Information form at the bottom of the screen.

For more information, see Release of Information (ROI) Overview.
After the ROI record has been completed and saved, the ADD RECORD button will appear.

After completing all necessary fields, click ADD RECORD to create the client record.
Unique Identifier
The system displays the client’s Unique Identifier (UID) on the right side of the screen. Hover over the information icon next to the UID to view a tooltip with the client’s Personal ID (used for identifying duplicate client records within Clarity Human Services).

Refer to our Personal ID article for more information on the Personal ID and how it is used to identify duplicate client records.
The URL for a client’s record contains the client’s UID. Users can edit the URL to navigate to another client’s record.

Alerts: Community Queue/Program Referral/Encampment Program Enrollment
After the client record is created, the following alerts may be displayed under the client's Unique Identifier if they have been enabled by a system administrator:
- Any referrals made to a program or a Community Queue for the client.
- Click VIEW DETAILS to view the referral.

Note: When Matching Process = “Match Maker Controlled,” the VIEW DETAILS link will be hidden for users who do not have the Referral Match Maker access permission.
- Active Encampment program enrollments.
- Click VIEW DETAILS to open the program enrollment page (if sharing settings and access role allow).

Check-in Button for Client Profile
A CHECK-IN button is available on the client profile that allows users to quickly check in a client without accessing their referral.

The CHECK-IN button will be visible on the client profile screen below the client’s unique identifier if:
- the System Administrator has enabled the CHECK-IN button in your community's referral settings
- the client has a referral to a community queue and/or at least one direct program referral (i.e. referrals that came from the Referrals tab or the Eligibility Determination page)
AND - there is at least one “VIEW DETAILS” link indicating a Referral
- User has access rights permissions “Edit Agency Referral” and/or “Edit Any Agency Referral.”
Note: The access rights “Edit Agency Referral”/”Edit Any Agency Referral” permissions affect the VIEW DETAILS link dependent on which agency the referral belongs to.
If the user hovers over the CHECK-IN button, a tooltip appears that states:
“Clicking the Check-In button will keep the client’s pending Community Queue and pending direct program referrals active.”

The following actions take place when the user clicks the CHECK-IN button:
- The clock resets for the referral and the client will remain active in all currently pending community queue referrals and all currently pending direct program referrals
- The “Last Activity” date on the modify referrals page updates to today for all currently pending referrals.
Adding a Photo
To add a photo to the client record, hover over the default Client Profile image and click UPDATE PROFILE PHOTO.

If you are taking a photo using a webcam, you may need to grant the site access to your camera in your browser.
If you’re uploading a file, the acceptable file formats are .gif, .jpg, .jpeg, .png, and .tiff, and the maximum file size is 25 MB.
Updated: 04/23/2026