Overview
The Client Forms feature allows system administrators to create standardized forms that can be made available to agencies and programs and completed in the client record (along with scanned documentation, if applicable). These forms can be customized to include electronic signature boxes and checkboxes and to pre-populate with the client’s name and the current date.
Managing Client Forms
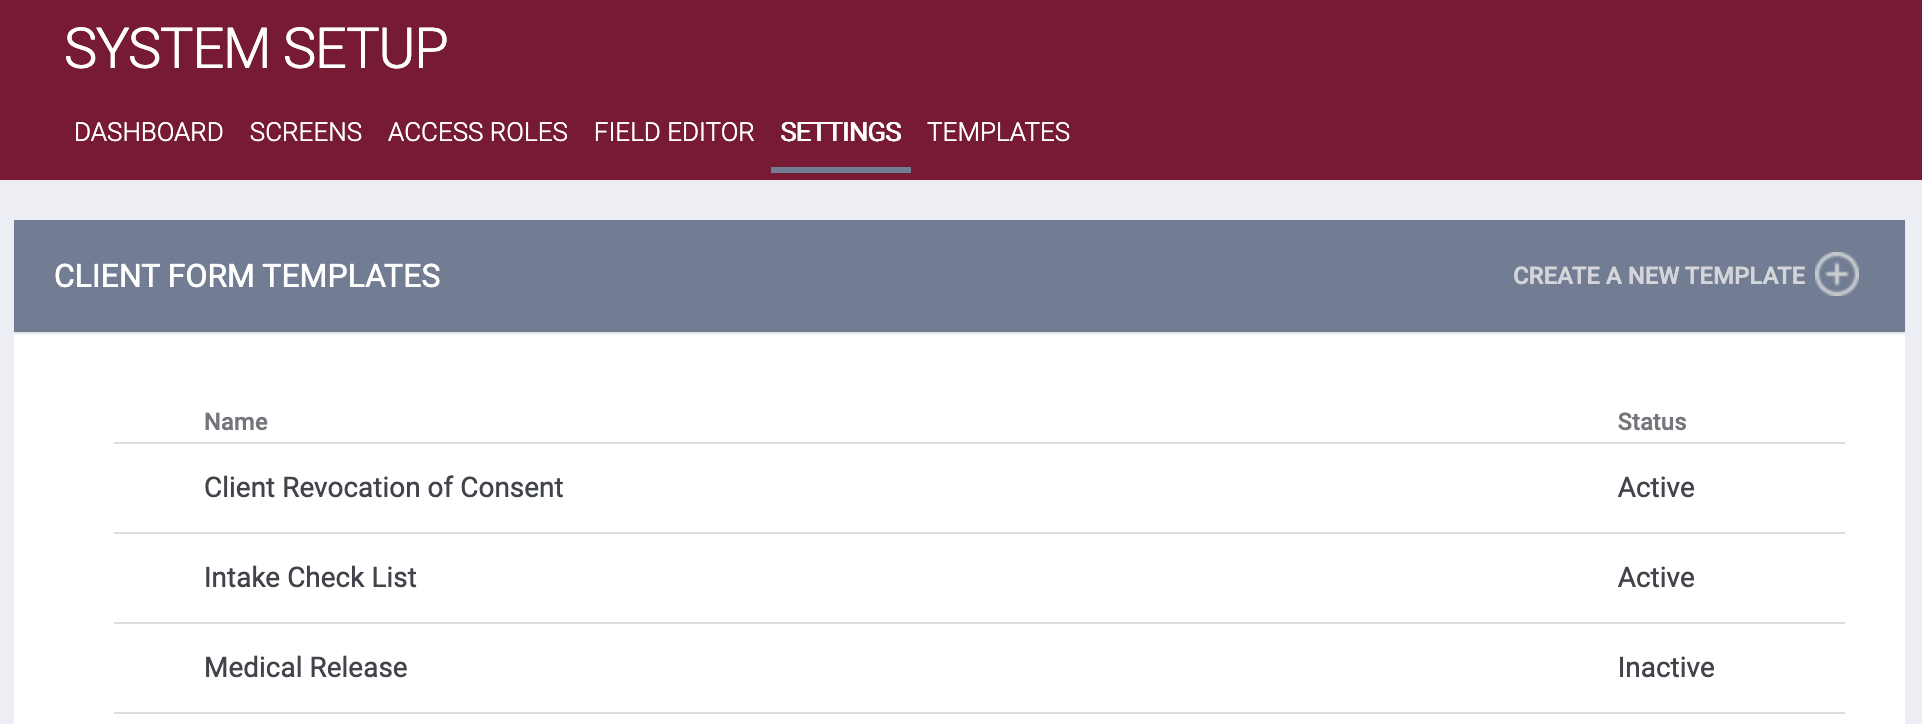
To create or edit a form, click the launchpad and navigate to SETUP > SETTINGS > Advanced Options > Client Forms. On the CLIENT FORM TEMPLATES page, you’ll see a list of all previously created forms.
The Status column indicates whether the form is “Active” or “Inactive.” An “Inactive” form is one that is no longer in use but is being retained for historical purposes.
To edit an existing form, click its Edit icon.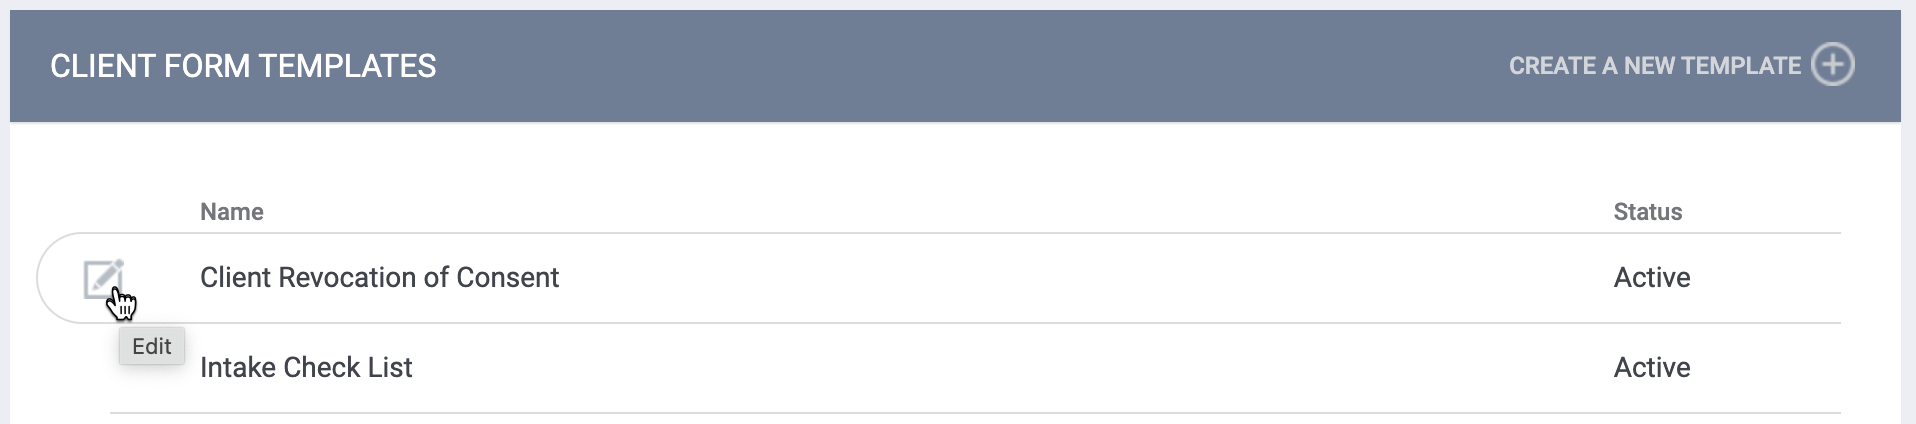
Creating a New Form
To create a new form, click CREATE A NEW TEMPLATE.

The ADD NEW CLIENT FORM TEMPLATE page appears.

- Enter a Name for the form.
- Select the Status of the form:
- The default setting is “‘Active.”
- Selecting “Inactive” allows the form to be retained for historical purposes even though it is no longer in use.
- In the Body field, you will use the form editor to create the content of the form.
- Type the desired text, using the text-editing tools as needed to create bold text, italicized text, numbered lists, or bulleted lists.

-
- Additional tools allow you to insert elements that will customize the form each time it is used.

-
-
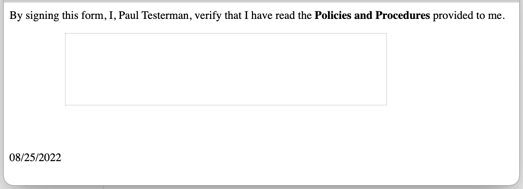
- Signature:
- Allows you to add a signature box that the client can sign.

- Appears as {$SIGNATURES.X} in the form editor (X = "0" for the first signature box, "1" for the second box, etc.).
Note: If a form contains more than one signature box, each one must be a unique element ({$SIGNATURES.0}, {$SIGNATURES.1}, {$SIGNATURES.2}, etc.) for the form to function properly. To achieve this, the system automatically assigns a unique number to the element each time a user clicks the Signature button to add a signature box.
If duplicate signature fields (such as {$SIGNATURES.0} and {$SIGNATURES.0}) are created by copying and pasting, or by manually editing the number to create a duplicate, the form will not function properly in the client record.
The system will not allow a form to be saved if it contains any duplicate signature boxes.
- Allows you to add a signature box that the client can sign.
- Signature:
-
-
-
- Checkbox:
- Adds a clickable checkbox.
- Appears as {$CHECKBOX} in the form editor.
- Client Full Name:
- Inserts the client name as it appears in the client record into the form.
- Appears as {$CLIENT_FULL_NAME} in the form editor.
- Current Date:
- Records the date the form was electronically signed.
- Appears as {$SIGNED_DATE} in the form editor.
- Checkbox:
-
-
-
- Textbox:
- Adds a textbox that a user can fill in when completing a form.
- Appears as {$TEXTBOX.0} for the first textbox added.
- Appears as {$TEXTBOX.1} for the next textbox added. The numbers continue counting up with each textbox added.
- Textbox:
-
-
-
- Short Text:
- Adds a textbox that a user can fill in when completing a form; this textbox has a 50 character limit.
- Appears as {$SHORTTEXT.0} for the first short textbox added.
- Appears as {$SHORTTEXT.1} for the next short textbox added. The numbers continue counting up with each short textbox added.
- Any Date:
- Adds a date field that the user can fill in when completing the form. The date entered must be valid and in the format MM/DD/YYYY.
- Appears as {$DATE.0} for the first date field added.
- Appears as {$DATE.1} for the next date field added. The numbers continue counting up with each date field added.
- Client Date of Birth:
- Inserts the client's date of birth as it appears in the client record into the form.
- Appears as {$CLIENT_DOB} in the form editor.
- Client Last Four of SSN:
- Inserts the client's last 4 digits of their SSN as it appears in the client record into the form.
- Appears as {$CLIENT_SSN} in the form editor.
- Short Text:
-

Click SAVE CHANGES when you are done.
Next, click PREVIEW.

A pop-up will show you how the form will appear in the client record. Notice that the system inserts a placeholder name in the Client Full Name field.
Make any additional edits, click SAVE CHANGES, and click PREVIEW to review the updated form.
Note: Modifying or deleting a previously created form will not impact previously recorded forms saved to client records.
Making Forms Available to Agencies and Programs
Once a form is created, it must be made available to agencies and/or programs before it can be completed in the client record. Refer to our Enabling Forms for Agencies and Programs article for details.
Audit Log
Users with the Admin Access Role Type with Audit Log permissions can review changes made to a client form template in the audit log.
The Audit Log on the Edit Client Form Template page includes changes to the following fields:
- id
- name
- status
A Content column in the Audit Log contains a View option. When you hover over View, a popup will show a preview of the form.

Updated: 04/21/2025