This article is for the current interface. For the new Clarity interface article, see Release of Information (ROI) Overview (New Clarity Interface).
Overview
ROIs can be recorded in a variety of formats, including scanned documents and electronically signed forms. System Administrators may make an ROI a requirement for creating a new client record, or users may be allowed to add one later.
Adding an ROI to a New Client Record
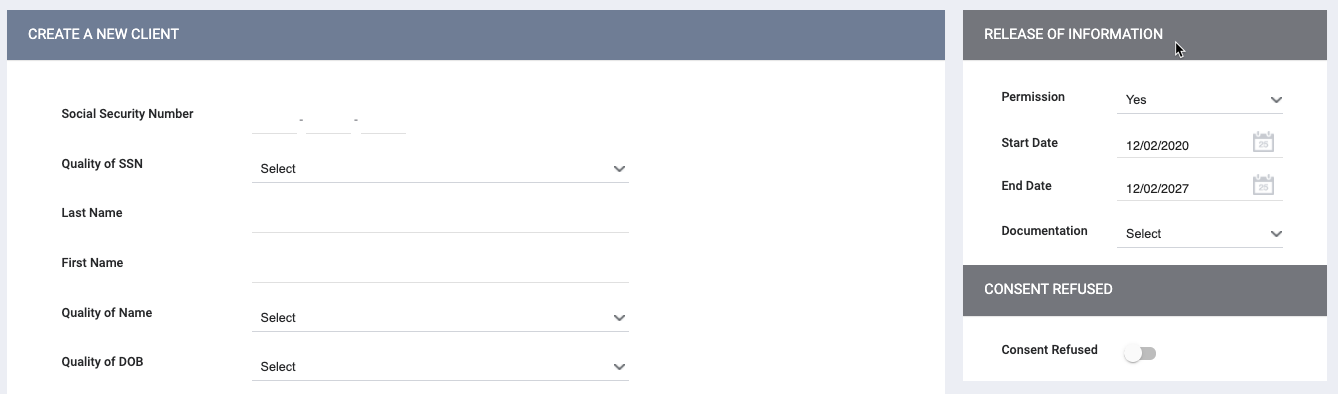
If a System Administrator has enabled the Require on Creation setting, you will see the RELEASE OF INFORMATION box at the top right of the page when you create a new client record. You will not be allowed to save the new client record until you complete the RELEASE OF INFORMATION box.
If a System Administrator has turned on the Enable Consent Refused setting, you will see the Consent Refused option under the Release of Information box.
Complete the following fields:
Permission
- "Yes": The client provided consent.
- "No": The client did not provide consent.
Start and End Dates
The Start Date is the beginning effective date of the ROI. The Start Date value defaults to today’s date, but it can be changed if applicable.
The End Date is the date when the ROI will expire.
- If Permission = "Yes," the End Date is auto-filled based on the agency's Default Term.
- If Permission = "No," the End Date is optional.
The logic for permitting overlapping ROI records (multiple records of the same Permission value with overlapping dates) is based on the instance setup ROI settings:
- If the Default Model is “None”:
- Overlapped ROI records are allowed, even within the same agency.
- If the Default Model is “CoC” or “Agency”:
- Overlapped ROI records are allowed, but not within the same agency. The user would have to switch to another agency to add an ROI that overlaps an existing ROI.
- If the Default Model is “System”:
- Overlapped ROI records are not allowed, even between different agencies.
To prevent having both a No and a Yes recorded for the same client, users cannot save a Yes if there is already a No that has not been ended prior to the Start Date of the Yes.
For example, this is how the system will behave if saving a Yes with a Start Date of October 11, 2021:
- If there is already a No without an End Date for that client, you will not be able to enter the Yes.
- If there is already a No with an End Date after October 11, 2021, for that client, you will not be able to enter the Yes.
- If there is already a No with an End Date before October 11, 2021, for that client, you will be able to enter the Yes.
If you had previously saved a No value for a client before the September 7, 2021 update in which we added Start and End dates for No values, and now you are entering a Yes for that client, the system will assign the following dates to the No value:
- The Start Date will be the date on which the No value was entered in the system
- The End Date will be one day prior to the Start Date that you enter for the Yes
So if you had saved a No for a client on June 7, 2019, and then you save a Yes with a Start Date of September 25, 2021:
- The Start Date for the No will be June 7, 2019
- The End Date for the No will be September 24, 2021
Documentation
The Documentation field indicates the method for collecting the ROI. The following options may be available, based on system configuration:
- "Electronic Signature": If you select this option, an E-SIGN DOCUMENT button appears. Click on the button for the client to sign the form electronically. The client can sign the form with their finger or a stylus. The system will not allow the user to save the form until a signature is applied to the electronic signature field.
- "Attached PDF": If you select this option, a Select File button displays, allowing you to upload a file.
- "Signed Paper Document": If you select this option, a Location text box appears for you to describe where the document is stored.
- "Verbal Consent": Select if the client verbally gave consent.
- "Outside Agency Verified": If you select this option, a Location text box appears for you to describe where the document is stored.
- "Household/Group Member": Select if the client is a minor and an adult household/group member signed the ROI.
- "None": Select if there is no ROI documentation.
Click ADD RECORD once all fields are complete.
To verify the ROI information is correct, click on the Client Privacy shield icon next to the client calendar and print icons to open the PRIVACY page, where you can review the ROI record details.
Hide from Customer Portal
When the Customer Portal is enabled, users with the Customer Portal Individual Record Management permission can turn on this setting to prevent this ROI from appearing in the portal.
Managing ROI within Existing Client Records
To access ROI information within an existing client record, click the Client Privacy shield icon, which navigates you to the PRIVACY page.
Note: Only users with the Privacy access right can see the Client Privacy shield icon.
The Privacy section displays private data and Consent Refused options. Below that section is the RELEASE OF INFORMATION section, where any previously recorded ROI records are listed.
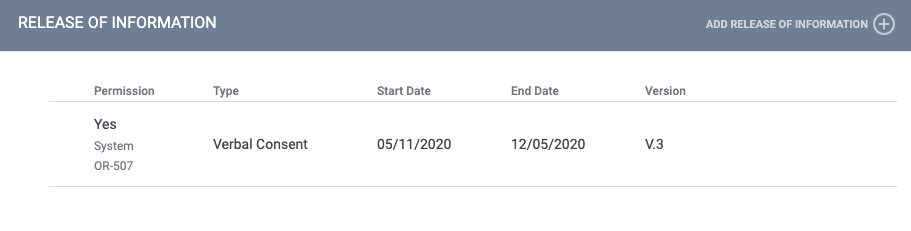
To edit an existing ROI record, click the Edit icon beside the record. To add a new record, click ADD RELEASE OF INFORMATION.
Note: The Version column, which updates each time an ROI is edited, only displays for System Administrators.
Compliance Warning
If a System Administrator enables the Compliance Warning setting, a yellow warning ribbon may appear across the screen of any client record with a missing, expired, or soon-to-expire ROI form. The Compliance Warning time period is determined by System Administrators and can range from 5 days to 3 months before the expiration of the ROI record.
Click the MANAGE button within the yellow ribbon or click the Client Privacy shield icon to access the PRIVACY page to update the ROI.
Note: Only users with the Privacy access permission will be able to see the MANAGE button and the Client Privacy shield icon.
Once a new ROI meeting the agency's compliance standards is recorded, the yellow ribbon disappears.
Note: Creating an ROI with any of the documentation types in the Documentation field -- even "None," if it is listed as one of the options -- will clear the Compliance Warning.
Updated: 04/23/2026