Contents
Viewing Encampments
To view encampments within Outreach, click the filter icon in the upper left corner of the map.
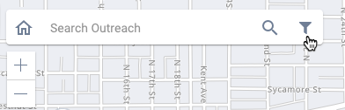
The Outreach DATA FILTER appears.
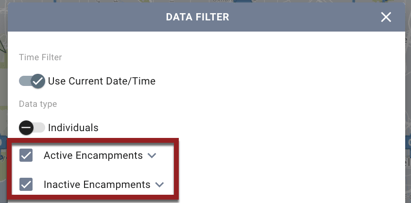
- Turn on Active Encampments to display active Encampments on the map.
- Turn on Inactive Encampments to display inactive Encampments on the map.
Active Encampments will have a sign icon that indicates the number of client locations, or "Persons," within that Encampment. For details on how client locations are included in an Encampment, see Persons in Encampments.
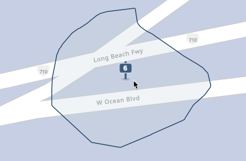
To view or edit an existing Encampment, click any area within the Encampment boundary. All other Encampments will be hidden, and a panel with details about the selected Encampment will appear on the right side of the screen.
Note: To create a new encampment or edit an existing encampment, the user must set the map's Time Filter in the DATA FILTER to "Use Current Date/Time."
Creating Encampments
To create a new encampment, click the Add Encampment icon in the lower right-hand corner of the screen.
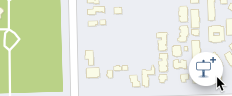
The Add Encampment screen appears. After you complete the Encampment Screen, you will draw a boundary for the Encampment.
Completing the Add Encampment Screen
The Add Encampment screen contains an Encampment Category field plus the fields included in the CoC's designated Encampment Screen. The ADD NEW BOUNDARY button will be grayed out until the required fields are completed. The SAVE button will be grayed out until the boundary is drawn.
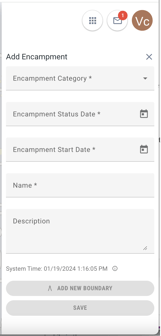
- Select an Encampment Category for the Encampment from the list of categories that have been assigned to the CoC in Outreach Settings.
- Select an Encampment Status Date and Encampment Start Date.
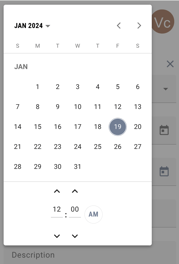
- The Encampment Start Date includes the time, which defaults to 12:00 am but is editable. To exit the date/time field, click outside the Add Encampment screen.
-
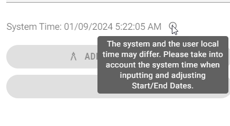
- The System Time is displayed near the bottom of the screen, along with a tooltip reminder that the system time and your local time might be different.
- If you create a future-dated Encampment, the Encampment will appear on the Outreach map when the future time is reached.
- Backdated encampments are reportable for the corresponding time period. For encampments created before Bitfocus added the Encampment Start Date field, the encampment creation date populates this field. Users can update this date if necessary.
- The System Time is displayed near the bottom of the screen, along with a tooltip reminder that the system time and your local time might be different.
- Enter a Name for the Encampment.
- Enter a Description for the Encampment if desired.
- Complete any custom fields that have been added to the screen.
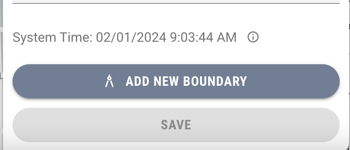
Once the required fields have been completed, the ADD NEW BOUNDARY button will become active.
Drawing the Encampment Boundary
Click ADD NEW BOUNDARY.
A drawing tool panel appears in the lower right corner of the screen. Draw the boundary as described in our Drawing and Editing Encampment Boundaries article.
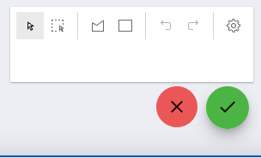
After you click the green check mark to indicate that you have finished drawing the boundary:
- If the system does not find any issues with the boundary you drew, the Add Encampment screen reappears. Click the SAVE button at the bottom of the screen. The encampment you created will now be visible on the map.
- If the system does find an issue with the boundary, a warning message will be displayed.
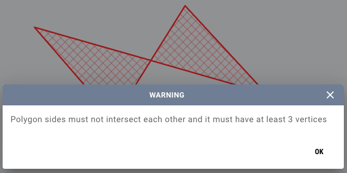
- If you draw a boundary that has intersecting lines or doesn't have at least three vertices, you will see the following message:
- Up to 10 active Encampment boundaries can overlap at the same timestamp if the Encampments are assigned different Encampment Categories. The system will check these conditions and display warning messages in the following situations:
In this situation:
The system displays this message, along with a list of the overlapping encampment(s)
A user tries to draw a new Encampment boundary that would:
● overlap an active Encampment boundary of the same category and timestamp
OR
● overlap multiple Encampments of the same category.
“There are existing encampment(s) of this category listed below that intersect the boundaries of this encampment. In order to add this encampment, please manually adjust the appropriate encampment boundaries.”
The system will highlight the intersecting boundaries in red.
A user tries to draw a new Encampment boundary when there are already 10 overlapping Encampments in the area.
“There are currently 10 active overlapping Encampments in this area, and this Encampment addition cannot be completed as it exceeds the limit.”
A user tries to draw an Encampment boundary when there are already 10 overlapping Encampments in the area, at least one of which has a start date in the future.
“There are current and future dated encampment(s) in this area which will exceed the 10 Encampment overlapping limit on the future dated start date. Please make adjustments as necessary by that date to ensure the limit is not exceeded.”
A user attempts to draw a backdated Encampment boundary that intersects future encampments of the same category.
“There are existing encampment(s) of this category that began at a later date listed below that intersect the boundaries of this encampment. In order to add this encampment, please manually adjust the appropriate encampment boundaries.”
- If you draw a boundary that has intersecting lines or doesn't have at least three vertices, you will see the following message:
PERSONS Tab
When you click on a saved encampment on the Outreach map, a panel appears on the right side of the screen with the PERSONS tab selected. The image below includes a "No records found" message because no persons have yet been added to this Encampment. When persons are added, the "No records found" message will be replaced with their names and icons.

The PERSONS tab displays the Encampment's name, Unique Identifier (UID), and a group of icons for use in editing and managing the encampment:
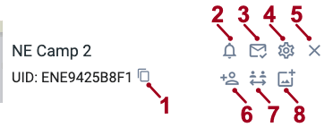
- Click the Copy icon to copy the UID to your clipboard.
- Click the Alerts & Notes icon to add or view encampment Alerts and Notes.
- Click the Subscribe icon to subscribe to an Encampment (or to unsubscribe if you have previously subscribed).
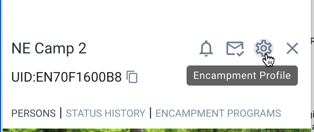
- Click the Gear icon to open the Encampment Profile. Refer to the Encampment Profile section of this article for details.
- Click the Close icon to exit this sidebar screen. (You will not be able to see other Encampments or individuals on the map until you exit.)
- Click the Add Persons icon to add person(s) to the encampment. Refer to the Persons in Encampments article for details.
- Click the Move Persons icon to move a client from one encampment to another.
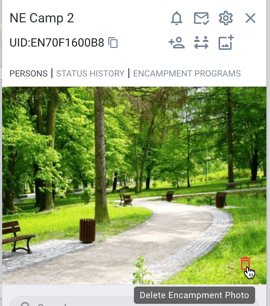
- Click the Photo icon to add a photo of the encampment to the Encampment Profile.
- You’ll be prompted to upload a file from your computer. After you upload the photo, adjust the cropping as appropriate, then click APPLY.
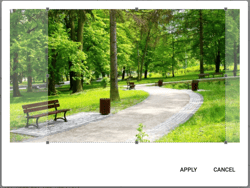
- To delete the photo, click the trash can icon in the lower right corner of the photo.
- If you add a photo from a mobile device, you can use the device's camera.
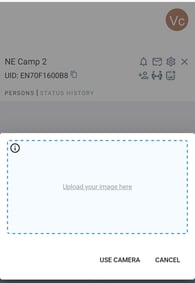
- You’ll be prompted to upload a file from your computer. After you upload the photo, adjust the cropping as appropriate, then click APPLY.
STATUS HISTORY Tab
Clicking the STATUS HISTORY tab next to the PERSONS tab will display a list of Status Updates.

A Status Update is an edit to any of the following fields:
- Encampment Status Date
- Encampment Start Date
- Name
- Description
- Any Core or Custom fields included on the CoC's Encampment screen
Click the Edit icon next to a Status Update to edit it.
Click the trash can icon next to a Status Update to delete it.
Notes:
- Editing a previous Status Update will not impact the most recent data that appears in the Encampment Screen.
- When you view an encampment using the Time Filter, the data you see will be based on the most recent Status Update as of the designated time. The number of persons in a Status Update is based on the Status Update record date.
ENCAMPMENT PROGRAMS Tab
The ENCAMPMENT PROGRAMS tab allows System Admin and Agency Manager users with appropriate access role permissions to view and create Encampment programs.
Note: The Encampment Programs toggle in the Outreach Setting of the agency the user is switched into must be enabled in order to use the Encampment program functionality within Outreach.
The ability of users to view the ENCAMPMENT PROGRAMS tab is as follows:
|
These users: |
Can see the ENCAMPMENT PROGRAMS tab for these Encampments: |
|
All Encampments in all Outreach Settings. |
|
All Encampments associated with the Outreach Setting of the agency they’re switched into. |
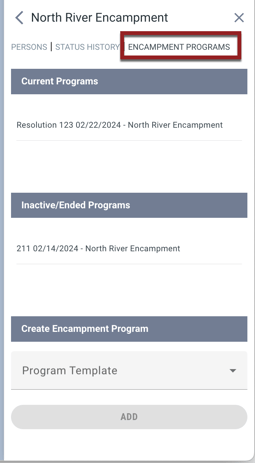
The ENCAMPMENT PROGRAMS tab contains three sections:
- A Current Programs section that lists active Encampment programs.
- For Agency Managers, this list will show all Encampment programs associated with the Outreach Setting for the agency the user is currently switched into.
- For System Administrator users and Admin users with full data access, this list will show all Encampment programs from all Outreach Settings.
- An Inactive/Ended Programs section that lists programs that are inactive or past the Operating End Date.
- A Create Encampment Program section. Refer to our Configuring Encampment Programs article for details.
Users can click on a program in the Current Programs or Inactive/Ended Programs sections to open the MODIFY PROGRAM page for that program, as long as they have the Manage Agency - Programs permission and have access to the Encampment System agency to which the program belongs.
For details on enrolling clients into Encampment programs, refer to our Enrolling Clients in Encampment Programs article.
Encampment Profile
Clicking the Gear icon on the PERSONS tab displays the Encampment Profile.
The Encampment Profile displays the fields that were completed on the Add Encampment screen and provides additional functions such as editing the encampment boundary, viewing Encampment Teams, and deleting or inactivating Encampments.
Admin users with Full System Sharing Access will also be able to see which agency created the encampment.

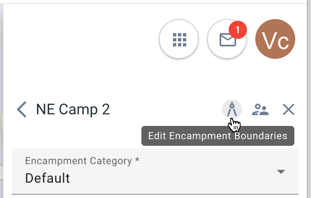
Editing Encampment Boundaries
To edit the boundaries of an encampment, click the Edit Encampment Boundaries icon.
Edit the boundary as described in our Drawing and Editing Encampment Boundaries article.
After you click the green check mark in the drawing tool panel to indicate that you are finished drawing the new boundary, the system will display a pop-up asking As of which date and time should this boundary be reflected? with a Use Current Date/Time toggle enabled.
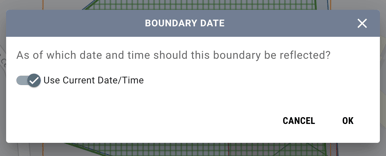
- To use the current date/time, click OK.
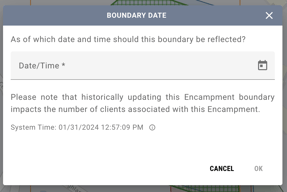
- Users with the Backdate Encampment Boundaries access permission can turn off the toggle and enter a date/time in the past as appropriate.
-
- The End Date of a backdated encampment boundary will be one of the following:
- The date when a new date/time is defined for As of which date and time should this boundary be reflected?
OR - An Encampment End Date that is entered by a user who is setting the encampment to Inactive.
- The date when a new date/time is defined for As of which date and time should this boundary be reflected?
- The End Date of a backdated encampment boundary will be one of the following:
-
- If a backdated boundary change causes a change in clients/counts in the Encampment, the system displays the following pop-up warning: “Please note that historically updating this Encampment boundary impacts the number of clients associated with this Encampment.”
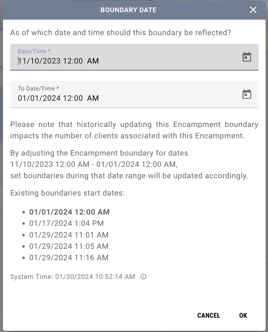
- When one boundary is backdated, and there is another boundary with a date that is after the backdated boundary’s date, a To Date/Time field appears that defaults to the date/time just before the next boundary change. The To Date/Time field can be edited, but not to a date that would create a gap in the boundary history.
- If a backdated boundary will overwrite existing boundaries, the system displays the following pop-up: “By adjusting the Encampment boundaries from date [As Of Date - To Date], set boundaries during that date range will be updated accordingly.”
- If a backdated boundary change causes a change in clients/counts in the Encampment, the system displays the following pop-up warning: “Please note that historically updating this Encampment boundary impacts the number of clients associated with this Encampment.”
After you edit the boundary, the system will display a pop-up explaining that person(s) within the previous boundary may no longer appear within the new boundary.
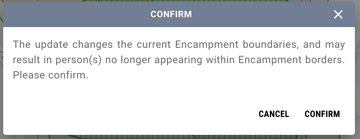
Click CONFIRM to return to the Encampment Profile screen.
Click SAVE to save the new boundary.
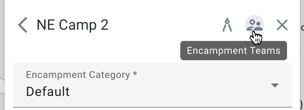
Viewing Encampment Teams
Click the Encampment Teams icon in the Encampment Profile to view options associated with Encampment Teams.
Editing Encampment Profile Fields
All of the fields in the Encampment Profile can be edited. Edits will be tracked in the Audit Log.
Each edit to the Encampment Status Date, Encampment Start Date, Name, and Description fields (plus any other fields that are designated in the CoC's Encampment screen) is known as a "Status Update" that can be viewed, edited, or deleted in the STATUS HISTORY tab.
Note: To edit the existing encampment profile fields, the user must set the map's Time Filter in the DATA FILTER to "Use Current Date/Time."
Inactivating an Encampment
To make an encampment inactive, switch the Status toggle on the Encampment Profile from "Active" to "Inactive." The Encampment End Date field will appear. Enter the date and time, then click SAVE.

Deleting an Encampment
To delete an encampment, scroll to the bottom of the Encampment Profile and click the trash can icon. The locations within the encampment will not be deleted.

Note: If the Encampment has any program enrollments or assigned programs, the system will hide the Encampment’s trash can icon, and you will not be able to delete the Encampment.
Viewing the Audit Log
An Audit Log is available in the Encampment Profile for viewing details about the creation and editing of the encampment.

The Audit Log tracks changes to the following:
- Adding or removing Persons in the Encampment

- Making a Status Update

- Editing Encampment Category, Status, or End Date in the Encampment Profile

- Changing the Encampment boundary

Use the toggles to filter the Audit Log according to the type of change.
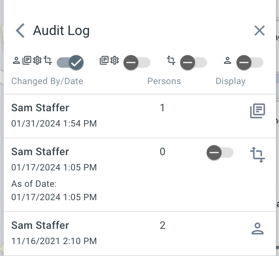
Click a record's icon to view more details about the change that was made.

To exit the Encampment Profile and return to the PERSONS screen, click the Back icon.

Updated: 12/04/2024