Managing Attendance Services in the Attendance Module
This article explains how to use the Attendance Module to record, view, and manage attendance-based services.
Overview
The Attendance Module provides a way to record, view, and manage attendance-based (daily attendance or multiple attendance) services for several clients at once for one or more dates.
Getting Started
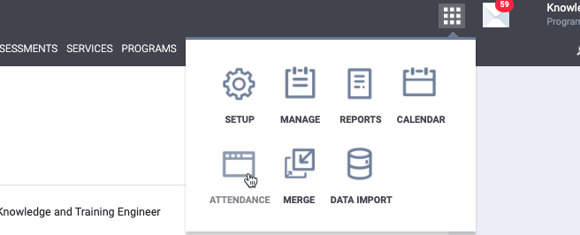
To access the Attendance Module, click the launchpad and click ATTENDANCE.

Any active attendance-based services for your agency (or the agency you’re switched into) will display in the module.
To find a service to provide to a client, users should enter a service name and/or make selections from the service category or program picklist, then click SEARCH.
- “All Results” (the default option) displays all available services, regardless of whether the service is connected to a program.
- Select “Any Program” to search for services assigned to any program.
- Use the “No Programs” option to search for services that are not assigned to any programs -- in other words, services that have the following Program Usage setting:
- Program Usage equals “Services Only.”
- Program Usage does not equal “Services Only,” but no programs are selected.
Users can turn on the Reservation toggle to limit the search results to services for which the Reservation Option setting is enabled.
Note: The Reservation Option setting is only for residential Service Items with a Delivery Type of “Daily Attendance.”
Click a service’s Edit icon to record or view existing service placements.

The Service Attendance page opens.

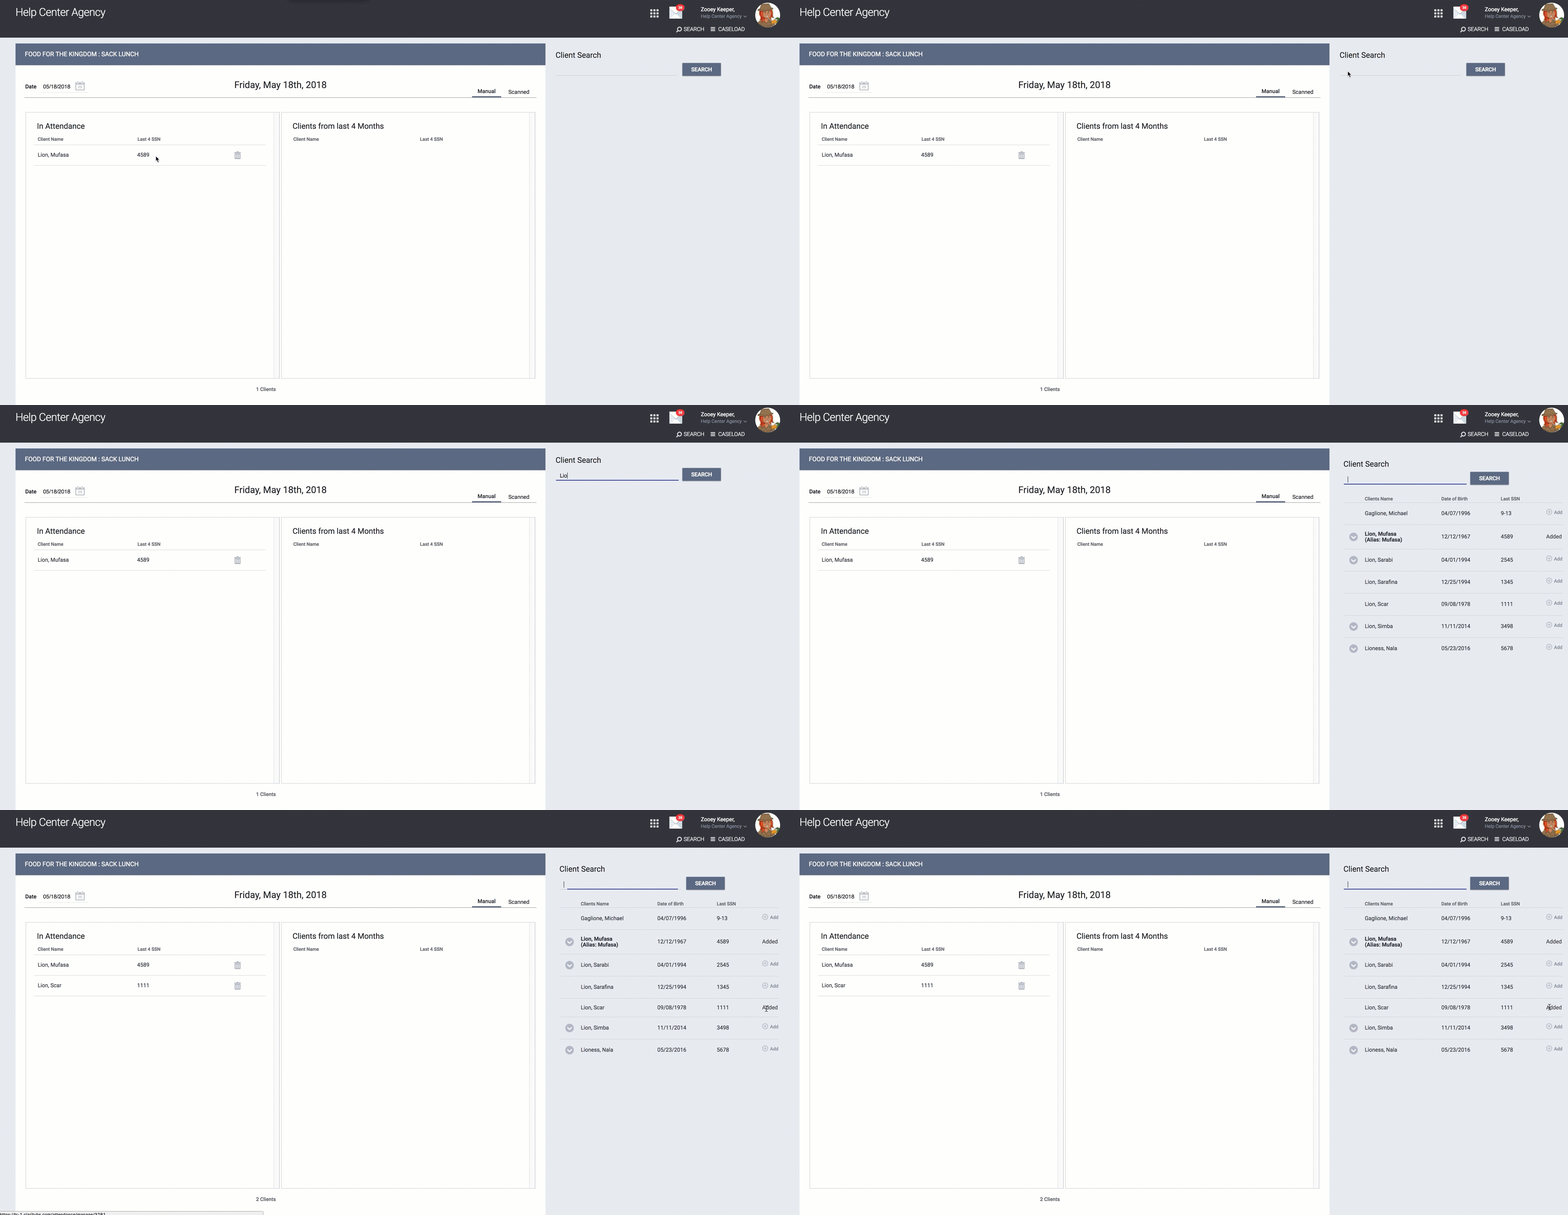
The Service Attendance page includes the following:
- In Attendance indicates where clients are being provided the service on the specified date display.
- If Attendance History Assist is enabled for the service item, this section will list the clients who have received the service within the designated timeframe.
- If Reserved Clients is enabled for the service item, this section will display reservations for the service item.
- The Client Search section is where you search for the clients to receive the service.
The screen will adjust to list the attendance information for the chosen date.
Recording Client Attendance Services
Users with the appropriate access rights have three ways to record client attendance services.
Add Clients from Attendance History Assist or Reservation List
Click Add next to the client’s name. The system will automatically save the service in the client record.

Users with the appropriate access rights can remove the client from the daily attendance list by selecting the trash can icon next to the client’s name. The client will then return to the reservation or Attendance History Assist list.
Client Search Box
Use the client search box to add a client who has not received the service during the last four months, add a client who does not have a reservation, or check in multiple household members.

Enter the client name (or part of the client name). As with the first method, click ADD to add the client to the In Attendance list.
Note: If the service transaction requires a program enrollment, the Attendance Module will not allow you to provide the service to clients who are not enrolled in the program.
To add members of a household, click the ![]() icon to the left of the client name. A list of their associated household members will drop down. Click ADD to check in these household members.
icon to the left of the client name. A list of their associated household members will drop down. Click ADD to check in these household members.

Unique Identifier Scan Upload
The Attendance Module allows you to scan the barcodes on Client ID cards to search for the client record automatically and apply the service to client records. Refer to [CLNT-103] Photo ID Card - Sample for details on generating client photo ID cards.
To scan client ID cards to record the service, click Scanned.

Note: The Client ID barcode format in Clarity Human Services is Code128 B. Ensure that your scanners are compatible with this format.
Adding Expenses for Attendance Services
For Attendance services that have been set up with a Charge per Attendance default amount, each attendance service added for a client will automatically add the default expense amount.
End users with the appropriate permissions can review the expense amounts in the client record by navigating to client PROFILE --> HISTORY tab. The user can edit the service and scroll down to see the expense amounts for each added attendance date in the ATTENDANCE section.
 For Attendance services that have been set up with an Adjustable option for expenses, an end user with the appropriate permissions can edit the attendance service in the client record and add an expense. Navigate to the client PROFILE --> HISTORY tab, locate the attendance service, edit and scroll down to the EXPENSES section and ADD EXPENSE.

More information about adding expenses can be found here.
Viewing Public Alerts in the Attendance Module
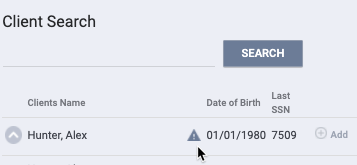
If a client record has an active (not expired) Public Alert that is not private, and if Enable Public Alert Banner is enabled for the service item, you will see an alert icon when viewing the client anywhere in the module (the Client Search section, In Attendance, Reserved Clients, and Clients from Last 4 Months).

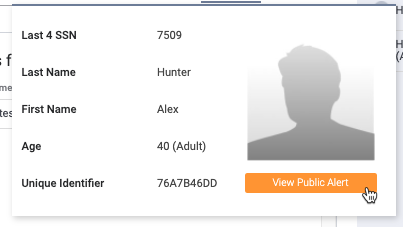
Hovering over the client name will display a pop-up with an option to view the public alert.

Clicking View Public Alert will open a new browser tab for the client’s NOTES tab, where you can view the Public Alert(s).
Viewing Program Restrictions in the Attendance Module
If a client record has an active (not expired) Program Restriction that is not marked private, you will see an alert icon when viewing the client anywhere in the module (the Client Search section, In Attendance, Reserved Clients, and Clients from Last 4 Months).

Hovering over the client name will display a pop-up with an option to view the program restriction.

Clicking VIEW PROGRAM RESTRICTION will open a new browser tab for the client's NOTES tab, where you can view the Program Restriction(s).
Connecting Attendance Services to a New Enrollment
If a client is exited from a program with attendance services that extended past the exit date, and then a new enrollment is created in that same program that started before those services ended, the system ends and removes any services from the original enrollment that conflict with the service dates of the new enrollment.
For example, consider Enrollment 1 for a program with attendance services from June 1 to June 10.
Enrollment 1 is exited on June 4.
On June 8, Enrollment 2 is created for the same program.
If the first service for Enrollment 2 is provided via the Attendance Module on June 9, the services for Enrollment 1 will end on June 8.
When the services end, the assigned staff person for the original enrollment and the person who created the services that were ended will receive the following notification: “The services for this enrollment have been ended for [date] because new services have been created for a new enrollment.”
INVENTORY and Attendance
When a user navigates to Attendance > Edit for a service connected to a site/building/unit, the tables show:
- Unit/Bed instead of Slot.
- The column shows [Unit_name: Bed_name] instead of the slot number.

For more information, please refer to the INVENTORY, Attendance, and Reservation Usage article.
Updated: 02/13/2026