Introduction to Creating and Maintaining Agencies
This article describes the settings involved in creating an agency in Clarity Human Services.
Overview
In Clarity Human Services, an agency represents an entity that operates one or more Programs. This aligns with the HMIS Data Standards definition of an "organization" (an entity "operating one or more projects that enter data into HMIS, as well as any residential continuum projects not participating in HMIS"). Programs, staff members, and all client data exist within the framework of Agencies.
In contrast to system setup, where configurations impact the entire system (all agencies and staff), agency management settings are specific to a single agency.
This article contains the following sections:
- Accessing Agency Management
- Searching for an Agency
- Creating a New Agency
- Editing an Agency
- Agency Notification Contacts
- Restoring Deleted Agencies
- Audit Log
Accessing Agency Management
To access the agency management section, click the Launchpad icon, then click MANAGE > AGENCIES.

From here, you can create a new agency, modify an existing agency, or switch to another agency.
Note: Only system administrators can search all system agencies and create new agencies.
Searching for an Agency
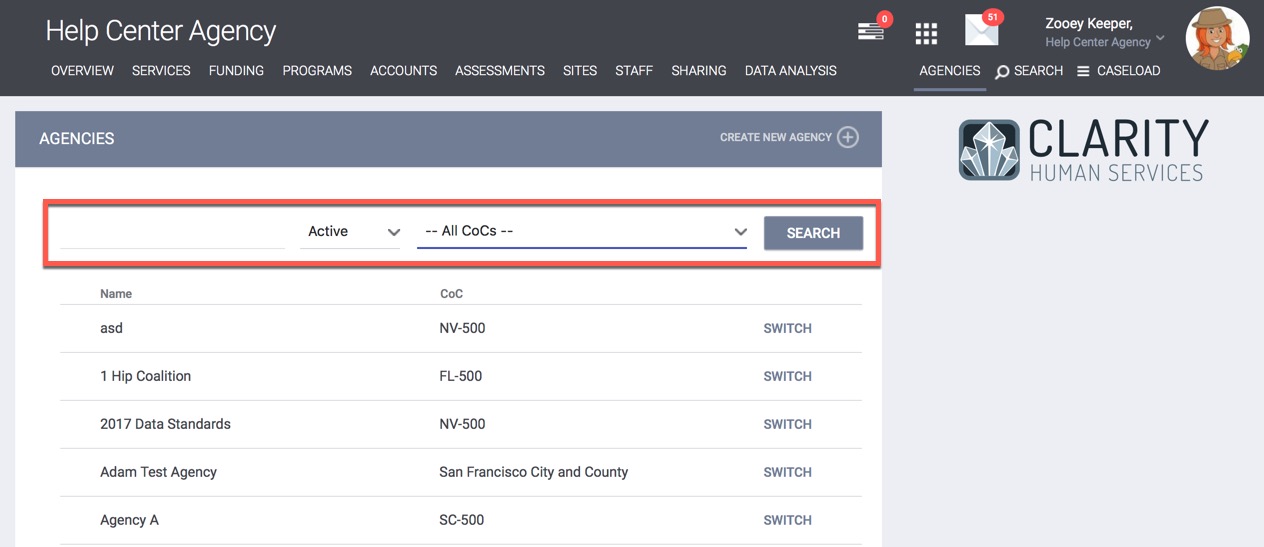
You can search for an agency by entering the program's name or alias in the search field at the top of the screen. You can refine your search by selecting an agency status and a CoC from the drop-down menus.

Note: Clicking the edit icon will only allow you to edit the agency's Overview. To modify any other components of the agency, you must click SWITCH.

Creating a New Agency
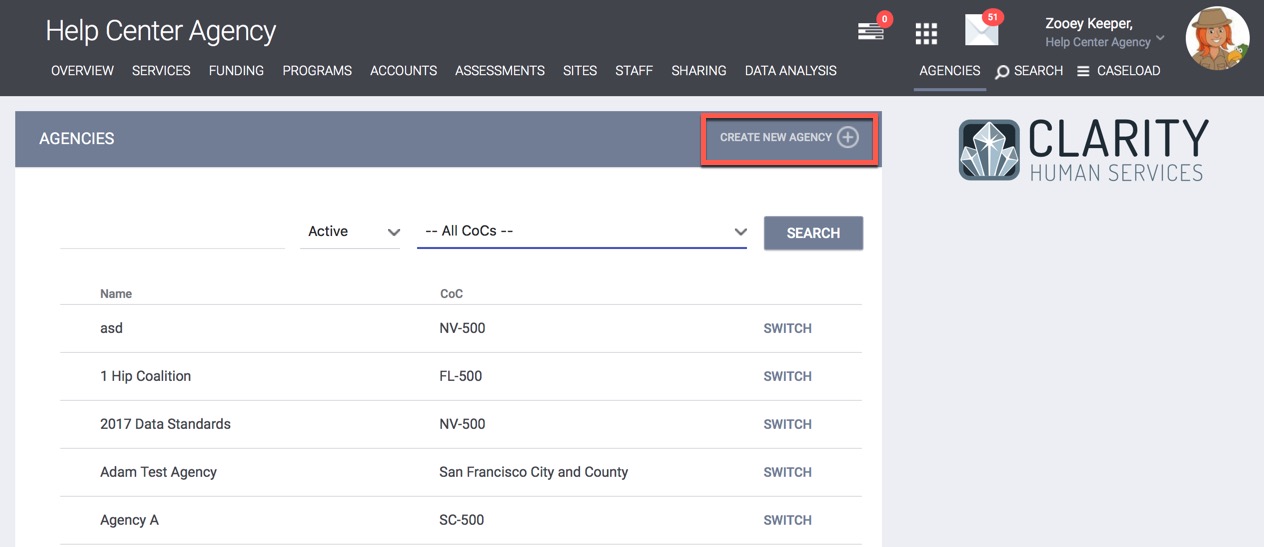
To create a new agency, select CREATE NEW AGENCY. (Be sure to search for the agency first to avoid creating duplicates.)

The CREATE NEW AGENCY page, which contains the fields in the agency OVERVIEW tab, opens.
Organization ID: the unique identifier generated by the system for the agency.
Agency Name: the name of the agency.
Note: The Agency Name cannot contain the < symbol (e.g., "<Test Agency").
Alias: in addition to a legal name for the agency, you can record a common name (or alias). Agencies are searchable by both their legal name as well as their alias. If an alias is entered for an agency, the alias will be displayed in parentheses after the agency's name in the following areas of the system:
- In the SEARCH results under MANAGE > AGENCIES.

- In the Agency drop-down menu of the Advanced Search Options on a client's HISTORY tab.
- In the Agency drop-down menu when searching BY AGENCY in a client's REFERRALS tab.
- In the Active Agency drop-down menu when searching a Community Queue.
- Select "Common" for the standard agency type in Clarity Human Services.
Note: once you create a Common agency and add staff to the agency, the system will not display the Agency Type field.
- Select "Informational" for an agency that may have a different purpose than a Common agency, such as in the following cases:
-
- When you need to add an unstaffed agency with Programs and Services required for reporting.
- When you need to report on an agency, but the staff won't be using HMIS.
- When you need a temporary placeholder agency or a training agency.
-
- Properties of Informational agencies:
- You cannot add staff directly to an Informational agency.
- Staff can access the agency through Additional Agency Access.
- Informational agencies will be hidden from the Inbox messaging and Client Profile page.
- Agency Notification Contacts, Default User Home Screen, Open Units Report, and Dashboard are unavailable on the Agency Overview page.
- Data Analysis and Explore aren't available with this type.
- If you want to convert the agency from one type to another, keep these considerations in mind:
-
-
- Converting from Informational to Common
- Standard setup fees will apply.
- Subscription Details count the total Programs regardless of Agency Type.
- Common Agencies count toward Agency Seats in Subscription Details.
- Converting from Informational to Common
-
-
-
- Converting from Common to Informational
- You will need to remove all staff members from a Common agency before the Agency Type option will be visible in Agency Overview.
- Any Agency Notification Contact or Responsible Staff Members are deleted when converting an agency.
- Converting from Common to Informational
-
Agency Address Information: agency address, city, state, county, and zip code. This information will be used when creating maps and directions to your agency for users.
Geocode: enter the geocode for the agency. Geocodes are updated annually and available on the HUD Exchange. Note: address and geocode information are used to create the default Site. After an agency is initially saved, the geocode does not display in the Overview.
Continuum of Care: select the Continuum of Care associated with the agency. Continuum of Care information is maintained by system administrators in System Variables.
Status: an "Active" agency is one that is currently collecting data or providing services. An "Inactive" agency is one that is not actively serving clients and/or collecting data. You can select "Inactive" if you wish to save the agency information for a later date.
Enforce SSO: When the system-level Enforce SSO setting is set to "Optional," this agency-level setting is displayed to allow agencies to select an SSO option for the users that have this agency as their primary agency.
Default Profile: the default Client Profile staff members will see when accessing a client record (this can be modified at the staff member level). The drop-down menu includes all screens configured by system administrators as Profile Screens.
Victim Service Provider: toggle on if the agency provides victim services.
Enable All Client Forms: determines the Form Templates available to staff members and for program configuration. For more information, see Enabling Forms for Agencies and Programs.
Staff Inventory Access: this setting, which controls which Units the agency's users will see on the Unit Queue tab, provides a picklist with three options:
- "Agency": The agency's users will only be able to see Units in that agency. This is the default selection for this picklist.
- "Coordinated Entry Type": The agency's users will be able to see all Units in either the CoC or the Primary Sharing Group, depending on the system's Coordinated Entry Type setting.
- "System": The agency's users will be able to see all Units in the system.
Click ADD RECORD to finish creating the new agency. The CREATE NEW AGENCY page becomes the MODIFY THE AGENCY page, and additional fields appear:
Navigation Profile: This setting defines the tabs that will be available in the client record for the agency, as well as the order in which the tabs will be displayed.
Default User Home Screen: use this setting to select the screen that the agency's users will see when they log in to the system. This setting can also be adjusted at the individual staff member level.
- Select "Client Search" to display the SEARCH page.
- Select "Dashboard" to display a Dashboard. If you select "Dashboard," a Dashboard field will appear for you to choose from a list of all available dashboards in the system.
- Select "Outreach" to display the Outreach map view.
Open Units Report: use this setting to select the report that will display in the Open Units tab of the Global REFERRALS tab (if applicable). The options in this drop-down menu are the reports that have been saved to the "program openings" subspace in Standalone Data Analysis.
Primary Coordinated Entry Group: the system displays this field if the Coordinated Entry Type is set as "Sharing Groups Based" and the agency has more than one sharing group. The options listed in this drop-down menu are the sharing groups that have been made available to the agency.
Click SAVE CHANGES to finish configuring the agency.
Editing an Agency
Access to the following options for editing an agency depends on access permissions:- Click MANAGE > OVERVIEW to access the AGENCY OVERVIEW page.
OR
- Click MANAGE > AGENCIES and click the Edit icon for an agency to access the MODIFY THE AGENCY page.
Note: If you click SAVE CHANGES on the AGENCY OVERVIEW page or the MODIFY THE AGENCY page without making any changes, the system will not display the green "Changes successfully saved" banner and will not update last_updated and ref_user_updated.
Agency Notification Contacts
The AGENCY OVERVIEW page includes an Agency Notification Contacts section where you can enter the names of staff members who should receive notifications for actions such as generating reports and other alerts. You can search by username or email address. In the Settings configuration, you can select whether or not the staff member should receive referral notifications (if applicable).

Restoring Deleted Agencies
Users with the Restore Deleted Data access permission can restore deleted agencies as follows:
- Navigate to MANAGE > AGENCIES.
- Scroll down to the bottom of the page and click Recover Deleted Data.

- Turn on the toggle for the Agency (or Agencies) you want to restore.
- Scroll down to the bottom of the page and click RESTORE.

Note: Users cannot delete agencies. If you need to delete an agency, please reach out to your System Administrator, your Agency Contact, or the Help Desk for next steps.
|
If you attempt to restore a single agency when there are no available licenses: |
If you attempt to restore multiple agencies when there are not enough available licenses: |
|
|
If Self-Service License Purchase is disabled: |
The system will not allow the agency to be restored until you purchase additional seat capacity from your Bitfocus Account Representative. |
The system will display a pop-up saying that you only have "x" license(s) available" and that you need to select which agencies to restore within the available license amount (x = the number of remaining agency licenses). You will then be redirected to the main "Restore" page, where you can select "x" agencies and click RESTORE again. To restore additional agencies past the license count, you must purchase additional seat capacity from your Bitfocus Account Representative. |
|
If Self-Service License Purchase is enabled: |
The system will prompt you to purchase additional seat capacity and will allow you to restore the agency. |
The system will display a pop-up saying that you only have "x" license(s) available" and that you need to select which agencies to restore within the available license amount (x = the number of remaining agency licenses). You will then be redirected to the main "Restore" page, where you can select "x" agencies and click RESTORE again. You will need to purchase additional seat capacity to restore additional agencies past the license count. |
Note: You can restore Informational agencies regardless of the number of seats.
Audit Log
Users with Admin Access Role Types with Audit Log permissions enabled in their access role can click the Audit Log button on the AGENCY OVERVIEW page to view changes to the following:
- Agency Name
- Alias
- Agency Type
- Address
- City
- State
- County
- Zip Code
- Geocode
- Continuum of Care
- Status
- Enforce SSO
- Navigation Profile
- Default Profile
- Default User Home Screen
- Open Units report
- Victim Service Provider
- Enable All Client Forms (including added or deleted forms)
- Staff Inventory Access
- Allow Referrals from Other Agencies
- Adding/deleting agency notification contacts
- Changing agency level notification settings
Updated: 12/12/2025