
This article is for the new Clarity interface. Screenshots and descriptions will be updated as features are released. For the current interface article, see How Do I Create Client Notes?
Table of Contents
Video Resources
Click play for a quick overview:
Overview
Depending on the agency's sharing settings and the staff member's access role, notes can be shared, edited, and deleted within and across agencies. An individual note can also be made private to the agency of the user who created it, regardless of the agency's sharing settings.
Note: The Notes tab can be enabled or disabled in the agency's Navigation Profile and a staff member's Access Role.
Creating Client Notes
To create a note, click the Notes tab within the client record and click the Add icon.
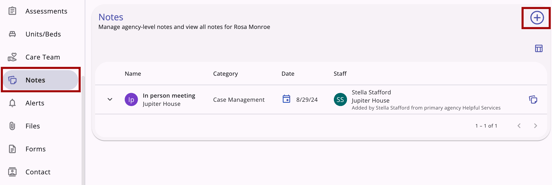
The Add Note modal opens on the right side of the page.
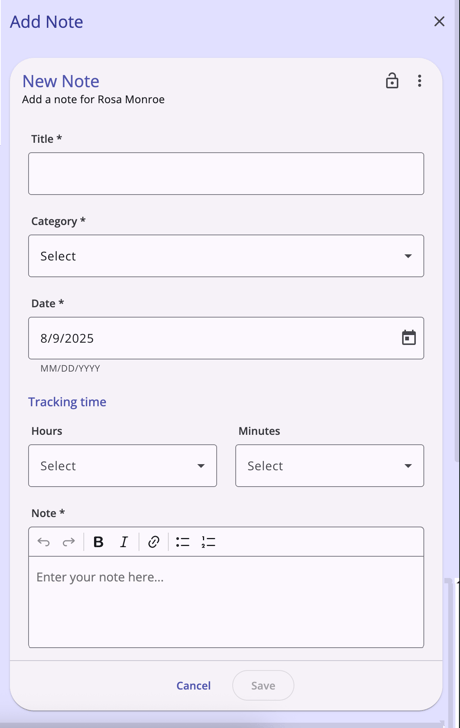
Enter a Title for your note, select a Category, select a Date, and type the desired text in the Notes field. The system automatically populates the Agency field with your agency name (or the name of the agency you are switched into).
Note: The Category options are determined by system administrators by editing the note_categories field in Field Editor. Please contact your system administrator if you need assistance determining which Category option to select.
Optional Time Tracking fields are available, which allow users to record the number of hours and minutes associated with the note. An agency may use these fields to collect the time spent entering the actual note or the total time spent on the client's session.
When you are done, click Save.
Tagging Users in Notes
Users with the appropriate access rights to create or edit a note can tag one or more end users in a note. A notification with a link to the tagged note and relevant client record will be sent to the user’s email and/or Staff Inbox. This ensures that relevant team members are immediately alerted to important updates or specific action items.
Where Tagging is Available
Tagging functionality is integrated across various sections of the client record. You can mention a colleague whenever you add a note in the following areas:
- Referrals: Notes added to a referral in the following locations:
- Client > Referrals tab
- Global Referrals tab > Incoming Referrals tab
- Global Referrals tab > Community Queue tab
- Global Referrals tab > Outgoing Referrals tab
- Client notes: General notes in the client’s Notes tab and notes within a client program’s Notes tab.
- Contact records: Notes added to a client’s Contact record in the Contact tab.
- Location records: Notes added to a client’s Location record in the Location tab.
- Services: General notes in the client’s Services tab and notes within a client program’s Services tab.
- Program Restrictions: Notes regarding a client's Program Restriction in the Restrictions tab.
How to Tag a User
Users can tag another user with the @ symbol followed by their name or email address in a Note textbox.
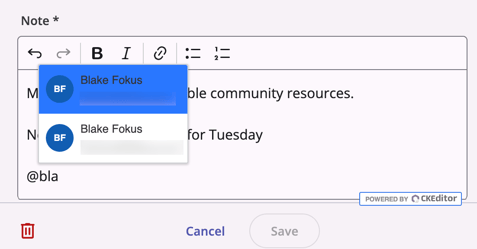
As you type, a list of suggested users will appear. The list only displays active users who have the appropriate sharing permissions to access the entity (referral, service, etc.) you are currently working on.
Finish typing your note and save it to trigger the notification. The email notification and staff inbox notifications look and function like other Clarity Human Services emails and system notifications.
Notifications and Link Routing
When a staff member is tagged, they receive a notification containing a hyperlink to the specific record. The system automatically detects which version of the interface the recipient uses:
- New Interface Users: If the tagged user has the new Clarity interface enabled for their account, the link will direct them to the new interface version of the page.
- If the tagged user does not have the new Clarity interface enabled for their account, the link will route them to the current interface version of the page.
Viewing and Modifying Client Notes
Notes available to you will display in the Notes tab and include the name and agency of the staff member who created the note, the category, and the date the note was created/last modified. Depending on your access role and the agency's sharing settings, you may be able to preview, view, edit, or delete notes created by users at other agencies.
To edit or view a note, click on the note title from the Notes tab and click the Edit icon. If Notes is set to Basic Shared by the creating agency in their sharing settings, this option is not available to staff members at other agencies.
The Edit Note modal for that note appears. Make any desired edits, then click Save.
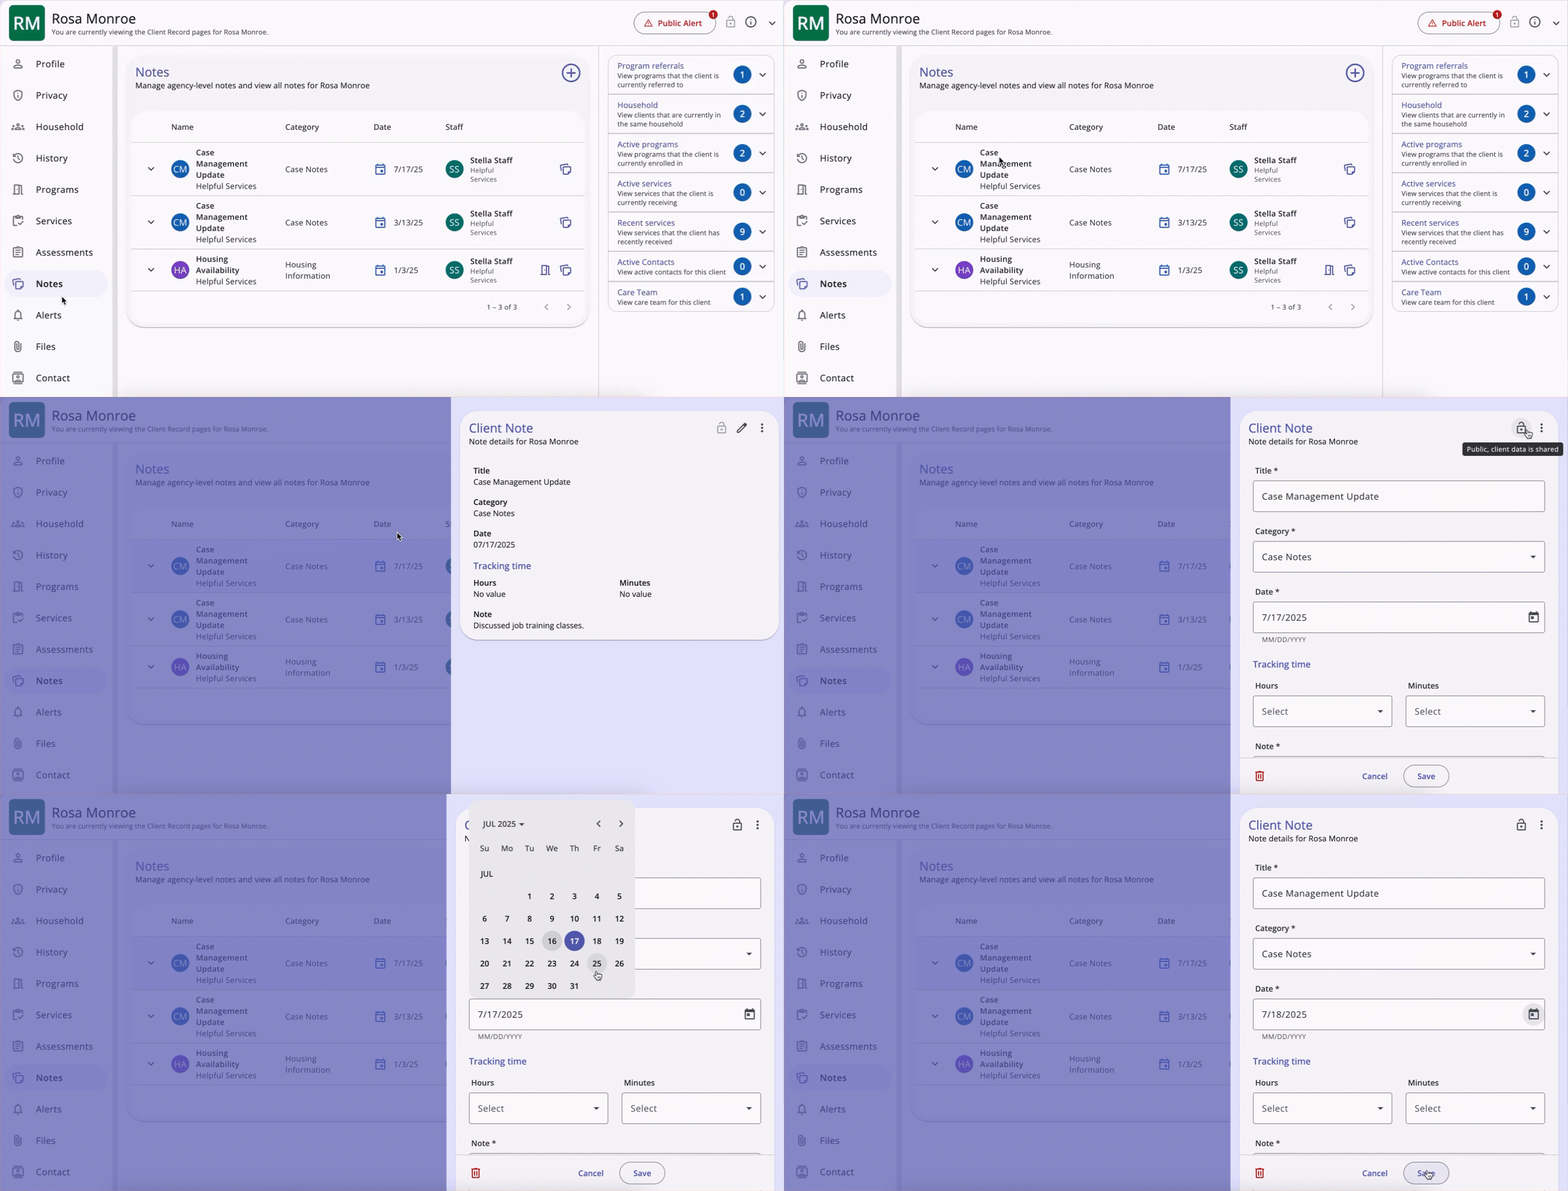
Note: If you click Save on the Client notes modal without making any changes, the system will not track the action in the Audit Log, will not display the green Changes successfully saved banner, and will not update last_updated and ref_user_updated.
Note Privacy
A Privacy lock icon is located at the top right corner of a note and marked public as default. The end user can hover over the lock icon to see a tooltip that indicates if the item is marked as private or public.
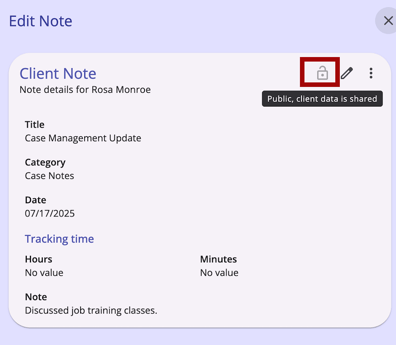
The end user can click on the Privacy icon and a privacy pop-up appears so they can update the privacy to private. The end user can use the same process to change privacy to public.
Program Notes
If the Program Notes setting has been enabled for a program, you can add notes within the Notes tab of a client's program enrollment. Notes added from within an enrollment will appear in both the program enrollment Notes tab and client-level Notes tab and can be viewed and modified in either place. The sharing of notes added from a program enrollment is subject to the creating agency's Notes sharing settings, not their Service/Programs/Assessments sharing settings.
To add a new program note, open the applicable program enrollment, click the Notes tab, and click the Add icon.
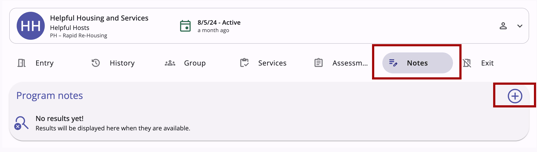
Enter a Title for your note, select a Category, select a Date, and type the desired text in the Notes field. The system automatically populates the Agency field with your agency name (or the name of the agency you are switched into). When you are done, click Save.
Audit Log
The View Audit Log option can be selected by a system administrator with audit log access rights.
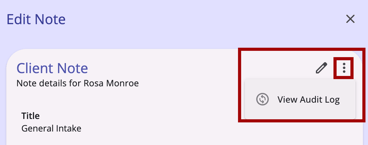
A log of all changes to the client note is displayed.
Icons & Tooltips
| Icon | Icon/Tooltip Name | Tooltip | Icon Location |

|
Add | "Add" | Anywhere the Add icon appears |

|
Delete | "Delete" | Anywhere the Delete icon appears |

|
Edit | "Edit" | Anywhere the Edit icon appears |

|
Note | "Note [formatted note text]" | Notes tab, program's Notes tab, Contact tab, History tab, Location tab |

|
Privacy - Private | "Private, client data is not shared" | Top right corner of the Client Note on the Edit Note screen |

|
Privacy - Public | "Public, client data is not shared" | Top right corner of the Client Note on the Edit Note screen |
Configuration Resources
The following configuration resources were noted in this article:
- System Advanced Options: Navigation Profiles
- How to Set Up a Program: Detailed Instructions
- Introduction to Sharing Client Data
- Rights Glossary for Access Roles
- Service Item Options: Time Tracking
- Creating and Editing Fields
Updated: 05/15/2026