Overview
Clarity users and Customer Portal client users can add photos to Location tabs in the current interface (Clarity users), the new Clarity interface (Clarity users), and the Customer Portal (client users). This allows case managers to quickly and accurately locate their clients who may not have easy-to-find addresses/locations.
This article includes the following sections:
Clarity User Experience
Users can view, add, and manage location photos.
Viewing & Managing Location Photos
Existing photos for each added location will be visible within the location records at LOCATION > EDIT CLIENT LOCATION, in the LOCATION PHOTOS section.
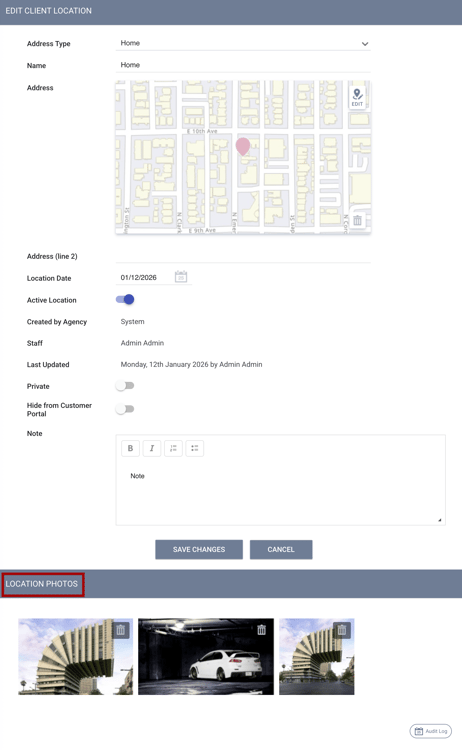
Users can add or delete photos of locations on the Location tab for both existing and newly added locations, if they have the appropriate access rights to edit locations.
When viewing a list of locations, a location will have a camera icon next to it if it has photos associated with the record.
 A mobile phone/information icon indicates that a client user has added location photos in the Customer Portal. A tooltip reads: “Client Supplied through the Customer Portal.”

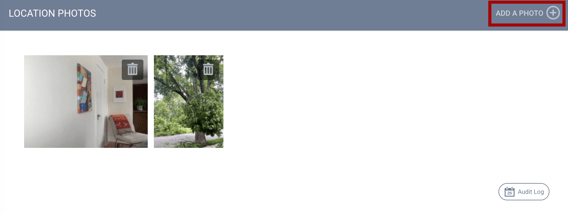
Adding a Location Photo
Users can add a location photo by clicking on the ADD A PHOTO/Add icon in the LOCATION PHOTOS section for a location.
Users can capture a photo with their device by clicking on TAKE A PICTURE INSTANTLY or TAKE A PICTURE AFTER 3 SECONDS, or by uploading a photo.

Additional details:
- A maximum of 3 photos can be uploaded per location.
- Once a user adds all 3 available photos, the Add a Photo link disappears
- The total file size for each photo must not exceed 25MB.
- Allowed file types are: PNG, GIF, JPG, JPEG, TIFF, HEIC
- An error message displays if the file exceeds the size limit.
Client User Experience
Customer Portal client users can view, add, and manage location photos in their Customer Portal account.
Adding a Photo
In the client user’s Customer Portal account, they will navigate to the Location tab to add a new location.

After adding the new address, a "Confirm Location" pop-up includes elements to add a photo:
- Take a photo using the device camera/webcam.
- Upload a photo from the device's file system.
Adding a photo is not a required field to save the location, and photos uploaded by user clients do not require approval from a Clarity user.
Additional details:
- A maximum of 3 photos can be uploaded per location.
- Once a user adds all 3 available photos, the Upload and Take Photos buttons are greyed out.
- The total file size for each photo must not exceed 25MB.
- Allowed file types are: PNG, GIF, JPG, JPEG, TIFF, HEIC.
A confirmation message appears upon successful upload. An error message will be displayed if the upload doesn’t meet the listed criteria. The error message will show until a new, valid photo is added. The available error messages are:
- “Photo Not Uploaded: The file type is invalid.”
- “Photo Not Uploaded: More than 3 files have been selected.”
- “Photo Not Uploaded: File exceeds size limit.”
Viewing & Managing Location Photos
Customer Portal client users can view and manage location photos from their location map or list of locations.
When a Customer Portal client user clicks the location pin on the location map, the location photos are displayed in a pop-up box, along with the address.
When the client user clicks the image, they see a larger version and can navigate through additional photos using the arrows. The client user can click Edit on the pop-up to manage their location photos.

When the client user clicks on the location in the list view, the same view as the pop-up on the location map is displayed. When the client user clicks the image, they will see a large version of the image and can navigate through the photos using the arrows.

In the list view, if a camera icon is present, the client user can delete or upload additional photos and edit the location fields.
Audit Log
When a Clarity user or Customer Portal client user uploads or edits a photo to a location, an entry appears in both the main Location tab audit log and the individual location record audit log.
In addition to the location photo values, the audit log entry shows:
- Changed by:
- Name of Clarity user or Name of Customer Portal client user
- An indication if the photo was uploaded via the Customer Portal, via Clarity 2.0 (the current interface), or Clarity 3.0 (the new interface).
- Date: the date, time, and elapsed time for the photo.

Updated: 02/10/2026