Standalone vs Embedded Looker
In order to provide a cost-effective alternative to a standalone Looker license, Bitfocus offers a Clarity Human Services embedded version that can be made available to more users at a reduced cost. The following is a summary of what is available with both license types.
|
|
Standalone |
Embedded |
| Viewing pre-saved content | ✔️ | ✔️ |
| Ad-hoc data pulls | ✔️ |
✔️ |
| Create looks from all data models | ✔️ |
✔️ |
| Create dashboards | ✔️ | ❌ |
| Content management (creating new folders, moving, copying, making public, deleting content) | ✔️ | ❌ |
| Scheduling / Send content delivery | ✔️ | ❌ |
| Access to Looker API | ✔️ | ❌ |
Accessing Embedded Looker
To access "Embedded Looker," you must have Data Analysis enabled in your access role. See Rights Glossary for Access Roles for information about the different Data Analysis rights.
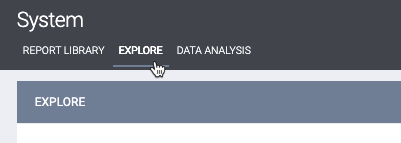
To access "Embedded Looker," click the Launchpad and navigate to REPORTS > EXPLORE.
Next, choose a Data Model.

You can search and select the fields you want to include in the Look from the left column. When a field is selected, it is highlighted in the left column and appears in the DATA section of the screen.
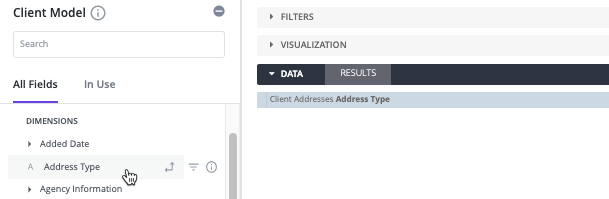
Filters can be added to refine datasets by clicking Filter next to the field, then selecting the appropriate filter in the Filters section. Pivoting fields by selecting the Pivot button next to the field can be useful to make data easier to understand.
When the Look is complete, click Save Look.

Moving Between Embedded and Standalone Looker
When you access Looker through Clarity Human Services, you are using a different Looker license. If you go back and forth between Clarity Human Services and Looker, you will notice problems running Looks in Looker.
- If you experience problems in Looker, log out and then log back in to Looker to restore access.
- If there is a problem in Clarity Human Services, navigate away from the Report area and then navigate back to restore functionality.
When a user logs in to both Standalone and Embedded Looker, the following message appears: "You are not authorized," as you cannot be on both at the same time.
Sharing Looks in Embedded Looker
To enable a Look in Embedded Looker that was saved in Standalone Looker:
- In Standalone Looker, share the Look to your community's Looker Shared Space or agency space. (The agency spaces are identified by the Project ID number.)
Important: Do not change the name of the Shared Space. - Update Clarity Human Services with the latest reports from Looker:
- Click the Launchpad.
- Navigate to SETUP > SETTINGS > Data Analysis.
- Click the REFRESH DATA ANALYSIS link.
- Enable the report:
- Click the Launchpad.
- Navigate to SETUP > SETTINGS > Data Analysis > [Agency Name] Reports. You'll see the complete listing of reports in the Looker Shared Space. Note: Users will only see folders for the agencies they have access to.
- Turn on the toggle for the report.
- Click SAVE CHANGES.
Built In Reports
Built-In Reports (LookML Dashboards) must be enabled using the same method above. The LookML Dashboards can be found in the Built In Reports folder and need to be toggled on to be accessible from embedded Looker. To learn more about Clarity Human Services' Dashboard Library, please review our dashboard articles.

Hyperlinks in Embedded Dashboards
Dashboards may include hyperlinks to other dashboards. To make this work:
- Save dashboards to link to the embedded folder, as shown above
- From Clarity, run the dashboard to link and copy the URL
- Use the Clarity embedded dashboard URL for the link in the main dashboard
Removing Looks in Embedded Looker
To remove a Look or dashboard:
- Standalone Looker Users
- Sign into agency folder in Stand Alone Looker.
- Select the ellipses (three dots) and "Move to Trash."
- Sign in to Clarity.
- Select the Launchpad > SETUP > SETTINGS > Data Analysis.
- Turn off the toggle for the deleted Look.
- Select the Launchpad > SETUP > SETTINGS > Data Analysis
- Click the REFRESH DATA ANALYSIS link.
- Note: Every 30 days, Looker will remove Looks from trash.
- Sign into agency folder in Stand Alone Looker.
- Embedded Communities Only
- Send in a Help Desk ticket to delete the Look.
- In Clarity, select the Launchpad > SETUP > SETTINGS > Data Analysis
- Click the REFRESH DATA ANALYSIS link.
- Note: Every 30 days, Looker will remove Looks from trash.
Updated: 03/24/2026