
Table of Contents
Overview
The Current Living Situation (CLS) assessment collects data for the HUD HMIS Data Element 4.12 Current Living Situation. Collection of this data element is required for Adults and Heads of Households in applicable programs at program start and subsequent dates of contact.
Clarity provides multiple entry points for recording CLS assessments, ensuring that data collection is easily and quickly accessible during standard case management workflows. CLS assessments can be accessed from the Client Profile sidebar, a Program's enrollment workflow, and the Assessments tab.
If you close the enrollment workflow before recording CLS, a Current Living Situation Needed prompt on the program's Information Bar takes you back to the CLS form.
To reduce rework, CLS assessments can be moved to a different program after they have been saved, eliminating the need to delete and re-enter records created under the wrong program.
Completing a CLS Assessment
The basics of completing a CLS assessment are consistent whether you are accessing it from the client's Profile, from a client's Program enrollment workflow, or from the client's Assessments tab. Details on accessing a CLS assessment can be found in this article in these sections:
Once the assessment appears for you to complete, the following fields are available:
- Date of Contact: This field is pre-populated with today's date.
- Warning: If you change the date to any day other than today, a non-blocking warning appears:
"Date of Contact is not today’s date. Confirm this reflects the actual date of contact."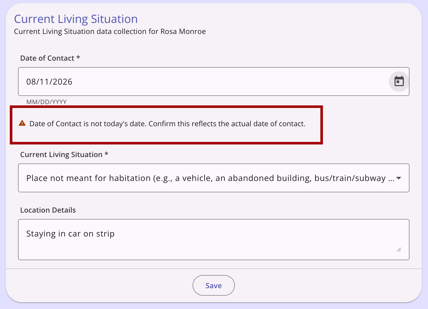
- You may still save the record if this warning appears.
- Warning: If you change the date to any day other than today, a non-blocking warning appears:
- Current Living Situation: Choose the appropriate answer from the drop-down list, which is populated with the selections in HUD’s Living Situation Option List (Appendix A of the Data Dictionary).
- Location Details: Enter the specific living situation details as required by the form.
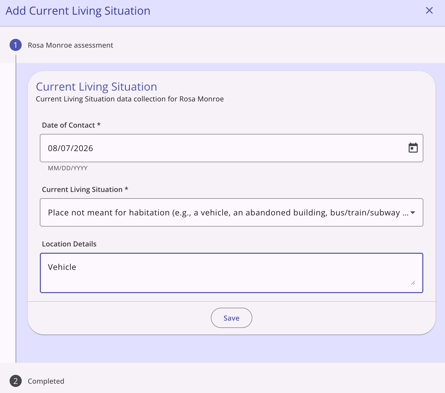
Depending on the selection for Current Living Situation, additional required fields may appear:
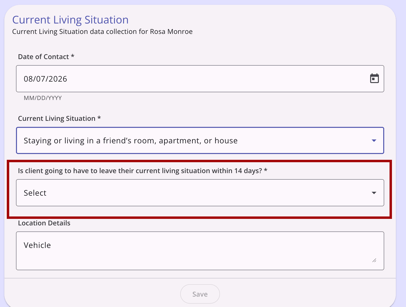
- If one of the Temporary or Permanent Housing Situations outlined in HUD's Living Situation Option List is selected, additional required field(s) will appear. For example, a Temporary Housing Situation was selected in the example below, and 1 additional field appeared automatically.
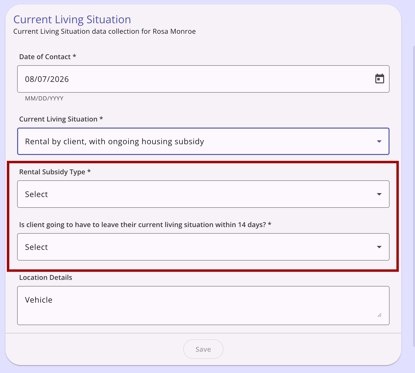
- If the Rental by client, with ongoing housing subsidy option is selected, the Rental Subsidy Type field will appear, plus an additional field since the option is a Permanent Housing Situation:
When all fields are complete, and any household member entries have been added, click Save, then click Complete to end the workflow.
Notes:
- Current Living Situation (CLS) data will cascade to new Current Living Situation (CLS) screens from the most recently completed Current Living Situation (CLS) screen that belongs to the current client program if the Cascade Enrollment Data setting is enabled in that program's setup. Please refer to the Data Cascading article for more details.
- For programs funded solely by PATH, your selection for the Current Living Situation field must be one of the following:
- “Place not meant for habitation (e.g., a vehicle, an abandoned building, bus/train/subway station/airport or anywhere outside)”
- “Emergency shelter, including hotel or motel paid for with emergency shelter voucher, or RHY-funded Host Home shelter”
- “Safe Haven”
- “Other”
- “Worker unable to determine”
Enrolling Household Members
If the client is part of a household with other adult members (18+) who are active in the same program enrollment, the Include Household Members step appears. This workflow step is optional.
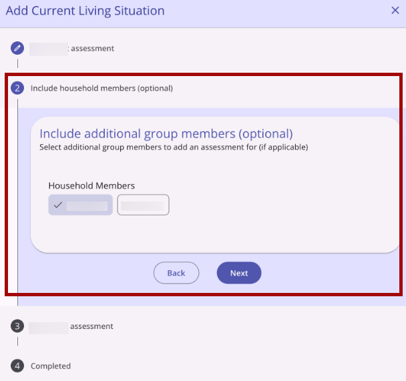
- Choosing Additional Group Members: You can select any combination of adult household members to include in the assessment.
- Sequential Workflow: The system will walk you through each selected member's form in sequence.
- Pre-filled Fields: Each member's form is pre-populated with the Date of Contact and Location Details from the Head of Household.
- The Current Living Situation field is based on the Head of Household's response, but can be edited for each individual.
Accessing CLS from the Client Profile
You can quickly initiate a CLS assessment directly from the client profile sidebar in the Active programs card.
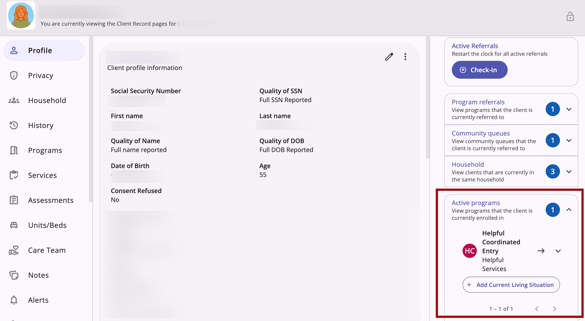
Using the Sidebar Entry Point
When the Active Programs card in the right sidebar is expanded, the + Add Current Living Situation button appears under the program name and agency.
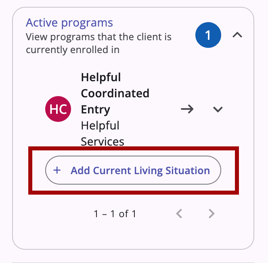
The + Add Current Living Situation button appears only if the client is an adult (age 18+) or the head of household, the program is active (non-exited), and Current Living Situation assessments are enabled for the program.
Accessing CLS in the Enrollment Workflow
To ensure compliance from the start, a CLS assessment is automatically listed as a step of a client's program enrollment workflow whenever a user enrolls a client in a CLS-enabled program.
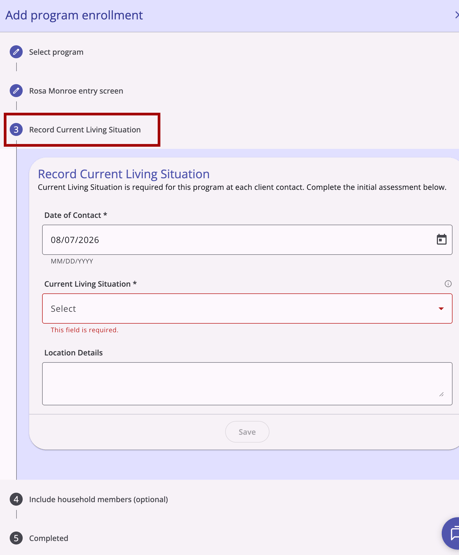
When users navigate to Client > Programs tab >Add program enrollment for a CLS-enabled program, the Record Current Living Situation step will appear after the Head of Household entry screen.
After you complete the workflow, the Task Summary on the Completed step confirms that the CLS was recorded. When you include household members, it shows how many. Refer to Creating and Managing Program Enrollments (New Clarity Interface) for the full list of Task Summary lines.
Closing the Workflow Before Recording CLS
Your enrollment is saved when you save the enrollment screen, which happens before the Record Current Living Situation step. The CLS is saved separately. If you close the workflow before recording CLS, you can add it later.
To close the workflow after saving the enrollment:
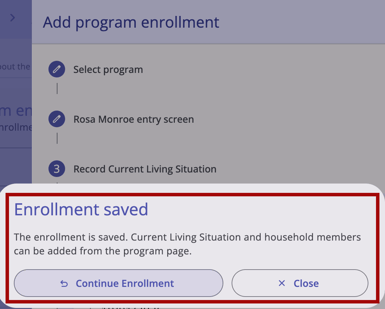
- Click the Close (X) icon in the Add program enrollment modal. The Enrollment saved dialog appears and reads: "The enrollment is saved. Current Living Situation and household members can be added from the program page."
Choose one of the following:
- Click Continue enrollment to keep the workflow open and continue to the Record Current Living Situation step.
- Click Close to close the workflow. The new enrollment opens, and it appears in the client's program enrollment history.
To record the CLS after closing the workflow:
- Open the new enrollment. The program's Information Box displays the Current Living Situation Needed prompt. Hover over the prompt to see a tooltip that explains what is missing.
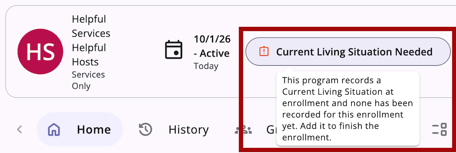
- Click Current Living Situation Needed. The Add Current Living Situation modal opens on the CLS form for this enrollment. You do not need to select a program.
- Complete the fields described in the Completing a CLS Assessment section in this article.
- Click Save. The prompt disappears without a page reload, and the CLS appears on the enrollment's Assessments workspace.
On smaller screens, like mobile devices, the prompt appears as a pill. Tap the pill to open a bottom sheet, then tap the button at the bottom of the sheet to open the CLS form.
Notes:
- The Current Living Situation Needed prompt stays until a CLS is recorded for the enrollment. Reloading the page does not clear it.
- The prompt appears only for CLS-enabled programs and only for enrollments in the agency you are working in. It does not appear for exited enrollments or for a minor who is not the head of household.
- If the first CLS date does not match the enrollment start date, the Information icon described in Enrollment Date Alignment appears on the program details workspace.
Enrollment Date Alignment
The Client > Program > Program Detail page will display a warning if the enrollment start date and the initial Current Living Situation (CLS) date do not match.
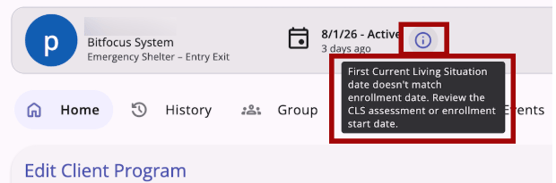
- Date Mismatch: If the initial CLS date does not match the Program Enrollment date, an Information (i) icon appears to the right of the enrollment date.
- Tooltip: Hovering over the icon displays:
"First Current Living Situation date doesn't match enrollment date. Review the CLS assessment or enrollment start date."
This indicator is visible in both active and inactive enrollment views. This message will disappear when the enrollment date and date of first contact match.
Accessing a CLS from Client-level Assessments
You can also initiate a CLS assessment from the client-level Assessments workspace.
- Initiation: Click + Add Assessment and select Current Living Situation.
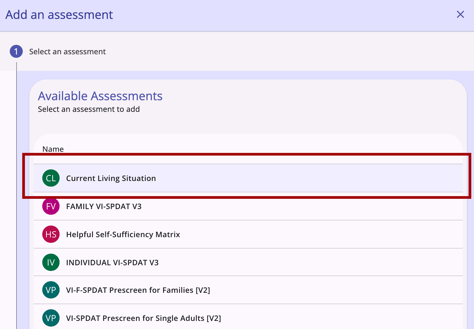
- This option only appears if the client has at least one active CLS-enabled enrollment.
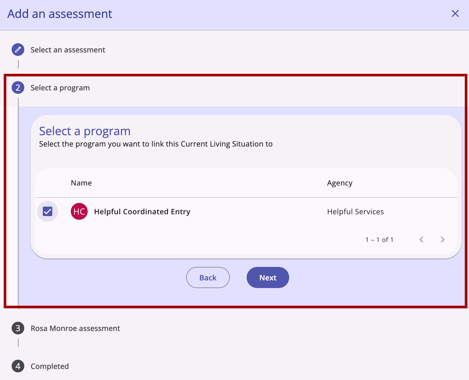
- Program Selection: You will be prompted to select which active enrollment the assessment belongs to.
-
Visibility: Once saved, the CLS record is visible in both the Client > Assessments tab and the Program > Assessments tab for the selected enrollment.
Moving a CLS Assessment
If a CLS assessment was recorded under the wrong program, it can be moved to the correct one. The Move To Another Program option is only available from the Client > Program > Assessments page. This action is not available from the client's History or Assessments tabs.
Locate the assessment in the program-level list, click the Action menu (⋮), and select the Move To Another Program option.
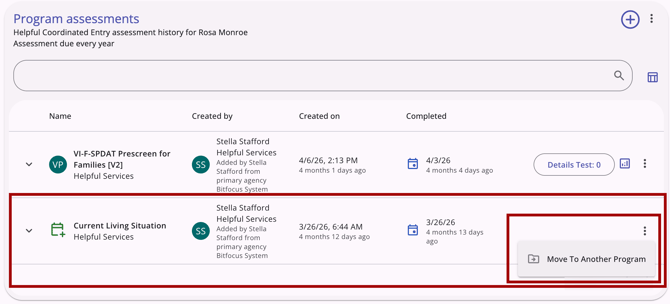
If another eligible, active CLS-enabled program is available for the client, the Move to Another Program modal opens on the right side of the page.
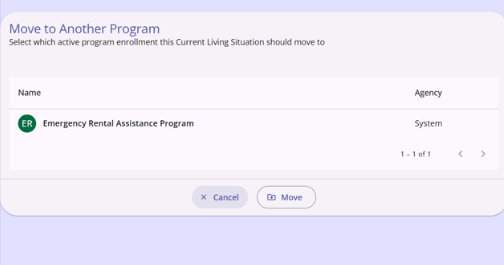
Select the appropriate program from the list, then click Move. Click Cancel to cancel the move action and return to the program's Assessments tab.
If there are no eligible, active CLS-enabled programs available for the client, a notification will appear that reads:
"This client has no other program that can hold a Current Living Situation."

Audit Log
Admin users with audit log access rights can access audit logs for client records. All user actions are recorded in the CLS assessment audit log to ensure data integrity and enable tracking.
Updated: 10/01/2026