
Table of Contents
Overview
The Reports workspace in the client record allows users to browse, run, and view client-level report results. This article covers how to access the Reports menu item, run and schedule reports, monitor report status, and view report output.
Accessing Client Reports
The Reports menu item appears in the client record navigation menu and uses the Bar Chart icon.
The Reports menu item is visible only to users with the Client Reports access right. If a user does not have this access right, the menu item does not appear. See the Rights Glossary for Access Roles article for details on access rights.
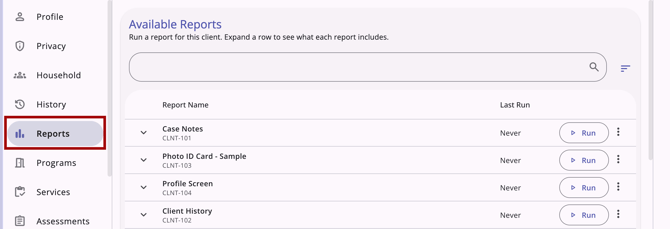
Viewing Available Reports
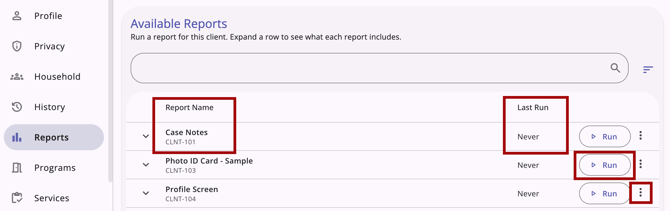
When you open the Reports workspace, the Available Reports table loads automatically. By default, the table includes:
- Report Name: The report prefix (e.g., [CLNT-101]) also displays as sub-text beneath the name.
- Last Run: The date and time you last ran the report. “Never” is displayed if you have never run the report.
- Run: A primary action button, described in the Running a Report section of this article.
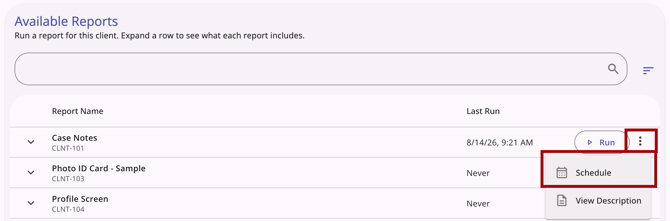
- Action Menu (kebab icon):
- Schedule: Opens the parameter form with an added Scheduled Process Date field, described in the Scheduling a Report section of this article.
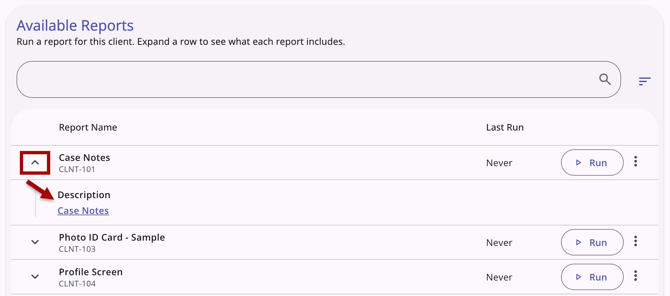
- View Description: Expands the row to show the report description and Help Center article link (if available).
Each row has a Chevron arrow on the far left. Clicking the arrow expands the row to reveal the report's description and a link to a Help Center article (if available). If a report has no description configured, the chevron does not appear for that row.
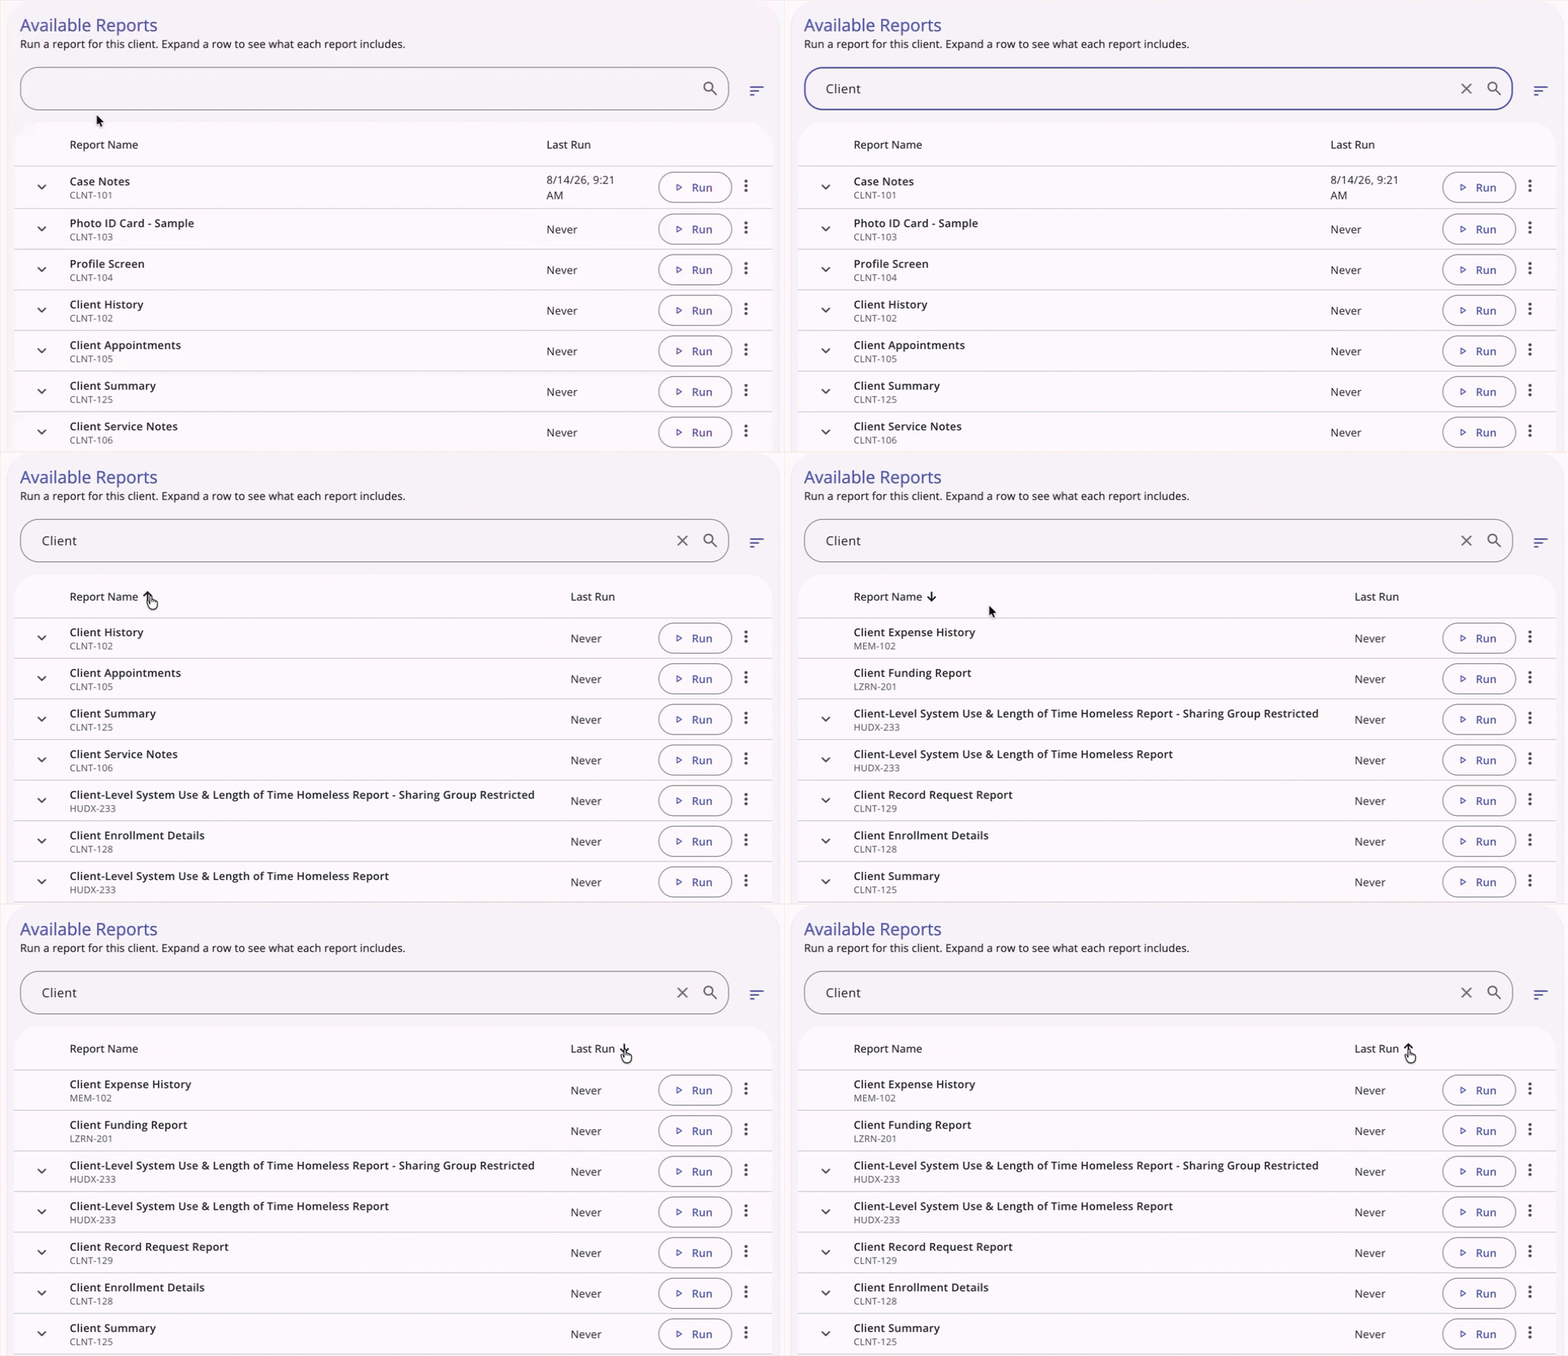
Searching and sorting:
- Use the search bar to search by Report Name.
- Sort the table by Report Name (A–Z or Z–A) or Last Run (newest first or oldest first).
Running a Report
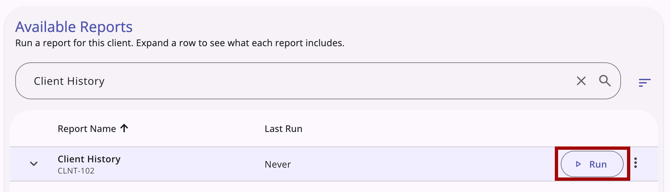
To run a report, locate the report in the Available Reports table using search, sort, or by reviewing the list. Click Run on the report's row.
The full-page parameter form opens within the client record's workspace. The client record header and secondary navigation remain visible, and breadcrumbs update to reflect your location (e.g., Client Name > Reports > [Report Name]).
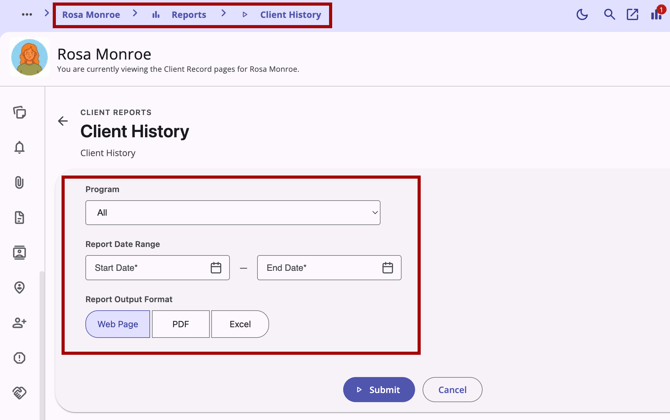
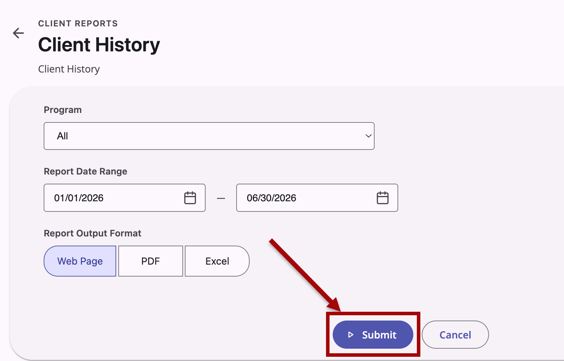
Fill in the report parameters. Click Submit to queue the report for processing, or click Cancel to return to the Reports workspace without submitting.
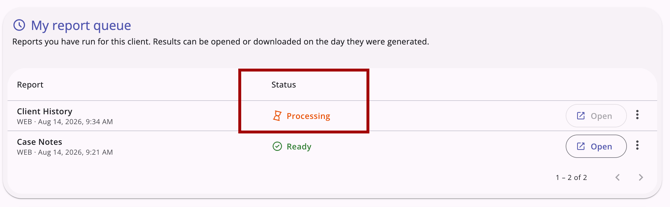
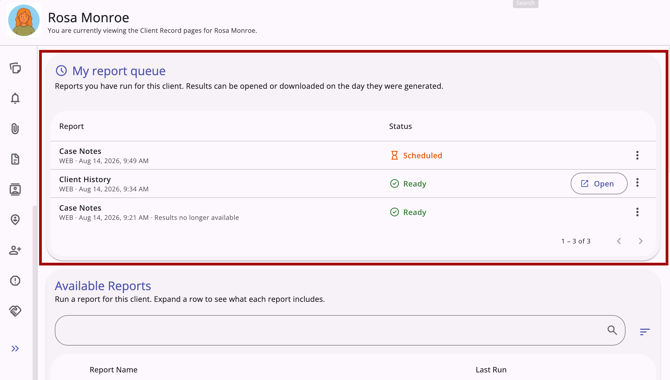
On successful submission, you're returned to the Reports workspace, and the report appears in the My report queue card with a Processing status.
If submission fails (due to a system or network error), a message displays:
"Something went wrong. Your report could not be submitted. Please try again."
You remain on the parameter form, and the Submit button stays active so you can try again.
Scheduling a Report
To run a report on a future date, select Schedule from a report's Action Menu (kebab icon) menu instead of Run.
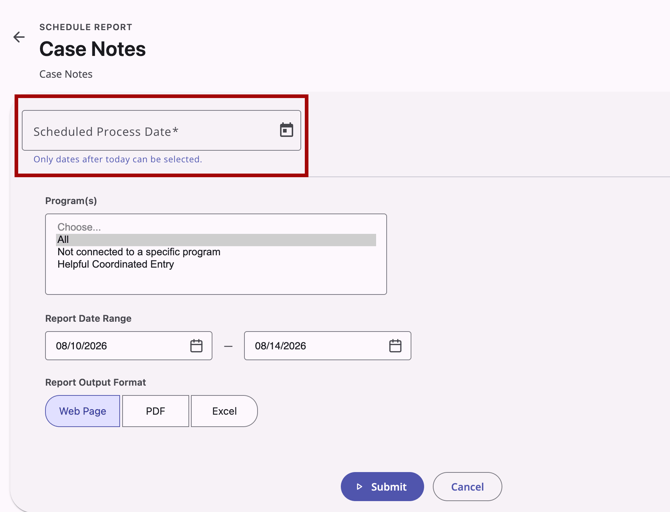
This opens the same full-page parameter form with one additional field at the top:
- Scheduled Process Date: Only dates after the current date can be selected.
Fill in the remaining parameters and click Submit as you would for an immediate report run.
Viewing Report Status
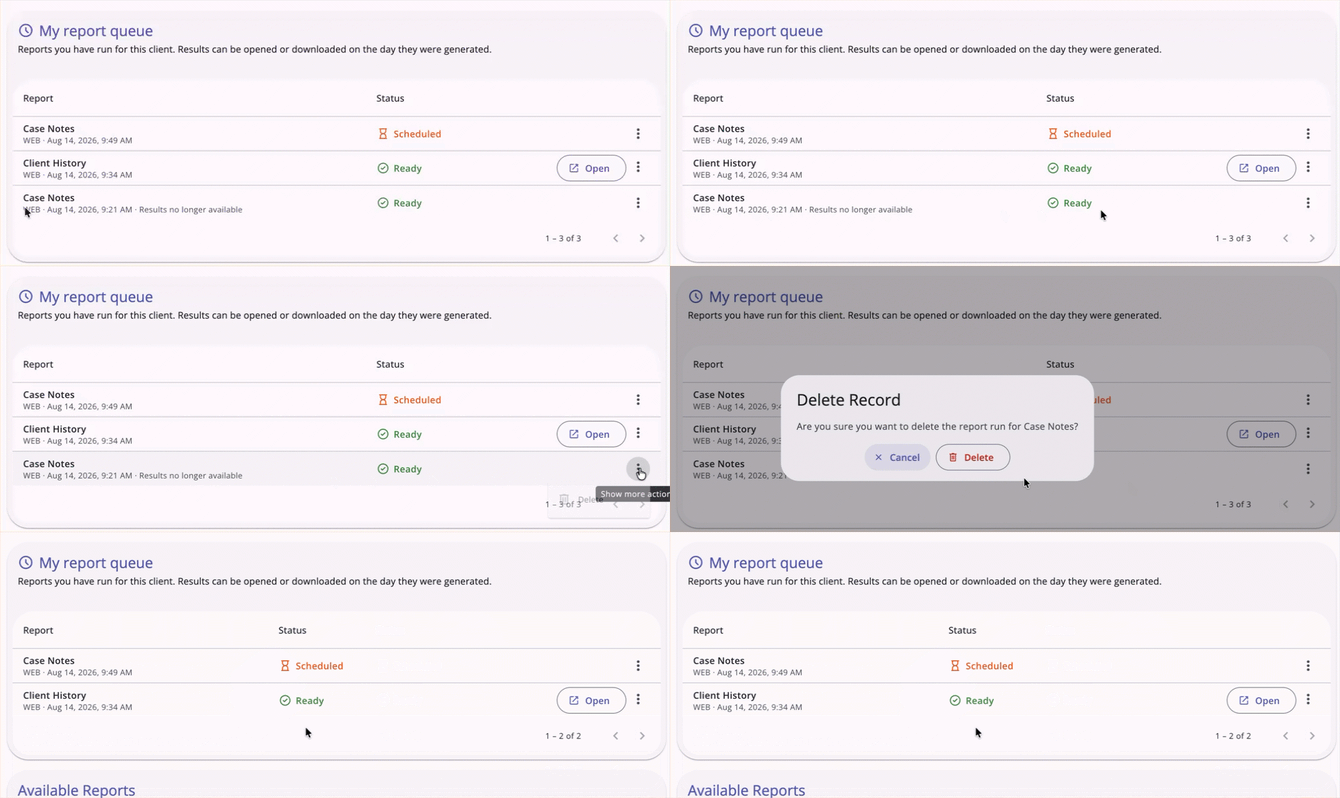
A My report queue card appears on the Reports workspace, above the Available Reports table, whenever you have one or more report runs for the current client within the past 60 days.
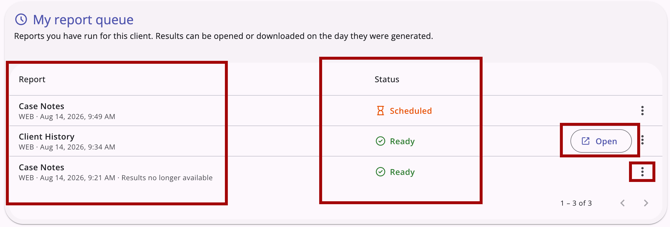
Each row in the card shows:
- Report Name: The name of the report that was run.
- Date/Time Submitted: When the report was submitted.
- Status: Processing (orange, spinning hourglass icon), Ready (green, check circle icon), or Failed (red, error icon).
- Actions: Open (Ready runs only) and an Action Menu (kebab icon) menu with Delete.
Notes on status and availability:
- The My report queue card only shows your own report runs for the client you're currently viewing.
- No other users' runs, nor runs for other clients, will appear.
- Reports can only be opened on the date they were run. After that day, the Open action no longer appears, but the run still shows in the card as a record that the report was run.
- If a specific report was run on a day, then the same report is run again later in the day, the first report is no longer available to open. A Results no longer available message will display.
- The status updates automatically as a report progresses; you don't need to refresh the page.
- You can delete a run in any status via the Action Menu (kebab icon) menu. Deleting requires confirmation (Delete to confirm, Cancel to back out).
- If you have no report runs for the client, the My report queue card doesn't display.
Global Report Status Icon
A Status icon appears in the primary header (near your name and other header icons) whenever you have one or more report runs in a Processing or Ready status for any client, not just the client record you're currently viewing.
/The%20primary%20header%20showing%20the%20Report%20Status%20icon%20with%20tooltip.png?width=402&height=83&name=The%20primary%20header%20showing%20the%20Report%20Status%20icon%20with%20tooltip.png)
- The icon uses the Bar Chart icon with a red status badge showing the number of Ready reports.
- When you hover over the Bar Chart icon, a simple Report status tooltip shows.
- The icon is hidden entirely when you have no report runs in Processing, Ready, or Failed status for the current date.
- Clicking the Bar Chart icon opens a summary card with a list of your reports, grouped into Ready (top) and Processing (bottom). Each row shows the report name, status, and Open/Delete actions.
- The Processing list will also include any reports in the Scheduled status, if any.
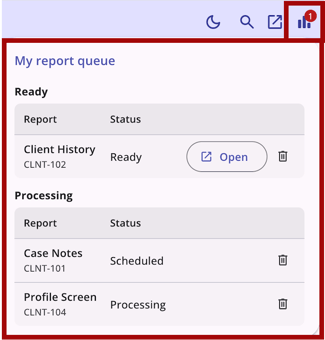
- The Bar Chart icon's status badge and summary card update in real time.
Viewing Report Output
When you click Open on a Ready run, the Web Page output opens full-page in a new browser window.
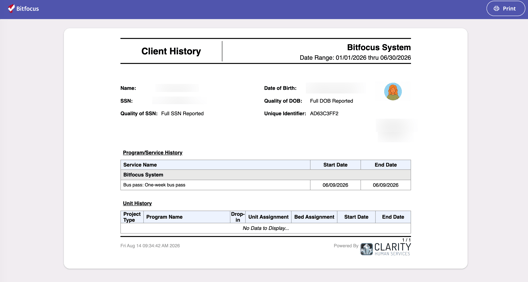
The PDF and Excel outputs download directly to your device.
Available Reports
The following reports are standard on the Reports workspace:
- [CLNT-101] Case Notes
- [CLNT-102] Client History
- [CLNT-103] Photo ID Card - Sample
- [CLNT-104] Profile Screen
- [CLNT-105] Client Appointments
- [CLNT-106] Client Service Notes
- [CLNT-125] Client Summary
- [CLNT-127] Homeless Status Timeline Report
- [CLNT-128] Client Enrollment Details
Updated: 10/01/2026