Additional Service Item Settings
This article explains the additional Service Item features including Expiry Warning, Authorization Lock, Additional Expenses options and more.
This article is for the current interface. For the new Clarity interface article, please click this link.
Overview
Once a service item has been recorded and saved, it can be edited by clicking its Edit icon on the HISTORY tab within the client record.

The HISTORY: EDIT page that appears will display information that was recorded when the service item was provided, as well as additional settings that are only available on this page.
Note:
- Users who are switched into an agency that is different from the one that provided the service will not see these additional settings.
- These additional settings are only available when editing the service item.
- The ability to edit services must be enabled in the staff member’s Access Role settings. For more information about Access Role settings, see the Access Roles series of articles.
Expiry Warning
When Expiry Warning is enabled, the system will send an automated email to the selected staff member at a specified time before the end date of a service item.
Once Expiry Warning is turned on, a picklist of your agency's staff members appears, with your name as the default selection. A picklist also appears with options for how many days prior to the end of the service item the notification will be sent, with "5 Days" as the default selection.
Adjust the name and number of days as appropriate, then click SAVE CHANGES.

Authorization Lock
Toggling on the Authorization Lock prevents the service item from being edited by any staff members who do not have Edit Agency Services Authorization Lock enabled in their Access Role settings. Once Authorization Lock is turned on, an editable date field appears to indicate the date the service item was locked.
![]()
Adjust the date if applicable, then click SAVE CHANGES. The toggle becomes read-only, and an "Unlock service item" link appears for turning off the lock if needed.
![]()
When Authorization Lock is turned on for the service item, a "Service item is locked" message will appear next to the service name on the HISTORY: EDIT page, and the SAVE CHANGES button will be hidden.

Private
Toggling on Private will make the service item only visible to staff members at your agency (for more information on private data, see Making Client Data Private).

Unlink a Program from a Service
When a service item is linked to a program enrollment, a record for the linked program will appear in the PROGRAMS section. You can unlink the service item from the enrollment by hovering over the program and clicking the trashcan icon.

Additional Expenses Options
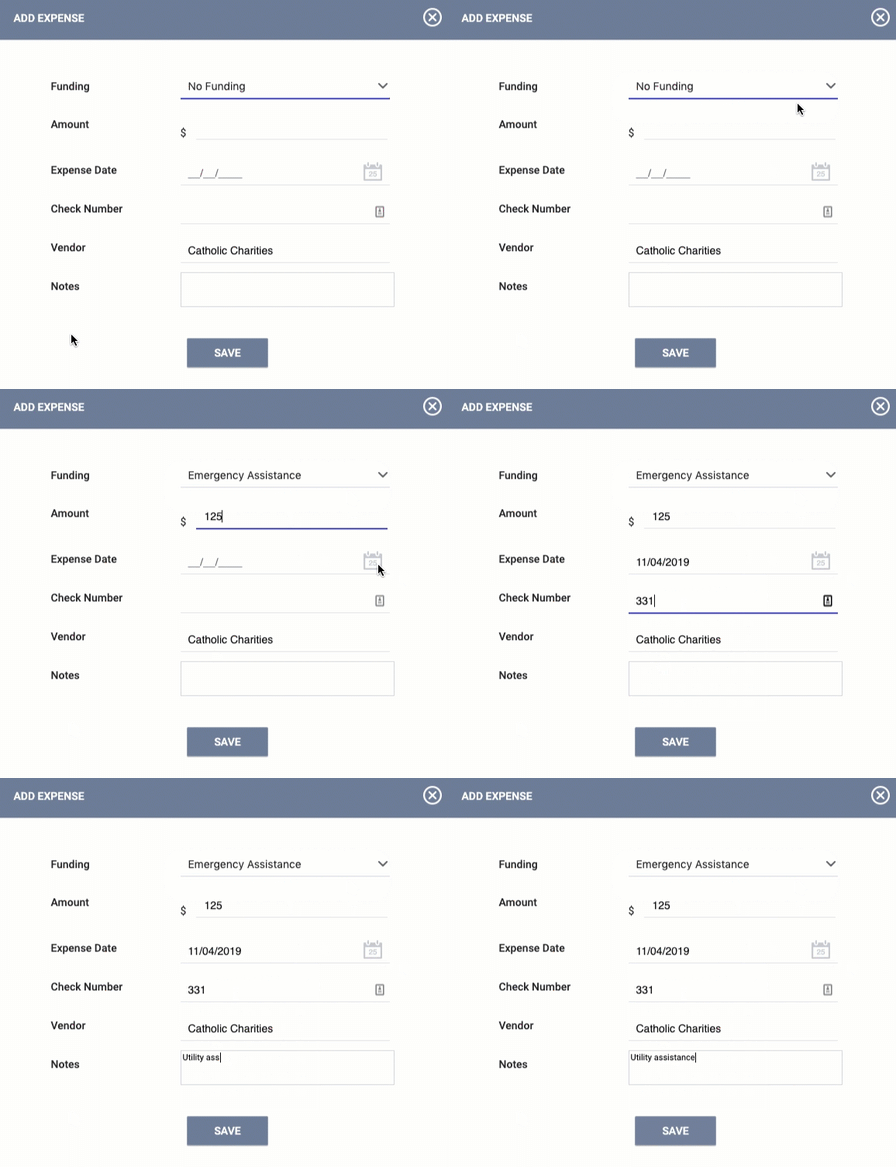
Additional expense configuration settings are available when you edit a service item. To modify an existing expense, click that Edit icon for that expense. To add a new expense, click ADD EXPENSE.

From MODIFY/ADD EXPENSE, you can associate a check number, notes, and vendor with the service item.

You can also associate multiple expenses with a service item by clicking ADD EXPENSE. The sum of all expense item amounts will appear in the EXPENSES header.

Notes:
- For services where Category = VA SSVF Services AND service item Category = Financial Assistance AND Delivery Type = Single Event, Amount is renamed Financial Assistance Amount for V3 SSVF Financial Assistance services

- For services where Category = VA SSVF Services AND service item Category = Financial Assistance AND Delivery Type = Single Event, the ADD EXPENSE button on the HISTORY: EDIT screen will not be visible/available when an expense record already exists for the same service transaction.

Group Options

When household member(s) are included at the time a service items is recorded, as shown in the image above, a GROUP OPTIONS section appears for that service item in the HISTORY tab. This section allows you to modify the start and end date of the service item for the other household member(s).
Clicking the link icon beside a household member’s name will take you to the service item within that household member's client record.

Note: Service item start and end date information is maintained independently for each household member. Changing this information under HISTORY: EDIT will only make the change in the client record from which the change is made. To update this information for additional household members, you must edit the dates under GROUP OPTIONS or from within the HISTORY tab of those household members' records.
Updated: 10/01/2025