Overview
File Categories are used to organize files that are uploaded into a client record.
Managing File Categories
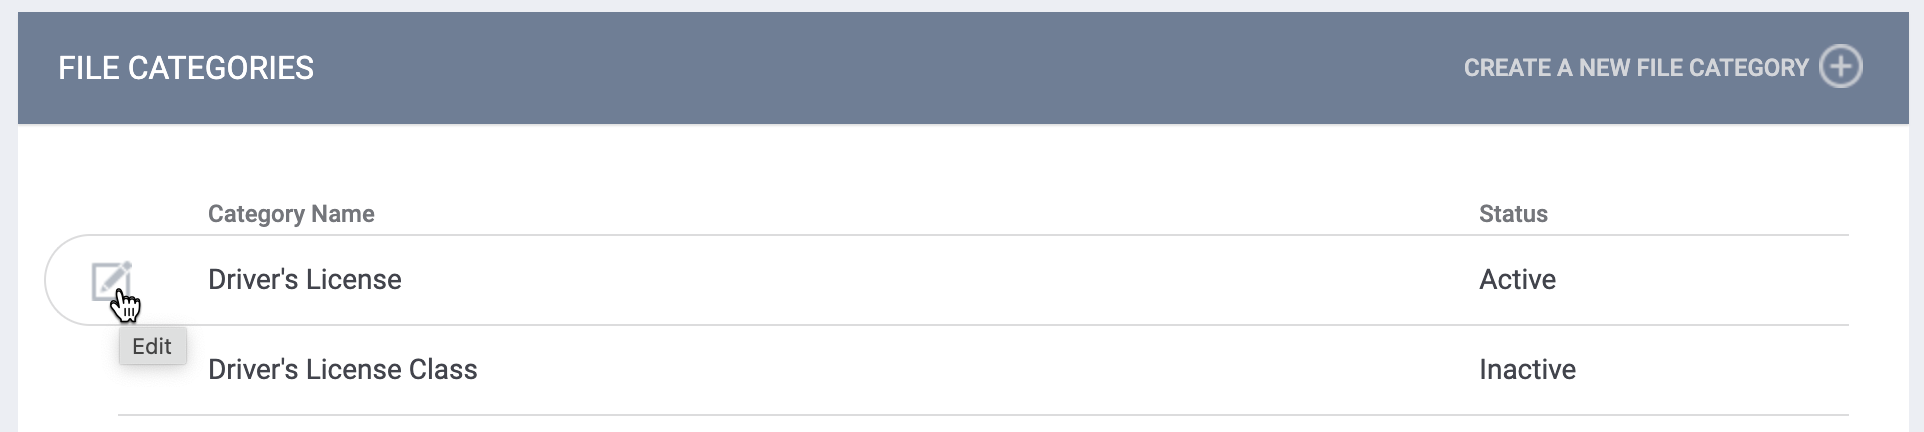
To create or edit a file category, click the launchpad and navigate to SETUP > SETTINGS > Advanced Options > File Categories. On the FILE CATEGORIES page, you’ll see a list of all previously created file categories.
The Status column indicates whether the file category is "Active" or "Inactive." An "Inactive" file category is one that is no longer in use but is being retained for historical purposes.

Adding a New File Category
To add a new File Category, click CREATE A NEW FILE CATEGORY.

The ADD NEW FILE CATEGORY page opens.
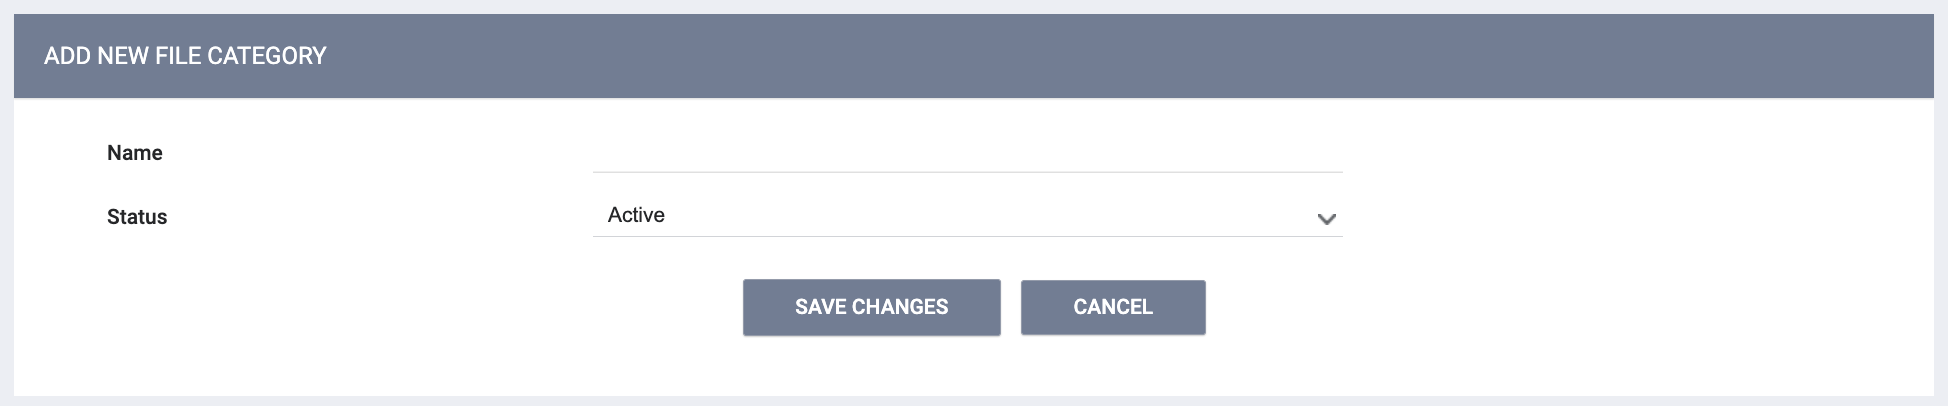
- Enter a Name for the file category.
- Select the Status of the file category:
- The default setting is “‘Active.”
- Selecting “Inactive” allows the file category to be retained for historical purposes even though it is no longer in use.
Click SAVE CHANGES. The EDIT FILE CATEGORY page appears.
To add a name for a file in this category, click ADD NEW FILE NAME.
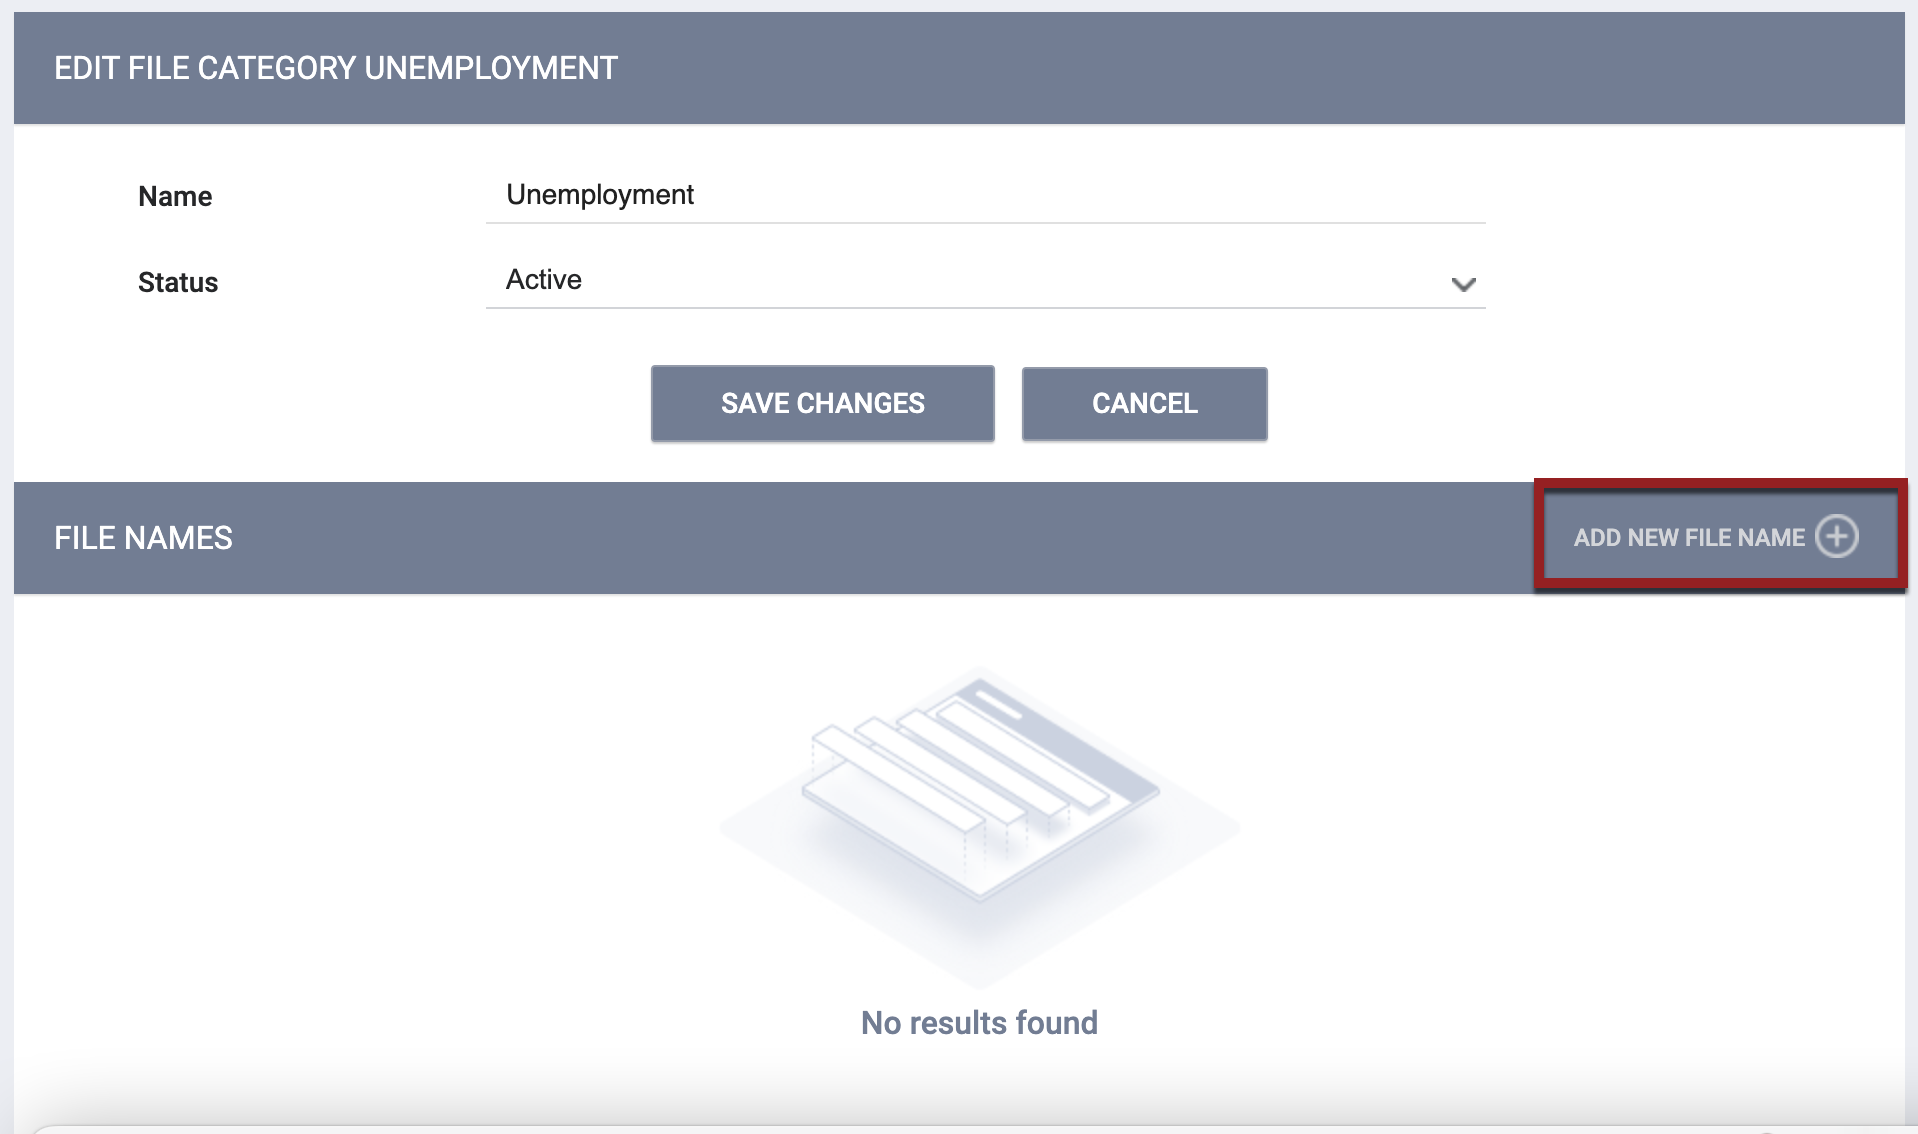
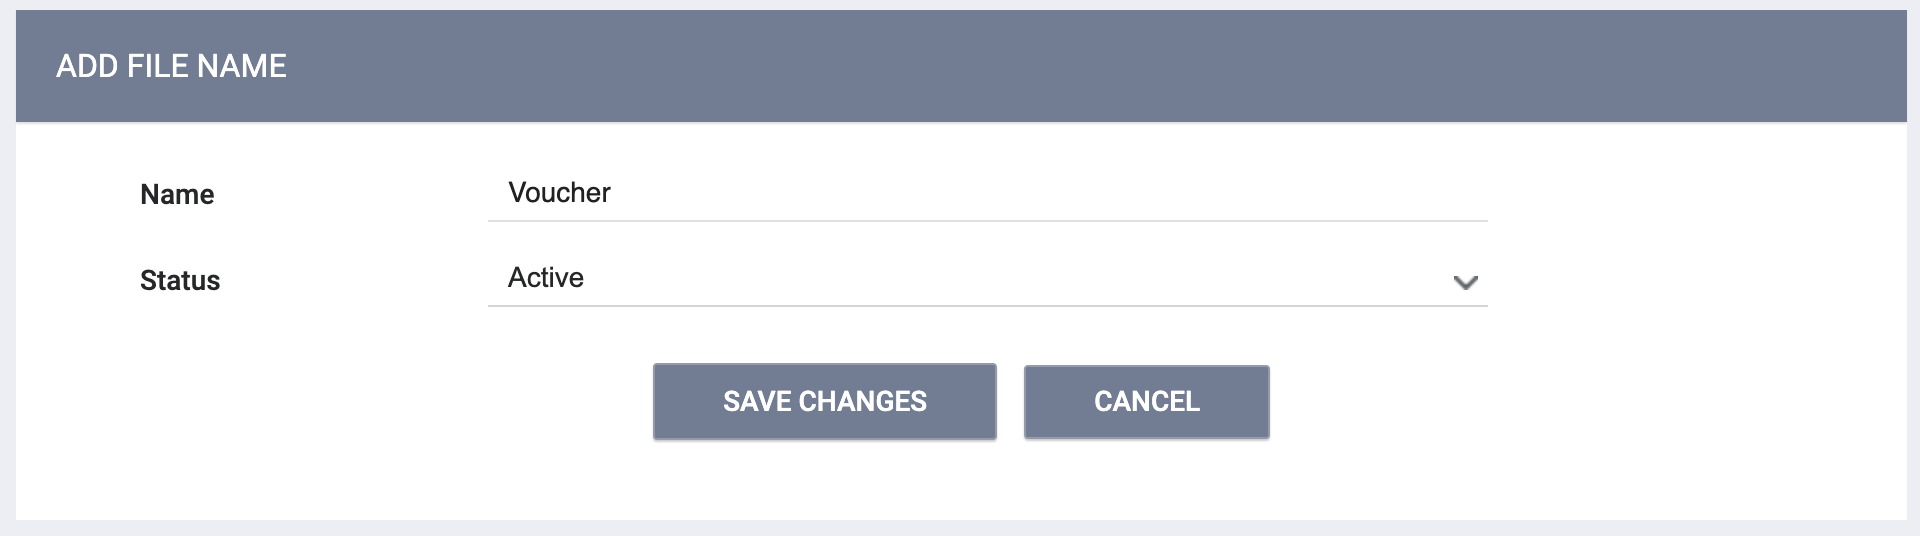
The ADD FILE NAME page appears.
- Enter a Name for the file name.
- Select the Status of the file name:
- The default setting is “‘Active.”
- Selecting “Inactive” allows the file name to be retained for historical purposes even though it is no longer in use.
Click SAVE CHANGES.
Repeat for any additional file names you want to add.
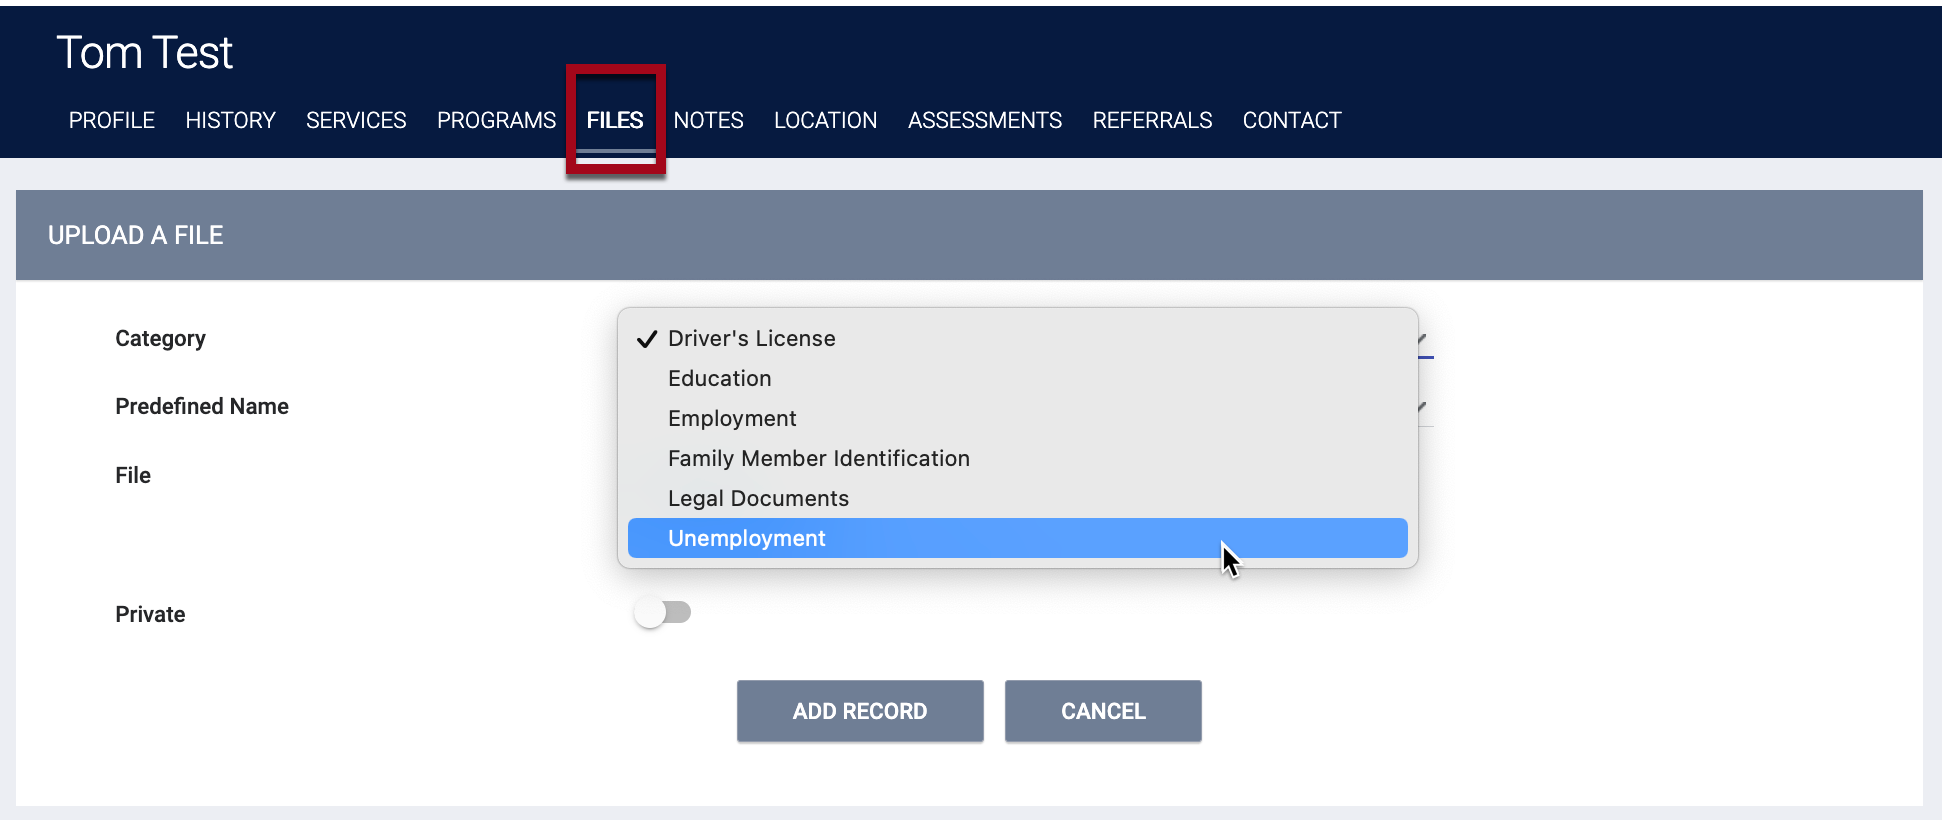
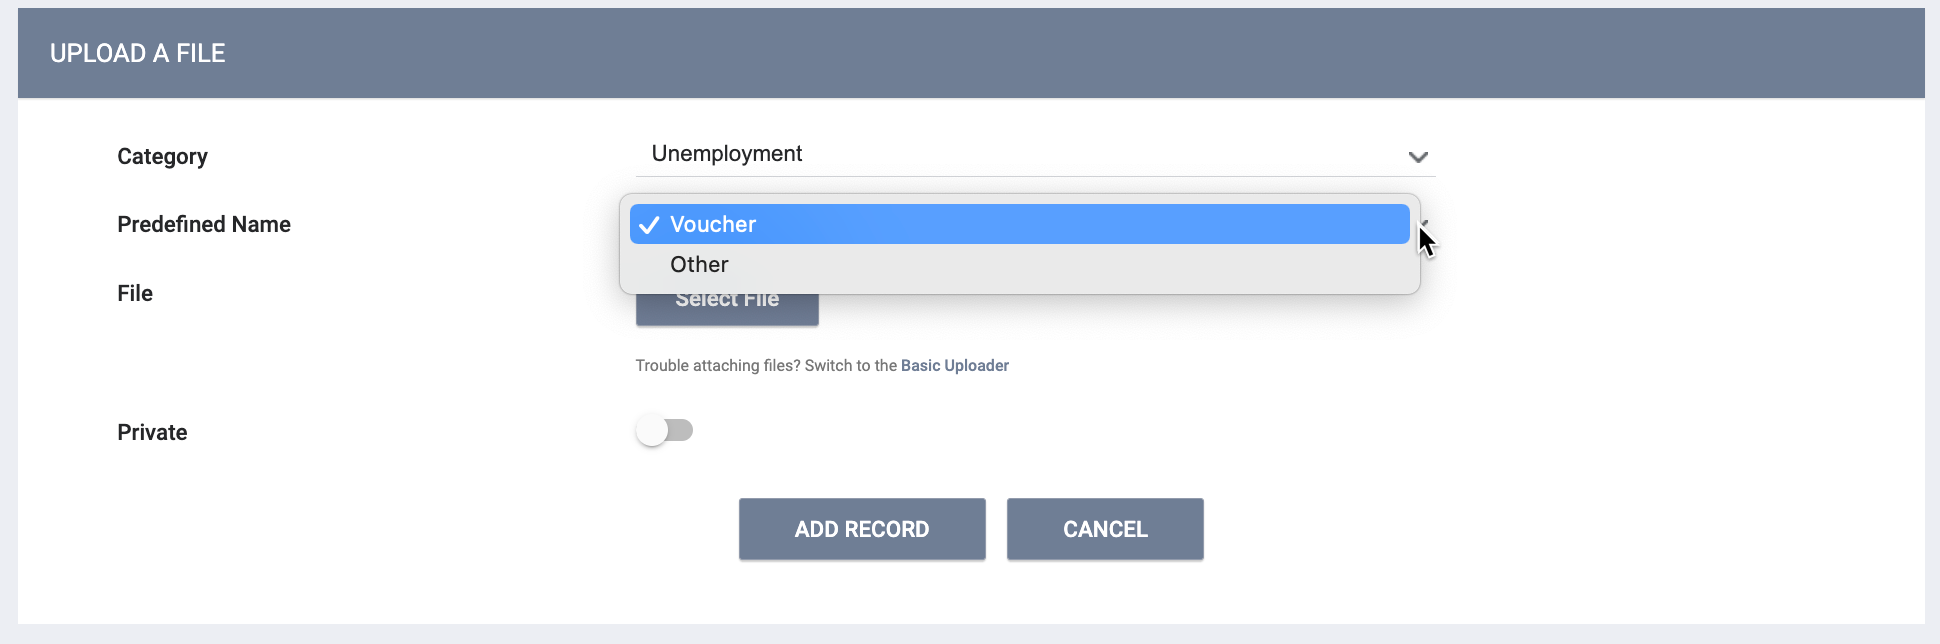
Now, when you click ADD FILE on the FILES tab of the client record, the new file category will appear in the Category drop-down list, and any file names you added will appear in the Predefined Name drop-down list.
Notice that a file name of "Other" is also available for each file category.
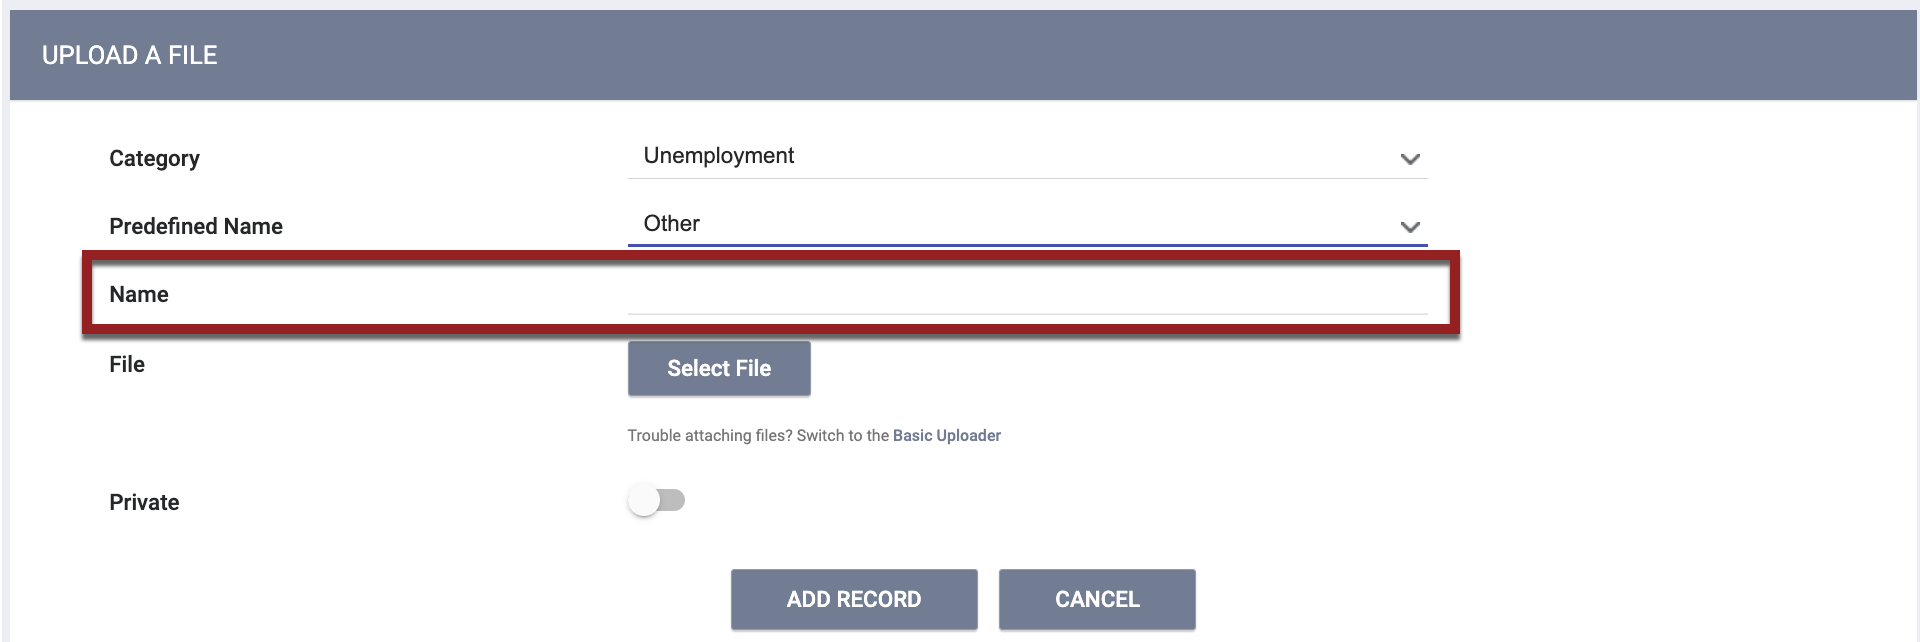
This "Other" option cannot be removed or edited, as it is not visible in the File Categories setup pages. If you do not add any file names to a file category, the "Other" option will still exist.
If you select "Other" for the file name, a text field appears for you to enter a name for the file.
Editing and Deleting
To edit a file category, go back to SETUP > SETTINGS > Advanced Options > File Categories, and click the Edit icon to the left of the file category.
This will take you to the EDIT FILE CATEGORY page, where you can rename the file category, add a new File Name, or edit an existing File Name.
If the trash can icon is visible for a file category or file name, you can delete that file category or file name by clicking the trash can.

Updated: 04/22/2025