Live Markers Overview
This article provides details about Live Markers and how to add them to screens.
Overview
Live Markers reference information already present in the client record to calculate values. Live markers are used for creating display constraints, calculations, eligibility requirements, and tracked characteristics. This prevents the need to enter data multiple times in these situations. System Administrators cannot create live markers.
For example, you can use the Children live marker to automatically calculate the number of children in the household based on Household Members and Date of Birth information. You can then use that live marker as a Display Constraint for another field in the screen that should only display for households of a certain size.
You can view Live markers in the Field Editor by searching for fields with the “Live Markers” filter.

Note: Live Markers are intended to be used in the logic for other fields, and, by default, they do not display in screens in the user interface; however, you can "unhide" them if desired.
Refer to the Live Marker Glossary for a full list of live markers, including a description of the information they display. Live marker fields that include calculations are marked with an asterisk in the glossary.
Adding Live Markers to Screens
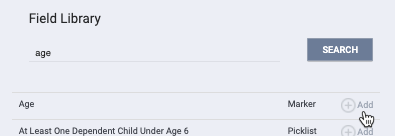
In the SCREEN EDITOR for the desired screen, use the Field Library in the sidebar to search for the live marker either by its name or by filtering for live markers. Once you locate the live marker, click ADD.

The live marker will display in the Screen Editor and can be used to create display constraints, calculations, eligibility requirements, and tracked characteristics.

Click the Edit icon next to the name of the live marker to modify the following:
- Display Name
- Hide (by default, this toggle is set to Hide, but you can untoggle it to “unhide” the live marker if desired)
- Size
Note: This editing capability does not currently apply to the Funding Source marker.
Updated: 04/22/2025