This article is for the new Clarity interface. Screenshots and descriptions will be updated as features are released. For the current interface article, see How Do I Conduct a Follow-up Assessment?
Table of Contents
Completing a Follow-up Assessment
To conduct a Follow-up Assessment, navigate to the Programs tab on the client navigation menu. Click on the name of the program enrollment in the Programs tab to choose the appropriate program enrollment.

Click on the Assessments tab and then click on the Add icon.

Select the Follow-up Assessment and click Next.

Complete the Follow-up Assessment and click Save & Next, then click Complete.
After you save the Follow-up Assessment, it will appear in the program enrollment’s Assessments tab. Click on the Follow-up Assessment to view or edit the assessment.

Assessment Restrictions
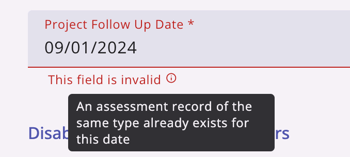
Users won’t be allowed to enter more than one Follow-up Assessment for the same date. A user attempting to add the assessment more than once for the same date will receive the warning “This field is invalid.”
Clicking the Tooltip icon to the right of the warning will provide more information. This warning will appear for all Program Types and Funding Sources.
Notes:
-
The warnings only apply to follow-up assessments collected under the same enrollment.
- This restriction does not apply to Current Living Situation assessments.
Updated: 04/27/2026